
Diagnose the Problem Before You Repair or Replace Your Opener
Use the complete model number and documentation for that exact unit before programming, adjusting, reconnecting or ordering parts.
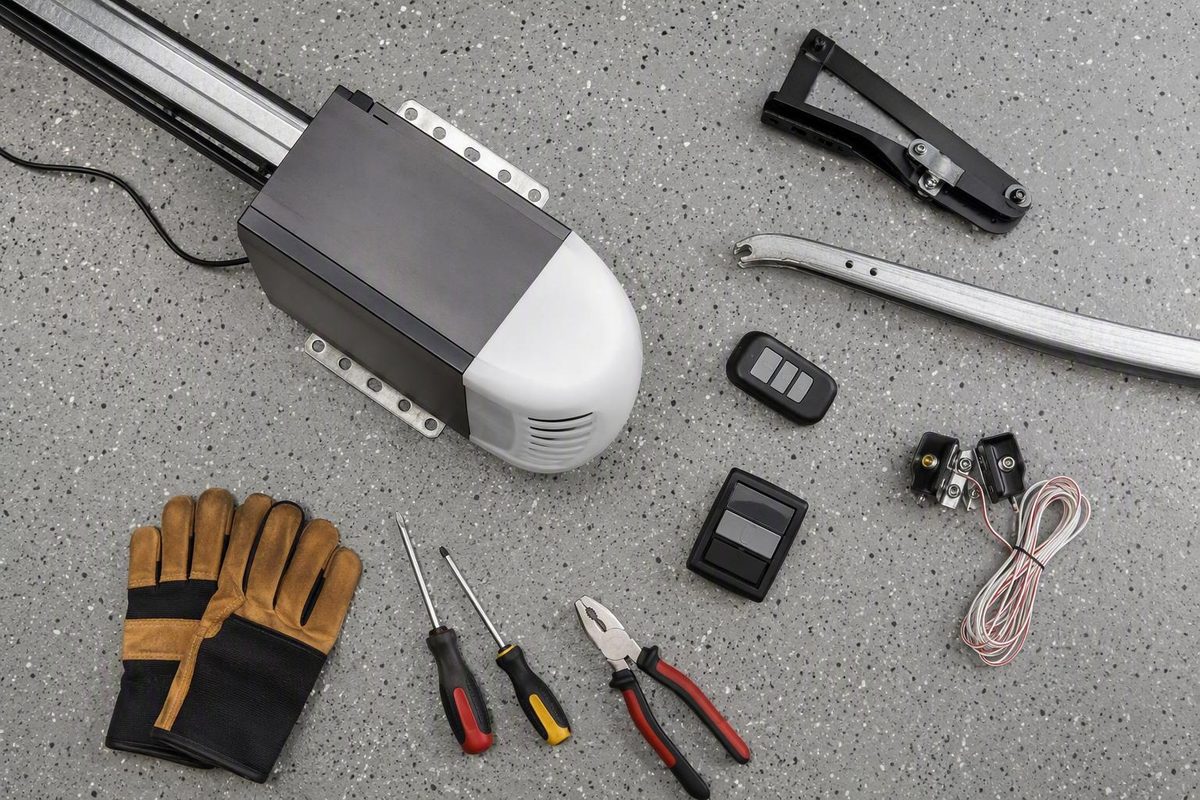
Craftsman garage door opener repair should begin with diagnosis, not a parts order. The same symptom can originate in a handheld remote, wall control, safety sensor, opener electronics, drive mechanism, or the garage door itself. A door that reverses may have an interrupted sensor beam, for example, but it may also be binding in the tracks or encountering a model-dependent travel problem.
That distinction matters because the reasonable homeowner checks are mostly external: confirming power, testing controls separately, cleaning sensor lenses, removing obstructions, and documenting the opener’s response. Springs, cables, unstable doors, household wiring, and internal opener components require qualified service.
Craftsman and older Sears-branded openers span multiple designs and generations. Do not assume a Learn-button sequence, diagnostic code, sensor-light color, adjustment procedure, or replacement part applies to your unit because it worked on another Craftsman opener. Record the complete model number and use documentation for that exact model before programming, adjusting, reconnecting, or ordering parts. If you cannot verify the applicable instructions, treat the procedure as unavailable rather than guessing.
Start With Safety and the Exact Opener Information
Before troubleshooting, create a short equipment and symptom record. This prevents repeated testing, helps distinguish model numbers belonging to the opener and accessories, and gives a technician useful information if external checks do not resolve the problem.
Record:
- The complete opener model number
- The manufacture date, if shown
- Whether it is a chain-, belt-, screw-, wall-mount, or other drive design
- Separate model numbers from remotes or keypads
- Whether the door was open, closed, or between positions when the problem appeared
- The exact symptom
- Any humming, grinding, clicking, squealing, rattling, or excessive chain noise
- The pattern of any opener, wall-control, or sensor indicator lights
- Whether the fault occurs every time or intermittently
- Which remotes, keypads, and wall controls still work
- Any recent outage, impact, door repair, or programming change
Photograph every accessible equipment label and the indicator lights. If a light is blinking, record the number of flashes and the pauses between groups. Do not rely on housing color, button color, or appearance alone to identify the model.
Check the paperwork supplied with the opener for the applicable manual. If that is unavailable, use the complete model number when requesting documentation from the manufacturer, seller, or a qualified service provider.
Use three troubleshooting boundaries
The actions in this guide fall into three categories:
- Homeowner-safe external checks: Testing an outlet with another device, replacing remote batteries, removing doorway obstructions, gently cleaning sensor lenses, and visually examining accessible components.
- Manual-dependent procedures: Reprogramming a remote, interpreting diagnostic lights, reconnecting the trolley, and changing an adjustment expressly permitted by the exact model manual.
- Technician-only work: Repairing springs, cables, damaged tracks, unstable doors, internal gears, motors, capacitors, logic boards, or household electrical wiring.
Place the door in the fully down position and disconnect electrical power before maintenance or before touching accessible wiring or drive components. Do not pull the emergency release while the door is open or unsupported; retailer troubleshooting guidance warns that the door could fall when it is disconnected in that condition (The Home Depot’s garage-door troubleshooting guidance).
Do not operate or disconnect a door that is moving, crooked, or unstable. Stop testing and obtain qualified help if you find:
- A broken, separated, or visibly distorted spring
- A frayed, loose, or displaced cable
- A roller outside the track
- A bent, detached, or visibly damaged track
- A door that hangs crooked
- A door that slams, drops, or will not remain stable
- A burning odor, smoke, heat damage, or sparking
- Cracked insulation or damaged electrical wiring
- Unexplained door movement
Commercial troubleshooting guidance likewise directs spring, cable, structural, burning-odor, sparking, and internal opener faults to professional service rather than homeowner repair (Craftsman troubleshooting and safety overview).
Its terms for informational content also state that articles are offered without a guarantee of accuracy or fitness for a particular purpose. When the door’s condition is uncertain, stopping is a valid diagnostic result.
Run the Five-Minute First-Check Sequence
The first checks should establish whether the opener has power, whether one control has failed, and whether the opener is disconnected from the door. Keep people, pets, vehicles, and stored items clear of the opening.
1. Confirm power rather than inferring it
Make sure the opener plug is seated in the outlet. Test that outlet with a small device you already know works.
Check the electrical panel. A tripped breaker may rest between its ON and OFF positions. Reset it by moving it fully to OFF and then back to ON. If it trips again, stop resetting it and arrange electrical evaluation. General Craftsman troubleshooting guidance recommends verifying the outlet and breaker before moving to wiring, thermal, motor, or internal-electronics diagnosis (Craftsman opener troubleshooting overview).
Also check the garage door’s manual lock. An engaged lock can prevent movement. Do not continue cycling an opener against a locked door.
2. Test each control independently
Try the controls one at a time:
- Hardwired wall control
- Each handheld remote
- Exterior wireless keypad
- Vehicle-integrated control, if applicable
Write down the results:
| Test result | First area to investigate |
|---|---|
| No controls work | Outlet, breaker, plug, manual lock, opener response, or model-specific electrical diagnosis |
| Wall control works but remote does not | Remote battery, range, interference, antenna, damage, compatibility, or programming |
| Remote works but wall control does not | Wall control or its visible low-voltage connection |
| Keypad alone fails | Keypad battery, programming, compatibility, or keypad condition |
| Motor responds but door does not move | Emergency release, trolley, drive mechanism, or door connection |
| Door moves but reverses or stops | Sensors, obstructions, binding, door hardware, or model-dependent travel settings |
This comparison does not prove which part has failed. It identifies the branch to investigate next.
3. Check remote basics
Replace the remote battery with the specified type and observe polarity. Test the remote from its normal operating position and then closer to the opener.
Inspect the opener’s hanging antenna for an obvious obstruction, displacement, or external damage. Do not dismantle the opener to trace the antenna internally.
If one programmed remote works and another does not, the failed remote, its battery, or its programming becomes more likely. If all wireless controls fail while the hardwired wall control works, investigate a shared wireless or compatibility issue before blaming the drive motor.
4. Check the emergency-release status
With the door fully closed and stable, look at the trolley and emergency-release mechanism. If the opener runs but the door does not move, the trolley may have been disconnected.
Reconnection methods vary. Follow the exact model manual. Do not pull, force, or improvise the mechanism.
5. Document the response
When controls appear dead, listen and look carefully:
- Does a relay click?
- Does the courtesy light turn on?
- Does the motor hum?
- Does an indicator flash?
- Does the response change after the opener has been idle?
- Is the failure constant or intermittent?
Confirmed outlet power does not prove that the logic board or motor has failed. Wall-control wiring, internal electronics, a thermal condition, a motor component, or another model-dependent problem may produce a similar outward symptom.
Isolate Remote, Keypad, and Wall-Control Failures
External controls are generally easier to isolate than internal opener components. The goal is to determine whether the fault follows one accessory or affects the entire system.
Wall control works, but the remote does not
Prioritize these possibilities:
- Depleted or incorrectly installed battery
- Excessive operating distance
- Radio interference
- Obstructed or displaced opener antenna
- Stuck, worn, or damaged remote button
- Lost programming
- An incompatible replacement remote
Test from the normal operating position and then closer to the garage. Try a second programmed remote if one is available. If the second remote works consistently, the comparison supports examining the first remote rather than the opener’s mechanical drive.
Do not assume compatibility because a replacement remote resembles the old one or carries related branding. Verify both the opener model and remote model against applicable documentation.
Remote works, but the wall control does not
Disconnect opener power before examining the wall control. Limit the inspection to visible, accessible conditions such as:
- A loose wire at an exposed terminal
- A wire pulled free from the wall control
- Crushed, cut, or visibly damaged low-voltage wire
- Corrosion or physical damage
- A button that sticks or no longer moves normally
This guide does not endorse energized testing, bridging terminals, or opening the motor housing. If the visible connection appears intact, restore power and document the result for service.
A functioning remote establishes that the opener can receive at least one command and operate under those conditions. That makes the wall-control branch more relevant, but it does not by itself confirm which component is defective.
Keypad alone fails
Replace the keypad battery if applicable, inspect the keys for visible damage, and note whether the keypad illuminates or responds.
Lost programming is possible, but there is no universal keypad enrollment sequence. Use documentation for the exact keypad and opener because timing, memory behavior, and compatibility can vary.
Every external control fails
Return to the outlet, breaker, plug, manual lock, and opener indicators. Record whether the unit clicks, illuminates, hums, flashes, or remains silent.
Do not replace a circuit board solely because every control fails. A shared power, control-wiring, motor, thermal, or electronics problem can create the same symptom.
Reprogram only from the applicable manual
Many Craftsman openers use some form of Learn function, but button location, color, timing windows, keypad steps, compatibility, and memory-clearing behavior are not uniform.
Before reprogramming, verify:
- Opener model number
- Remote or keypad model number
- Documented compatibility
- The correct Learn control
- Whether the procedure adds one device or clears memory
- Required timing and indicator response
If you cannot verify those points, stop. Telling a technician that “the wall button works, two remotes fail, and the keypad lights but does not operate the door” is more useful than attempting multiple generic programming sequences.
Troubleshoot a Door That Will Not Close or Immediately Reverses
A door that starts down, stops, and returns upward often directs attention to the safety sensors. The symptom does not prove that a sensor is defective.
Possible categories include:
- An object in the doorway
- An interrupted sensor beam
- Dirty or misaligned sensor lenses
- A bumped sensor bracket
- Loose or damaged sensor wiring
- Debris or resistance in a track
- A binding or uneven door
- A spring, cable, roller, or balance problem
- Model-dependent travel settings
Third-party Craftsman troubleshooting guidance lists both sensor and mechanical resistance causes for closing reversal, reinforcing why the symptom alone is not a diagnosis (Craftsman reversal-problem guide).
Clear the doorway and sensor beam
Remove vehicles, tools, cords, leaves, storage bins, and other objects from the door’s path. Look for smaller items near floor level that could interrupt the beam.
Gently clean both sensor lenses with a soft, dry cloth. Do not flood the housings with cleaner or disturb the wiring unnecessarily.
Inspect alignment without assuming an LED meaning
Check whether the sensor housings face each other and whether either bracket appears to have been bumped. Compare the two indicator lights for steadiness and record any blinking or loss of illumination.
Record the colors and patterns, then interpret them using documentation for the complete opener model.
If a bracket is loose or visibly displaced, do not create a permanent alignment with tape or bend structural hardware. Document the condition for correction.
Inspect accessible sensor wiring
Disconnect power before touching accessible connections. Visually follow the low-voltage wire where practical and look for:
- A wire pulled from a visible terminal
- Staple damage
- Cuts or abrasion
- Pinched insulation
- A loose wire near a sensor
- Corrosion or impact damage
Do not open the motor housing or perform energized tests. Document visible wiring damage for model-specific repair.
Look for track resistance
Inspect accessible tracks for stones, hardened debris, displaced objects, or an obvious bend. Observe rollers from a safe position.
Do not loosen track brackets, hammer tracks into shape, or attempt structural realignment. A visibly bent, detached, or damaged track is a stop condition.
Never defeat the sensors
Do not bypass, cover, tape over, relocate, or otherwise defeat the photoelectric sensors to make the door close. Remove the obstruction, correct only an approved external condition, or obtain qualified diagnosis.
Do not treat increased closing force as a general repair. Travel and force adjustments are manual-dependent; if the exact manual authorizes an adjustment, first rule out obstructions and door-system problems, follow the documented limits, and complete the reversal-safety test specified for that model. This guide does not establish one universal adjustment or test sequence.
Diagnose Partial Travel, Binding, and Apparent Opener Failure
The opener does not lift the door independently of the counterbalance and guide system. Springs, cables, rollers, hinges, tracks, and door balance affect movement. Binding or lost balance can cause a functioning opener to stop, reverse, strain, or appear to have a motor problem.
Avoid repeatedly cycling the opener against resistance. Once the failure is repeatable, stop and diagnose the category rather than continuing to load the system.
Perform only a limited manual-movement assessment
Attempt this assessment only if:
- The door is fully closed
- The door appears straight and stable
- No spring or cable damage is visible
- No roller is out of the track
- The tracks appear attached
- There is no burning odor, sparking, heat damage, or damaged wiring
Disconnect electrical power. Use the emergency release only as directed by the applicable manual, with the door fully closed and stable.
Move the door only enough to observe whether it:
- Moves smoothly
- Binds at the same point each time
- Travels unevenly
- Feels unusually heavy
- Jerks or catches
- Will not remain stable
- Appears crooked in the opening
This is a diagnostic observation, not a strength test. Do not force a heavy or stuck door.
Stop when the door system is suspect
End the assessment and call a garage-door technician if the door is unusually heavy, crooked, jerky, unstable, off track, difficult to control, associated with damaged springs or cables, or prone to dropping or slamming. General troubleshooting guidance reserves spring and cable work for qualified service and warns against releasing an open door (The Home Depot’s guidance on door-system faults).
Do not adjust spring tension, cable drums, lift cables, track alignment, bottom fixtures, or other high-tension components. The assessment is limited to distinguishing a freely moving, stable door from one that may be overloading the opener.
Separate door repair from opener repair
If the disconnected door binds or is unstable, the primary repair may involve the garage door rather than the opener. If the door moves smoothly and remains stable but the opener still stops, makes drive noise, or fails to move its trolley, attention can shift toward the opener.
Ask for these categories to be itemized separately. A spring, cable, track, or roller repair is not the same cost category as a remote, sensor, trolley, gear, motor, or logic-board repair.
Interpret Humming, Grinding, Clicking, and No Door Movement
Sound is useful diagnostic evidence, but it is not proof of a specific failed part. Record the sound before another operation:
- Humming: The motor may be energized without producing movement.
- Clicking: A control or relay may be responding without successful operation.
- Grinding: A gear or drive component may be slipping or damaged.
- Squealing: An applicable moving component may be dry or worn.
- Rattling: Accessible hardware or a drive component may be loose.
- Excessive chain noise: The chain, sprocket, rail, trolley, or related hardware may require model-specific inspection.
Also note whether the trolley and visible drive component move while the door remains stationary.
Motor runs, but nothing moves
Possible categories include:
- An engaged emergency release
- A disconnected or damaged trolley or carriage
- A disconnected, damaged, or visibly sagging belt or chain
- A stripped internal drive gear
- Another internal drive failure
- A motor that cannot transmit motion
With the door closed and power disconnected, perform only a visual check for an obvious release condition, separation, sagging drive component, or loose accessible fastener. Keep hands away from sprockets, rails, belts, chains, and trolley mechanisms whenever power is connected.
If the trolley moves but the door does not, a carriage or door-connection fault is possible. It is not confirmed until inspected safely.
Grinding with no door movement
Grinding while the motor runs can indicate internal gear or drive damage. Stop repeated cycling. Craftsman-oriented troubleshooting guidance lists an engaged release, disconnected chain or belt, and stripped drive gear among possible causes of motor noise without door movement.
Opening the motor housing, replacing gears or boards, servicing a capacitor, diagnosing an internal motor fault, or tensioning a chain or belt is outside this guide’s external checks. Those procedures require model-specific instructions and appropriate service qualifications.
Loose hardware and lubrication
With power disconnected and the door closed, you may visually inspect accessible hardware for an obviously loose fastener. Do not loosen structural track hardware or remove guarded components.
Use lubricant only in the product and location approved by the exact opener or door manual. Available general guidance mentions white lithium grease or garage-door-specific lubricant for certain applicable points, but that does not mean every rail, chain, belt, track, roller, or spring should be lubricated.
Do not use WD-40 as a universal garage-door lubricant. Do not apply any product to photo-eye lenses, belts, electrical components, or tracks unless the applicable documentation expressly instructs you to do so.
Noise may originate in rollers, hinges, bearings, or other door hardware rather than the ceiling-mounted opener. If the sound follows the door’s movement, include a door-system inspection in the quote.
Know When to Call a Garage-Door Technician or an Electrician
The correct professional depends on whether the problem belongs to the door, opener, or household power supply.
Call a garage-door technician for door and opener work
Arrange qualified garage-door service for:
- Broken, distorted, or worn springs
- Loose, displaced, or frayed cables
- An off-track door
- Bent, detached, or structurally damaged tracks
- A crooked, unstable, dropping, or slamming door
- Damaged rollers or door hardware beyond an external cleaning check
- Internal gears, trolleys, sprockets, or drive components
- Motor or opener-housing work
- Persistent reversal after external sensor and obstruction checks
- Unresolved diagnostic indicators
- Model-dependent travel problems not resolved through verified instructions
- Unexplained movement
Stop operation and seek prompt evaluation for burning smells, smoke, sparking, heat damage, or visibly damaged wiring.
A powered but unreliable opener may involve a logic board, motor, capacitor, thermal condition, control circuit, or internal wiring. The outward symptoms do not reliably distinguish those possibilities, so diagnosis should precede board or motor replacement.
Call an electrician for the household supply
An electrician is the more appropriate starting point when testing indicates:
- A failed or intermittent household outlet
- A breaker that trips repeatedly
- Damaged building wiring
- Heat or discoloration at the receptacle
- A need for a new outlet, wiring run, or dedicated circuit
Consumer cost guidance similarly distinguishes opener replacement from new wiring or circuit work that may require an electrician (ConsumerAffairs’ opener replacement and electrical-work guide).
Do not use extension cords or improvised wiring as a permanent solution. If you cannot determine whether the problem is in the opener or household circuit, describe the tests already performed when scheduling service.
Prepare a technician-ready symptom log
Provide:
- Complete opener model number
- Manufacture date, if available
- Drive type
- Separate remote or keypad model numbers
- Current door position
- Exact symptom
- Sounds and when they occur
- Indicator-light color and blink pattern
- Whether the fault is constant or intermittent
- Which controls work
- Whether outlet power was confirmed with another device
- Whether the door lock was checked
- Whether the sensors were cleaned and doorway cleared
- Whether the trolley appears connected
- Any recent outage, impact, repair, or programming attempt
Ask for a diagnosis and written quote separating:
- Opener parts
- Garage-door or counterbalance-system repairs
- Labor
- Diagnostic or service-call fees
- Electrical work
- Accessories
- Proposed replacement equipment
Regional businesses may advertise service for Craftsman products, but that does not establish authorization by Craftsman. Verify qualifications, insurance, authorization, warranties, and parts sourcing independently if those factors matter to your decision.
Decide Whether to Repair or Replace the Opener
A successful diagnosis does not automatically make repair the best choice. Evaluate safety equipment, reliability, parts support, door condition, and total quoted cost rather than relying on age alone.
| Decision factor | Repair may be reasonable when… | Replacement deserves stronger consideration when… |
|---|---|---|
| Safety equipment | Required safety equipment is present and working | Photoelectric sensors are missing or cannot be restored |
| Reliability | The fault is isolated and the opener was otherwise dependable | Failures are repeated, intermittent, or affect multiple systems |
| Repair history | This is the first limited repair | The opener has required several recent repairs |
| Parts | The exact documented part is available | Model-specific parts are unavailable or compatibility is uncertain |
| Recall status | No unresolved recall has been identified | The complete model has an unresolved recall |
| Warranty | Repair is covered or clearly permitted | Coverage has ended or compatibility could affect coverage |
| Door condition | The door is stable and moves properly | The door also needs spring, cable, roller, or track work |
| Quote | The repair is limited and clearly itemized | Repair approaches the total cost of a comparable installed replacement |
| Features | Existing safety and control functions meet your needs | Safety equipment is missing or reliability is unacceptable |
Use the complete model number when asking the manufacturer, seller, or service provider to verify recall status, warranty terms, and parts availability. The brand name, opener age, housing color, and drive type do not establish those model-specific answers.
Treat age policies as policies, not universal law
Some regional service companies recommend replacement for openers manufactured before 1993, units without photoelectric eyes, recalled equipment, or models with unavailable parts. One provider expressly presents those criteria as circumstances in which it recommends replacement or declines repair (a regional provider’s published Craftsman service policy).
That is an example of a provider policy, not evidence of a universal law or verified Craftsman mandate requiring every older Sears or Craftsman opener to be replaced. Evaluate the complete model, installed safety equipment, recall status, physical condition, parts support, and written quote.
Missing photoelectric sensors, an unresolved recall, repeated failures, or unavailable safety-compatible parts are strong reasons to evaluate replacement.
Use the 50% rule cautiously
A commonly cited rule of thumb is to consider replacement when the repair estimate approaches half the installed cost of a comparable new opener. ConsumerAffairs presents that threshold as a rule of thumb, not a Craftsman requirement (ConsumerAffairs’ repair-versus-replacement guidance).
Compare equivalent scopes. A repair quote excluding service fees cannot be fairly compared with an installed replacement quote that includes labor, removal, accessories, setup, and electrical work.
Cost reference points
The Home Depot lists generic opener repair at $49–$299, with $129 labor shown separately. It also estimates about $149 for opener parts and approximately $390 for a replacement opener. These are broad, non-Craftsman-specific estimates, and the page says local prices may vary (The Home Depot’s garage-door and opener cost estimates, accessed August 7, 2026).
ConsumerAffairs, in a guide updated May 13, 2026, reports about $174 for average opener repair and approximately $329 for replacement. It lists Craftsman opener purchase prices of $140–$325, but that brand range is for purchasing equipment—not repairing a Craftsman opener.
The sources do not use identical scopes. Do not average their figures into a supposedly precise expected price.
A quote can change based on:
- Diagnosis and service-call fees
- Exact opener model
- Drive type
- Parts availability
- Local labor rates
- Door size, weight, and condition
- Remotes, keypads, battery backup, or other accessories
- Household electrical work
- Separate spring, cable, roller, or track repair
- Removal and disposal
- Warranty coverage
For replacement, ask whether the quote includes the opener, rail or drive assembly, controls, sensors, installation, removal, setup, safety testing, and applicable fees. For repair, request the exact part, compatibility basis, labor charge, warranty, and separate door-system work.
Repair is easier to justify when the door is sound, the fault is isolated, the correct part is documented, safety equipment is functional, and the written quote is substantially below a comparable installed replacement.
Replacement becomes more compelling when safety sensors are missing, a recall remains unresolved, exact parts are unavailable, failures are repeated, the door and opener both require major work, or repair offers little economic advantage.
Frequently Asked Questions
Why does my Craftsman garage door opener have power but not respond?
Confirmed outlet power eliminates only one possibility. The fault could still involve a wall control, visible control wiring, manual lock, lost programming, internal electronics, thermal condition, motor, or drive problem.
Test the wall control, remote, and keypad separately. Record whether the opener clicks, hums, illuminates, or flashes. If none of the controls works despite verified outlet power, do not assume the logic board is defective.
Stop immediately for sparking, burning odor, heat damage, or damaged wiring. Call an electrician if the outlet or household circuit is unreliable; call a garage-door technician when the supply is sound but the opener remains unresponsive.
Can I bypass the safety sensors if the door will not close?
No. Do not bypass, cover, tape over, relocate, or defeat the safety sensors to force operation.
Clear the doorway and beam, clean both lenses gently, inspect the brackets for obvious displacement, and record the sensor indicators. With power disconnected, visually check accessible wiring for damage.
If the door still reverses, investigate track resistance, binding, and other door conditions rather than increasing closing force. Arrange service if the cause remains unresolved.
What do the flashing lights on my Craftsman opener mean?
The meaning depends on the exact opener model and which light is flashing. A motor-unit diagnostic indicator, wall-control light, courtesy lamp, and photo-eye LED may communicate different conditions.
Record:
- Which component is flashing
- The light color
- Number of flashes
- Pauses between groups
- Door position
- Which controls work
- Any accompanying sound
Then consult documentation for the complete opener model. Do not apply a code table from a visually similar unit as universal Craftsman guidance. Commercial service pages list flashing indicators among reported Craftsman symptoms, but they do not establish one code system for every model (overview of reported Craftsman opener symptoms).
How much does Craftsman garage door opener repair cost?
There is no single Craftsman repair price. Published figures are broad estimates that may use different scopes and may exclude diagnosis, travel, labor, or parts.
The final price depends on the diagnosed fault, opener model, drive design, parts supply, local labor, accessories, electrical requirements, and door condition. Spring, cable, track, and roller work should be itemized separately because those are door-system repairs rather than opener-only repairs.
Obtain a written quote separating the service fee, opener parts, labor, door hardware, electrical work, and any proposed replacement.
Should an older Sears or Craftsman opener be repaired or replaced?
Do not decide from age alone. Start with the complete model number, safety equipment, recall status, parts availability, repair history, reliability, door condition, and an itemized quote.
Replacement deserves serious consideration if photoelectric safety sensors are missing, the model has an unresolved recall, compatible parts are unavailable, or the opener has suffered repeated failures. Recommendations concerning pre-1993 units often appear in regional providers’ policies, but those policies are not proof of a universal legal or Craftsman requirement.
The Bottom Line
Use a three-way decision:
- Complete only low-risk external checks when the door is fully closed and stable.
- Use documentation for the exact model for programming, diagnostic codes, compatibility, emergency-release reconnection, and permitted adjustments.
- Stop for professional diagnosis when the problem involves an unstable door, springs, cables, tracks, household electricity, or internal drive and electronic components.
The useful outcome is not a guessed replacement part. It is identifying whether the failure belongs to a control, sensor, opener, household power supply, or garage-door system—and then choosing repair or replacement from that diagnosis.