
Replace a Garage Door Hinge Without Mixing Up the Hardware
Match a garage door hinge by model, number and position, then use a controlled replacement sequence—or stop for cable, track or panel damage.
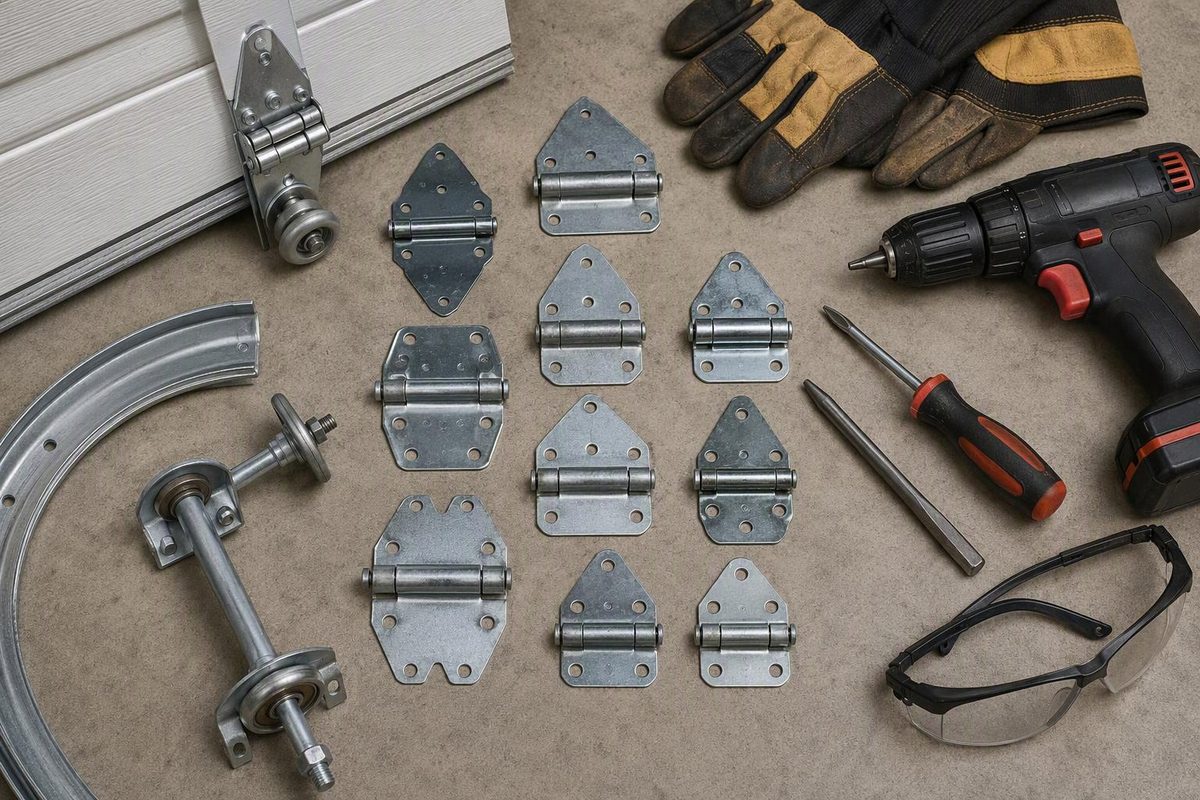
Replace one ordinary hinge only when the door is fully closed, aligned and otherwise working normally—and only if the door maker permits owner repair; leave bottom brackets, cables, springs, damaged panels and off-track doors to a qualified technician. On the residential doors covered by one Clopay manual, #1 hinges go at center stiles while #2 and #3 hinges occupy successively higher section ends, which is why position and number must match (Clopay installation manual).
Identify the hardware before ordering
A sectional door can have several fixtures that look broadly similar but do different jobs:
- Center hinges join adjacent sections away from the tracks and normally do not hold a roller.
- End or roller hinges sit at the section edges. Their roller tubes establish the door’s spacing from the track.
- Top fixtures hold the top rollers and may be adjustable; they are not ordinary hinges.
- Bottom brackets connect the door to the lift cables. Do not loosen or remove them.
Hinge numbers are not universal part numbers. They indicate geometry or position within a particular hardware system, so a hinge stamped “#2” is not automatically interchangeable with every other #2 hinge.
With the door closed, record:
- The manufacturer, model number and serial number from the interior label.
- The number and any other markings stamped into the damaged hinge.
- Whether it is a center hinge or an end hinge with a roller tube.
- Its position: count section joints upward from the floor and note left, right or center.
- The hole pattern, overall dimensions, metal thickness and roller-tube arrangement.
- Clear photos of the hinge in place and the surrounding stile and panel.
Clopay advises starting with the door model and using the number stamped on the old hinge to identify a replacement (Clopay parts guide). Prefer the door maker’s specified part over a look-alike “universal” hinge; the wrong offset can misplace the roller and make the door bind.
Check the manual—and stop at these conditions
Find the installation or service manual for the exact door before removing hardware. Manufacturer rules differ: Clopay says a reasonably handy owner can perform some repairs by following the installation manual, while the cited Amarr manual says garage-door repair work must be performed by a trained technician (Clopay repair guidance; Amarr safety instructions). Follow the rule for your door.
Do not proceed when:
- The part is a bottom bracket or a lift cable is attached to it.
- A spring is broken, a cable is loose or frayed, or a cable has left its drum.
- The door is open, partly open, crooked, off-track, binding or unexpectedly heavy.
- The roller has left the track, or the track must be bent, spread or loosened.
- The hinge pulled through the door skin, its screws no longer grip, or the supporting stile is cracked or torn.
- Several hinges are bent, the door sags, or sections no longer align.
- The work would disturb red fasteners or warning-labeled hardware.
The springs, cables and bottom brackets belong to the counterbalance system and can remain under severe tension even with the door closed. Amarr specifically warns owners not to loosen red fasteners or repair springs, spring brackets, bottom corner brackets and counterbalance lift cables (Amarr safety instructions).
A replacement hinge also cannot repair torn sheet metal or a damaged stile. Random longer screws may conceal the failure without restoring the attachment the door was designed to use.
Replace an ordinary center hinge
This sequence is for one center hinge on a fully closed, stable and aligned door when the manufacturer permits the repair. An end hinge also controls roller position; unless the manual gives a replacement procedure that does not require altering the track, have that repair handled by a technician.
- Isolate the opener. Close the door completely, unplug the opener and keep remotes and wall controls out of use. Keep people, pets and vehicles away. Wear gloves and eye protection.
- Preserve the layout. Photograph the intact hinge, mark its outline and confirm which leaf is on the upper section. Replace only one hinge at a time.
- Remove the fasteners carefully. Keep fingers away from the section joint. If the sections shift, separate or flex as the screws are loosened, stop and reinstall the hardware if that can be done without force.
- Inspect the attachment. The stile and mounting holes must be sound. Stop if holes are enlarged, metal is cracked, or a fastener spins without tightening.
- Install the exact replacement. Match the original orientation, holes and manufacturer-specified fasteners. Start all fasteners before tightening them evenly. Do not drill a new pattern or crush the panel by overtightening.
- Check the hinge. Both leaves should lie flat, the pivot should move freely, and the adjacent sections should remain aligned.
Fasteners are door-specific. The cited Clopay manual uses #14 × 5/8-inch sheet-metal screws for hinges on the models it covers, but that does not establish the correct screw for another door. The same manual warns against overtightening specified door hardware (Clopay installation manual). Wind-load-rated doors may also have supplemental drawings that control the hardware and reinforcement layout.
Test without forcing the repair
Remove tools, then move the disconnected door only if it operated normally and was properly balanced before the repair. Raise it slowly just far enough to watch the repaired joint begin to articulate; stop if the hinge shifts, the panel flexes around the screws, or the door pops, scrapes, binds or becomes crooked. Do not use the opener to push through resistance.
After a successful manual check, reconnect the opener according to its instructions and run one complete cycle from the wall control while keeping the door in view. Inspect every hinge for bending, loose fasteners and damaged attachment points: Overhead Door notes that sectional doors commonly have three or more hinges between sections and recommends checking all of them (maintenance guide).
If the failed hinge is part of wider panel sag, investigate the structure rather than installing more hinges or reinforcement by guesswork. A garage-door strut serves a different load path and must be matched to the door rather than treated as a cure for every hinge failure.