
Test the Door’s Balance—But Leave Loaded Spring Hardware Alone
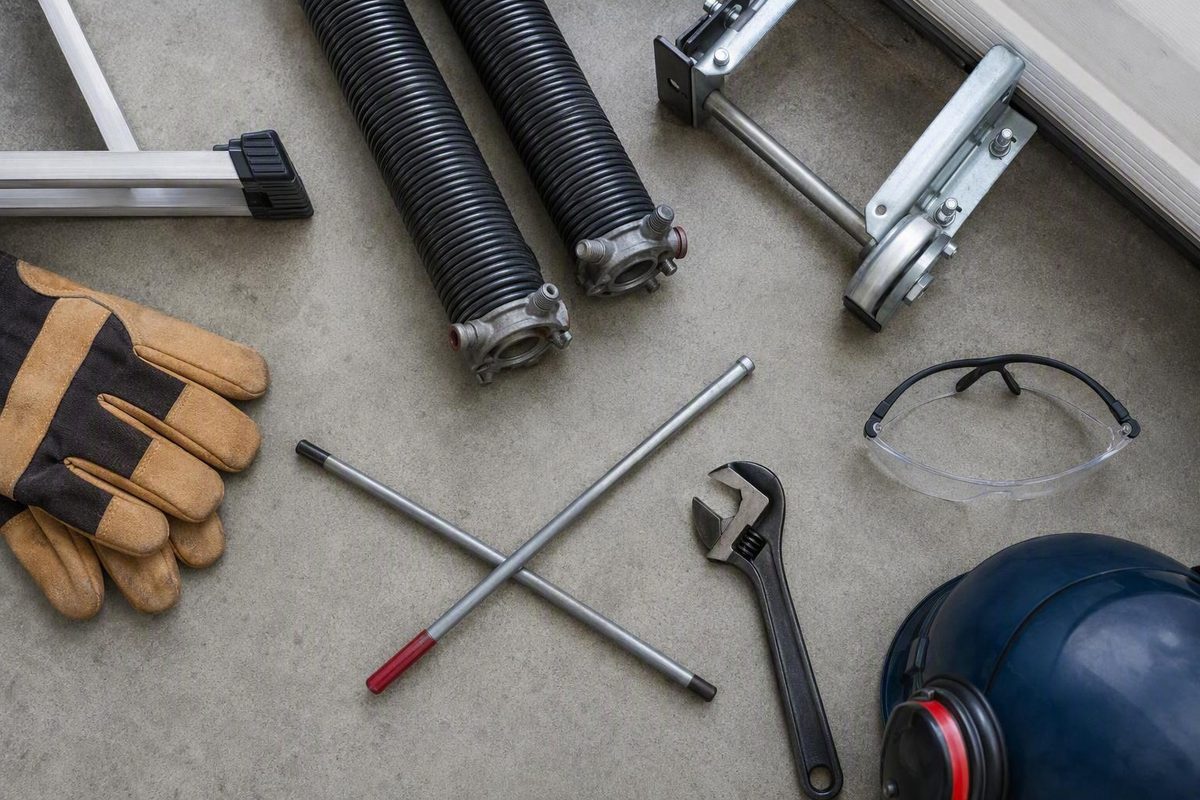
The direct answer: diagnose the balance, do not adjust the loaded hardware
If you are asking how do you adjust the springs on a garage door, the safety-first answer is straightforward: an untrained homeowner should not perform the adjustment. Do not loosen, move, or alter springs, winding cones, lift cables, cable drums, pulleys, bottom brackets, spring-loaded brackets, or fasteners carrying spring force.
Garage-door springs counterbalance the door by storing mechanical energy. If a spring, cable, winding bar, cone, or connected component slips or releases unexpectedly, that energy can cause serious injury or property damage. Chamberlain’s manufacturer guidance tells owners not to loosen, move, or adjust springs, cables, pulleys, brackets, or related hardware and to call a trained door-system technician when a door binds, sticks, or is out of balance (Chamberlain garage-door balance guidance).
That does not mean you cannot gather useful information. If the door is stable, fully closable, and visibly intact, you may be able to:
- Identify whether it has torsion or extension springs.
- Inspect the system visually from a safe distance.
- Check for an obvious obstruction.
- Perform a cautious manual balance test.
- Record symptoms, measurements, and model information for a technician.
Diagnosis and repair are different jobs. A balance test can reveal that the counterbalance system needs attention, but it cannot prove that changing spring tension is the correct repair. The fault could instead involve a broken or worn spring, a cable, drum, roller, track, obstruction, or another component.
This article explains how to identify the spring system, interpret a balance test, recognize stop-work conditions, and understand what a trained technician evaluates. It does not provide a universal winding direction, turn count, or loaded-hardware procedure because no such instruction applies safely to every door.
That boundary is deliberate. Garage Reference’s stated editorial approach is to identify work that is genuinely dangerous rather than imply that publishing a tutorial makes it safe.
Identify the spring system without touching it
Most residential garage doors use either torsion springs or extension springs. You can usually identify the general system by looking from a distance while the door is closed.
Torsion springs are generally mounted on a metal shaft above the door opening. The spring coils wrap around the shaft, with cable drums commonly positioned near its ends. A torsion spring twists to store energy.
Extension springs generally run beside the horizontal tracks extending into the garage. These springs stretch as the door closes and contract as it opens. Torsion and extension systems operate differently and require different service methods (garage-door spring-system overview).
Do not touch components merely to identify them. Treat the following as no-touch zones:
- Spring coils
- Torsion-spring winding cones
- Set screws on winding cones
- Lift cables
- Cable drums
- Pulleys
- Bottom corner brackets
- Spring anchor points
- Brackets carrying spring or cable force
- Any fastener connected to loaded spring, cable, drum, or bracket hardware
- Any fastener the exact manufacturer manual identifies as safety-critical
Bottom brackets deserve particular caution. A loose-looking cable is not an invitation to pull it tight, put it back on a drum, or loosen its bracket.
On an extension-spring system, look from a distance for a containment cable. It commonly passes through the extension spring to help limit projectile danger if the spring breaks, but its exact routing and attachment must match the door manufacturer’s instructions. Inspection should remain visual: do not tug the cable, reposition its attachment hardware, or test whether it is taut. If containment hardware is missing, damaged, detached, or routed questionably, stop operating the door and arrange an inspection.
Not every installation resembles a generic diagram. Some doors use enclosed spring assemblies, proprietary counterbalance units, rear-mounted torsion systems, or low-headroom hardware. If the components are covered or arranged differently, find the door label and exact manufacturer manual. Do not remove a cover or infer a procedure from a video showing a conventional torsion door.
Useful identification details include:
- Door manufacturer and model
- Opener manufacturer and model
- Door width and height
- Number of visible springs
- Whether the springs are above the opening or beside the tracks
- Any label on the spring assembly
- Whether the installation is marked as low headroom
- Any unusual track, drum, or enclosed-counterbalance configuration
Take photographs only from a stable position outside the door’s travel path. Do not stand beneath an unstable door to obtain a closer image.
When it is safe—and unsafe—to test door balance
A balance test is appropriate only after the door passes a pre-test safety gate.
Do not disconnect the opener or attempt manual movement if the door is:
- Stuck open or partly open
- Crooked in the opening
- Hanging unevenly
- Rapidly dropping
- Unstable or likely to move unexpectedly
- Visibly associated with a broken spring
- Showing a loose, slack, displaced, rusted, or frayed cable
- Binding severely
- Off a track
- Damaged at a hinge, roller, bracket, or panel
- Making abnormal movements after a recent loud bang
Pulling the emergency release removes the opener’s connection to the door. If the spring system cannot support the door, disconnecting it may allow the door to move under its own weight. A stuck-open, crooked, cable-damaged, or otherwise unstable door needs area control and trained service—not a balance test (garage-door repair safety guidance).
If the door is stable, visibly intact, and able to close normally, use this cautious diagnostic sequence:
-
Clear the area. Move people, pets, tools, bicycles, and vehicles away from the door and its travel path.
-
Close the door fully. Begin with the door resting on the floor. Do not start with a partly open door.
-
Disconnect the opener according to its manual. Manual-release and reconnection procedures vary by opener and rail design. Use the model-specific instructions rather than assuming the cord must be pulled in a particular direction.
-
Stand to one side, not beneath the door. With a secure grip, slowly raise the door by hand to approximately waist height—about three to four feet. Stop if it becomes unexpectedly heavy, jerks, tilts, or binds.
-
Release it cautiously and observe. Keep your feet and hands outside pinch and impact zones. Step clear rather than trying to catch a door that begins falling rapidly.
For an intact door, manufacturer guidance describes lifting the disconnected door approximately three to four feet and observing whether it remains supported. A slow rise or gentle fall may be acceptable, while slamming down or shooting upward indicates an out-of-balance system requiring trained service (Chamberlain garage-door balance test).
In practical terms:
- Remains near the test position: The door appears reasonably balanced.
- Falls or slams: Counterbalance support is inadequate, or another mechanical fault is interfering.
- Rises forcefully: The system has excessive lift or another counterbalance fault.
- Moves crookedly, binds, or becomes unexpectedly heavy: Stop the test and request inspection.
A small drift does not necessarily prove that adjustment is required. Use the door manufacturer’s stated tolerance for the final judgment.
If a stable door sticks at one point, look for visible debris or an obvious obstruction without reaching into moving parts. Do not loosen track bolts, bend the track, reseat rollers, or alter loaded hardware. Binding can distort the balance-test result and may indicate a problem with a track, roller, hinge, panel, cable, or counterbalance component.
After the test, lower the door carefully only if it remains stable and controllable. Reconnect the opener exactly as its manual directs, then confirm that the carriage has engaged normally before operating the door. Do not repeatedly pull the release cord or force the trolley in an attempt to make it reconnect.
Read the symptoms without jumping to a spring diagnosis
A door’s behavior provides clues, not a conclusive diagnosis. Springs, cables, drums, rollers, tracks, hinges, door panels, and opener components work as a system. A fault in one area can resemble a spring-tension problem elsewhere.
Commercial service guidance likewise notes that falling, heaviness, crooked travel, or opener strain may involve worn springs, stretched or frayed cables, damaged rollers, or bent tracks—not spring tension alone (Overhead Door Company of Texoma balance guide).
| Observed behavior | Possible explanations | Safe next action | Stop-work status |
|---|---|---|---|
| Remains near halfway | Counterbalance appears reasonably balanced | Finish the cautious test and reconnect according to the opener manual | Usually no, if travel is smooth and the system is intact |
| Slowly drifts | May be within manufacturer tolerance or may indicate developing imbalance | Check the exact door manual and monitor for changes | Not necessarily, unless drift accelerates or damage appears |
| Falls or slams | Inadequate spring support, worn or broken spring, cable trouble, or binding hardware | Clear the area, stop powered operation, and request inspection | Yes |
| Rises forcefully | Excessive lift or another counterbalance fault | Do not continue moving or testing the door; clear the area and request service | Yes |
| Feels unusually heavy | Insufficient spring support, broken or worn spring, cable issue, damaged rollers, or binding tracks | Stop the test and arrange inspection | Yes |
| Travels crookedly | Cable, drum, roller, track, bracket, or spring-system fault | Keep clear and do not attempt to straighten or lower it | Yes |
| Binds or sticks | Obstruction, bent track, damaged roller or hinge, panel interference, or counterbalance trouble | Visually check for debris only; do not alter track position | Yes if significant or accompanied by instability |
| Makes a loud bang | A spring or another loaded component may have failed | Inspect only from a distance and call a technician | Yes |
| Has a visible gap in a spring | Likely broken torsion-spring coil | Do not operate or touch the assembly | Yes |
| Has a slack or frayed cable | Cable or counterbalance-system fault; cable may be displaced from a drum | Isolate the area and request service | Yes |
A heavy or falling door often suggests inadequate counterbalance support, but it does not tell you whether the correct remedy is adjustment, spring replacement, cable repair, track work, or another intervention.
Forceful upward movement likewise does not mean a homeowner should remove an arbitrary amount of spring tension. It indicates excessive lift or another counterbalance problem that must be evaluated against the door’s actual weight, spring specifications, drum dimensions, cable condition, and hardware geometry.
Crooked travel points beyond a simple “more or less tension” question. One cable may be slack or off its drum, a roller may be displaced, a track may be damaged, or the shaft and drums may not be operating together correctly. Continuing to run the opener can worsen the misalignment.
A loud bang followed by a visible gap in a torsion spring—or by a door that suddenly feels much heavier—strongly suggests spring failure. Adjustment cannot reconnect a broken coil. The spring and the rest of the counterbalance system need inspection.
Do not compensate by increasing the opener’s force setting or changing its travel limits. The opener moves a properly counterbalanced door; it is not a replacement counterweight. Do not use the opener to move a visibly damaged, crooked, or seriously unbalanced door.
What a trained technician adjusts on a torsion-spring system
A technician does not begin by selecting a turn count from a generic chart. The first task is to inspect the complete system and determine whether adjustment is appropriate at all.
At a non-procedural level, professional torsion-spring service involves:
- Identifying the door, spring, drum, cable, and track configuration.
- Checking for broken, worn, corroded, deformed, or incorrectly sized parts.
- Closing and securing the door.
- Immobilizing the shaft or related hardware as required by the applicable procedure.
- Controlling the winding cone with correctly sized solid-steel winding bars.
- Making small, configuration-specific changes.
- Securing the assembly.
- Removing locking tools in the proper sequence.
- Retesting manual travel and balance.
- Confirming cable, drum, opener, and safety-system operation.
Increasing or reducing torsion-spring tension changes the lift supplied by the spring. The correct setting depends on the door’s height and actual weight, spring specifications, cable-drum dimensions, hardware geometry, installation type, and manufacturer instructions. There is no safe universal number of turns.
Correct tools matter. Screwdrivers, punches, rebar, socket extensions, and other improvised rods are not substitutes for winding bars. They may fit the winding cone poorly, bend, slip, or leave the user unable to control the spring’s stored energy. Clopay-derived torsion instructions specify solid-steel winding bars and locking pliers and expressly prohibit screwdriver substitutes (Clopay-derived torsion-spring instructions).
A two-spring torsion system also requires coordinated evaluation. Under the applicable Clopay-derived procedure, paired springs receive equal adjustments, but that does not mean every apparent imbalance should be corrected by changing both. A technician must first confirm that the springs are the correct matched components, neither is damaged, and the cables and drums are properly seated and synchronized.
Published references sometimes describe professional changes in quarter-turn increments. That explains how controlled work may be measured; it is not permission to add or remove a particular number of turns on an unidentified door.
Brand-specific instructions have limits. The Clopay-derived material is designed for Clopay doors, serves only as general reference for other brands, and expressly does not apply to low-headroom installations. Enclosed, rear-torsion, proprietary, commercial, and unusual-track systems may require entirely different parts, tools, and procedures.
Why extension springs require a different service approach
Extension and torsion springs are different systems. Their energy storage, attachment methods, hardware, failure modes, and service procedures are not interchangeable.
An extension spring stretches beside a horizontal track as the door closes. If the spring or an attachment point fails, the spring and connected hardware can whip or become projectiles. A torsion-spring procedure cannot be adapted safely to an extension system.
Some extension systems change tension through attachment hardware such as an S-hook, eye bolt, pulley, or cable connection. The visibility of that hardware does not make it safe to reposition. Those components may remain loaded, and changing one connection can affect cable tension, door alignment, and spring extension.
Containment cables are a key safety feature. They commonly pass through extension springs to help restrain components if a spring breaks. Exact routing is installation-specific, so inspect only from a distance and compare the arrangement with the manufacturer’s manual. Do not pull the cable, disconnect it, or attempt to correct its routing. Missing, damaged, detached, or questionable containment hardware is a reason to stop operating the door and request inspection (extension-spring safety overview).
Because extension-system arrangements vary, there is no universal homeowner adjustment procedure supported here. Use the exact door manufacturer’s instructions to identify the system, then have a trained door-system technician evaluate spring condition, attachment points, pulleys, lift cables, tracks, and containment hardware.
When adjustment is not the repair you need
Adjustment changes available counterbalance lift; it does not restore damaged material. Any of the following can indicate that replacement or broader system repair is more appropriate:
- A visible gap in a torsion spring
- A broken or separated coil
- Severe corrosion, pitting, or deformation
- An extension spring that appears distorted or damaged
- A loose, displaced, rusted, or frayed cable
- A cable that has left its drum
- A damaged drum or pulley
- Repeated loss of balance after prior service
- A spring that cannot provide adequate lift within its specified setup
- Crooked movement or recurring cable slack
- Damaged rollers, hinges, tracks, brackets, or door sections
- An incorrectly sized spring
- Missing or damaged extension-spring containment hardware
A broken spring cannot be restored by adjustment. Additional winding also cannot make a severely worn, damaged, or incorrectly sized spring suitable for the door. Incorrect spring selection or adjustment can affect cables, tracks, the opener, and other components, so the complete assembly should be assessed rather than treating tension as an isolated setting (garage-door spring replacement safety overview).
Cables, drums, rollers, tracks, and obstructions can imitate a spring problem. The opener introduces another variable: improper travel or force configuration can affect powered behavior, although changing those settings will not correct bad mechanical balance.
If the door uses a matched pair of springs, both need coordinated evaluation. Replacing both is not a universal requirement for every system, so ask the technician to explain the door-specific basis for the recommendation.
If the door is stuck open or appears likely to fall:
- Keep everyone away from the opening and the area beneath the door.
- Move vehicles only if they can be moved without passing under or disturbing the door.
- Do not pull the emergency release.
- Do not attempt to lower, straighten, or rebalance the door.
- Do not brace it with improvised supports or climb beneath it.
- Stop using wall controls, remotes, keypads, and smart controls.
- Call a trained door-system technician and describe the door’s position before arrival.
Prepare the following details for the service call:
- Door width and height
- Door and opener manufacturer and model
- Spring type and number of visible springs
- Whether the door is fully open, partly open, or closed
- Whether it moves manually, under opener power, both, or neither
- Whether it falls, rises, binds, or travels crookedly
- Any bang, scraping, popping, or straining sound
- Visible spring gaps, broken coils, cable fraying, or cable slack
- Any recent impact, track damage, or prior spring work
- Photographs taken without entering the door’s path
These details can help a technician arrive prepared without requiring you to manipulate the system.
How to verify the door after professional service
After adjustment or replacement, let the technician declare the system safe before conducting or observing verification checks. A proper result involves more than making the opener move the door.
First, check manual travel. With the opener disconnected by the correct model-specific method, the door should move smoothly through its range without severe resistance, jerking, scraping, binding, or crooked travel.
Next, check balance at multiple positions, including approximately halfway. The door should remain reasonably stable within the manufacturer’s acceptable tolerance. It should not slam down, shoot upward, or become markedly heavier at one point.
Visually verify that the lift cables remain appropriately taut and correctly seated on their drums during normal operation. Do not attempt to reseat a cable, rotate a drum, or correct cable tension yourself. If a cable leaves a drum groove, becomes slack, or changes position during a test, stop operation.
Reconnect the opener according to its manual and run several ordinary powered cycles. Watch and listen for:
- Jerking or uneven movement
- Motor strain
- Scraping or popping
- Hard impacts at the floor or upper travel point
- Cable slack
- Crooked panel movement
- Failure of the trolley to engage normally
Then test the photo-eye and auto-reverse safety functions exactly as the opener manufacturer directs. Test objects, positioning, and sequences differ by model. Professional service guidance calls for manual balance testing, normal powered cycles, and checks of the reversal and photo-eye functions after spring work (professional adjustment and verification overview).
Do not accept increased opener force as a substitute for proper manual balance. If the disconnected door remains heavy, unstable, or crooked, the mechanical issue remains even if the opener can move it.
Keep the exact door and opener manuals with the technician’s service record, spring specifications, and parts information. Acceptable drift, service methods, and counterbalance settings vary by system; those records are more useful than a generic turn-count chart during future service.
Frequently asked questions
How do I know whether my garage door needs more or less spring tension?
A stable, intact door that falls during a cautious manual balance test has inadequate counterbalance support. A door that rises forcefully has excessive lift or another counterbalance fault. A door that remains near halfway appears reasonably balanced, while some manufacturer guidance permits a slow rise or gentle fall.
Those results do not prove that spring tension alone is responsible. Cable, drum, roller, track, spring-condition, or geometry problems can produce similar behavior. Use the test to decide whether inspection is needed—not to decide how many turns to add or remove.
How many turns should a garage-door spring have?
There is no universal turn count. The correct setting depends on the exact door height and weight, spring specifications, drum dimensions, cable arrangement, installation geometry, and manufacturer procedure.
Published numerical examples apply only to identified configurations. A video from a garage-door-parts seller, for example, ties its demonstrated turn counts to door height and drum diameter and requires balance testing afterward (configuration-specific turn-count demonstration). Such an example is not a safe substitute for the specifications and procedure for your door.
Can I use a screwdriver or rebar instead of winding bars?
No. Screwdrivers, punches, rebar, socket extensions, and other improvised rods are not acceptable substitutes for correctly sized solid-steel winding bars. They may fit poorly, bend, slip, or be ejected while the spring is loaded.
Having proper bars does not by itself make the work safe. The technician must also understand the spring orientation, winding cone, shaft, door restraint, cable and drum setup, and applicable manufacturer procedure. The Clopay-derived instructions specifying winding bars are configuration-specific and do not apply unchanged to every brand or installation.
Should I pull the emergency release if the door is stuck open or has a broken spring?
No. If the door is stuck open, unstable, crooked, or associated with a broken spring or loose cable, pulling the release may disconnect the mechanism currently restraining it. The door could move or fall.
Keep people and vehicles away, stop all opener operation, avoid standing beneath the door, and call a trained technician. The balance test described above begins with a stable, visibly intact door fully closed—not a damaged door suspended overhead.
Does a heavy or crooked garage door always mean the springs need adjustment?
No. A heavy door may have inadequate spring support, but it may also have a broken or worn spring, cable trouble, damaged rollers, bent or obstructed tracks, or another mechanical fault.
Do not add spring tension or increase opener force based on the symptom alone. Stop operating the door and have the complete counterbalance and guide system inspected.
The decision rule is simple: if a stable, intact door moves smoothly and remains near the midpoint during a cautious manual balance test, spring adjustment is not clearly indicated. If it falls, rises forcefully, binds, travels crookedly, feels unusually heavy, or shows spring or cable damage, stop operating it and arrange a manufacturer-compatible inspection. Exact spring settings belong to the specific door; a generic turn count is not a safe substitute for trained service.