
How to Read a Cracked Garage Floor Before You Try to Fix It
About 1/8 inch is only a screening rule, not a structural threshold. Growth, vertical offset, water and rocking help separate monitoring from evaluation.
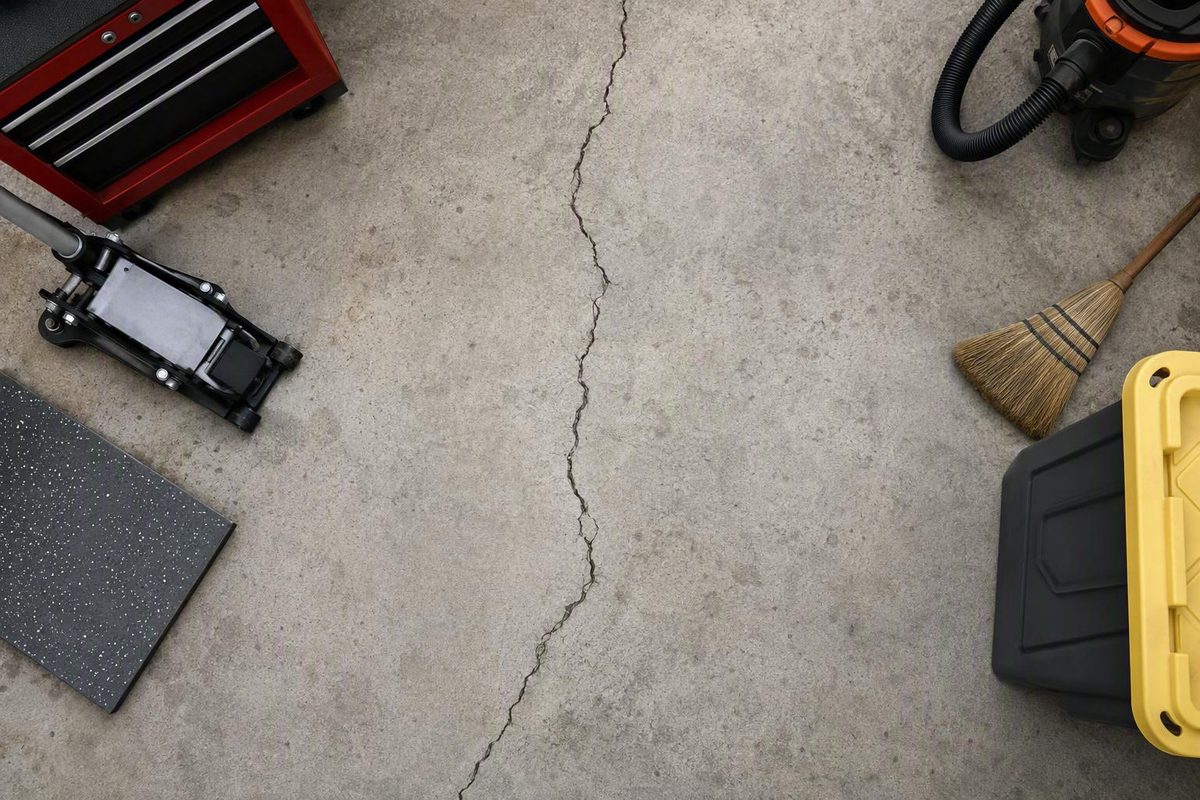
Start here: a symptom-to-action check for a cracked garage floor
Garage floor cracking is common. A tight, level crack caused by concrete shrinkage—or one that follows a planned control joint—may be primarily cosmetic. The presence of a crack alone does not prove that the garage slab is failing or that the house foundation is damaged.
The useful first question is not simply, “How wide is it?” Ask:
- Is one side higher than the other?
- Has the crack become wider, longer, or more irregular?
- Is water entering through it?
- Has the floor developed a dip, raised panel, or changed slope?
- Does part of the slab rock, or does one area sound different when tapped?
- Are doors sticking, or are there new cracks elsewhere in the building?
Those observations lead to three practical paths:
- Monitor it. Photograph and measure a dry, level hairline crack that appears unchanged and has no related symptoms.
- Consider a cosmetic repair. A stable, level, nonstructural crack may be filled if it traps dirt, admits minor moisture, interferes with cleaning, or looks objectionable.
- Seek evaluation. Growth, vertical displacement, recurring water entry, broad settlement or heave, rocking panels, suspected loss of support, or related building symptoms justify investigating the cause before filling or covering the crack.
Several commercial inspection and repair sources use approximately 1/8 inch as a screening rule of thumb. It is not a universal engineering threshold, a building-wide diagnosis, or proof that a wider crack is structural. Scott Home Inspection, for example, presents that dimension as approximate guidance and also emphasizes displacement and altered floor drainage (Scott Home Inspection).
A narrow crack that grows or develops a raised edge can be more concerning than a wider crack that remains level, dry, and unchanged. Width is one clue—not a verdict.
| Observation | Possible significance | Next step |
|---|---|---|
| Level, dry hairline crack | Possible curing shrinkage or stable surface cracking | Photograph, measure, and monitor; fill only if desired |
| Crack following a control joint | The joint may be directing expected cracking | Monitor for leakage, spreading, or displacement |
| Crack becoming wider or longer | Possible ongoing slab movement | Record the change and arrange evaluation if progression continues |
| One side higher than the other | Settlement, heave, or another form of differential movement may be present | Investigate before grinding, patching, or coating |
| Wet crack or recurring staining | Water may be entering through the crack or reaching it from below or nearby | Find the water source and assess drainage before sealing |
| Sunken or rocking panel | Possible loss of support beneath part of the slab | Avoid treating it as a surface-only repair; obtain professional input |
| Crack continuing into a wall | The problem may extend beyond a cosmetic floor defect | Seek a broader assessment rather than diagnosing it from appearance alone |
Garage construction varies. In some buildings, the garage floor and house foundation have different structural roles; in others, their relationship may be more complicated. A floor crack cannot establish foundation damage without a site-specific assessment.
Why concrete garage floors crack
A crack’s appearance can suggest possible causes, but it usually cannot confirm one. Concrete characteristics, subgrade conditions, drainage, climate, loading, and construction details can all contribute—sometimes in combination.
Curing shrinkage is one of the less alarming possibilities. Concrete loses volume as it cures and dries. Restraint within the slab can then produce fine surface cracks. These may remain level and stable without indicating continuing movement below the floor.
Control joints are deliberately installed weak points intended to manage where concrete cracks as it shrinks or moves. A crack that stays within a control joint may therefore reflect the joint doing its job. It still deserves attention if it leaks, spreads, or develops vertical displacement. Commercial garage-floor guidance distinguishes hairline shrinkage and joint-following cracks from cracks that grow or become uneven; it also identifies insufficient or poorly located joints as a possible contributor (Epp Foundation Repair).
Installation-related contributors can include:
- A concrete mixture unsuited to the application
- Improper placement, finishing, or curing
- Inadequate subgrade preparation or compaction
- Too few or poorly located control joints
- Reinforcement or concrete-cover problems
- Loading the slab before it was ready
These are possibilities, not visual diagnoses. A photograph cannot reveal the original concrete mixture, curing conditions, reinforcement placement, or subgrade density.
Settlement occurs when a slab section moves downward. Poorly compacted fill may compress over time. Erosion or washout may remove support. A subsurface void can leave a panel spanning an unsupported area until it cracks, drops, or rocks.
Heave is different: a force beneath the slab pushes a section upward. Depending on the site, possible mechanisms include frost-related expansion or expansive soil. The distinction matters because a technique intended to raise a settled panel would not address the force already lifting a heaved section.
Moisture can be both a clue and a worsening mechanism. Water may travel through a pre-existing crack, collect at a low point, erode material near a slab edge, or contribute to recurring support loss. Where saturated concrete is exposed to freezing, freeze-thaw cycling may worsen cracking and surface deterioration. Water and deicing salts may also accompany flaking or scaling.
Other possible contributors include temperature movement, an isolated impact, and excessive or highly concentrated loads. A crack beneath machinery or near an impact point does not prove loading was the sole cause. The floor may also have had a weak surface, inadequate support, or pre-existing damage.
| Possible cause | Pattern or symptom that may support the possibility | Important limitation |
|---|---|---|
| Curing shrinkage | Fine, level crack with no continuing change | A narrow crack is not automatically harmless |
| Control-joint behavior | Crack follows a straight formed or saw-cut joint | Leakage or displacement changes the assessment |
| Settlement | Dip, sunken section, changed slope, or one side lower | Surface inspection cannot identify the underlying soil condition |
| Heave | Raised panel or upward displacement | The cause of uplift cannot be confirmed from the crack alone |
| Freeze-thaw exposure | Moisture, scaling, and worsening damage where freezing occurs | Both saturation and freezing conditions must be relevant |
| Drainage or support loss | Pooling, wet slab edges, rocking, or localized sinking | Confirmation may require investigation below or around the slab |
| Impact or loading | Localized damage near equipment, storage, or an impact point | Proximity does not prove causation |
Treat these patterns as triage clues. They can help determine what to inspect next, but they cannot establish structural significance, confirm a void, or distinguish settlement from heave with certainty.
Inspect and document the crack before repairing it
If active movement is possible, establish a baseline before applying filler.
Use a repeatable process:
- Locate the entire crack. Remove movable items and trace the opening from end to end. Note whether it stops within the floor, follows a joint, reaches a wall, or connects with other cracks.
- Measure the maximum visible width. Use a ruler or crack gauge and record the same unit each time. Select fixed measurement points, such as “door end,” “center,” and “wall end.”
- Check for vertical difference. Place the same straightedge across the crack at each named point. Keep it in the same orientation on later inspections and record which side is higher, along with the measured gap or offset.
- Record the length and endpoints. Mark the endpoints with removable tape or map their positions relative to fixed features.
- Look for moisture. Note active water, dampness, white deposits, dark staining, rust-colored marks, or recurring wetness after rain.
- Check the surface. Record loose aggregate, flaking, scaling, crumbling edges, spalling, or areas that sound noticeably different from the surrounding slab.
- Assess slope and drainage. Look for pooling and note whether water moves toward the garage door, a wall, or the crack.
- Check nearby operation. Record whether the garage door seals evenly, tracks normally, or appears newly misaligned. Note changes involving fixed cabinets or equipment.
Take dated photographs from the same positions. Include a wide view showing the crack’s location and a close view with a ruler or gauge.
Record conditions that may help explain a change:
- Recent heavy rain
- Freezing or thawing weather
- A new vehicle, machine, storage rack, or concentrated load
- Gutter, downspout, grading, or drainage changes
- Plumbing leaks or repeated wash water
- Changes in garage-door alignment
- New pooling or a noticeable change in floor slope
An informal tapping comparison may reveal that one area sounds different from another, but it does not confirm a subsurface void. Commercial flooring guidance treats tapping as a preliminary clue and places greater emphasis on documenting width, displacement, moisture, and movement (Nature Stone).
A changed slope matters even when the crack itself looks modest. A low area can retain water, while a new drainage path may direct water toward walls, slab edges, or the opening. That moisture can complicate both diagnosis and repair adhesion.
Monitoring is a way to detect change, not a guarantee that a crack is dormant after a preset number of weeks or months. Active leakage, visible growth, increasing displacement, or a rocking panel should not be placed on an arbitrary long-term observation schedule.
A printable log can use these fields:
| Date | Photo no. | Measurement point | Width | Vertical offset | Moisture or staining | Weather/recent event | Drainage or pooling | Door alignment |
|---|---|---|---|---|---|---|---|---|
Add notes for crack length, endpoint movement, loose concrete, new loads, and any change elsewhere in the garage. Use the same tools, units, named points, and straightedge orientation during each inspection. If movement is suspected, preserve this baseline before filling the opening.
Warning signs that justify professional evaluation
Stop treating garage floor cracking as a cosmetic issue when observations suggest continuing movement, water problems, lost support, or effects beyond the immediate crack.
Primary escalation signs include:
- Measurable widening or lengthening
- Increasing vertical displacement
- Sharply variable width
- Recurring water entry or persistent staining
- A broad dip, raised area, settlement pattern, or heave pattern
- A sunken, loose, or rocking slab section
- Suspected erosion, washout, or missing subgrade support
- A crack that continues from the floor into a wall
Related symptoms can strengthen the case for a broader assessment:
- A garage door that has become difficult to operate or no longer seals evenly
- Sloping surfaces or a change in drainage direction
- Pooling near walls, corners, or the garage opening
- New cracks in walls, steps, siding, or visible foundation elements
- Misaligned fixed equipment or cabinetry
- Similar movement in adjacent slabs or walkways
Vertical displacement deserves attention for two reasons. First, it shows that the two sides are no longer in the same plane. Second, the resulting lip can catch shoes, creepers, jacks, carts, toolboxes, and small wheels. Commercial garage-floor safety guidance identifies uneven cracks as practical trip and wheel hazards but does not establish one universal displacement limit for every private garage (Nature Stone). Until a pronounced or unstable offset is assessed, keep foot traffic and wheeled equipment away from the affected area where practical.
Commercial sources use different screening figures. Some suggest evaluation or closer attention around 1/8 inch, while another uses approximately 1/4 inch, particularly when growth is present. These are commercial screening suggestions—not universal structural or safety standards. Product instructions may use other dimensions because they define what a particular filler can accommodate, not whether a slab is structurally sound (Scott Home Inspection).
Seek professional evaluation when the cause remains uncertain and the crack is progressing, displaced, wet, extensive, or accompanied by symptoms elsewhere. Supplied home-inspection guidance recommends structural-engineer evaluation for large cracks, wall extensions, and cracking accompanied by settlement, heave, or uneven slab sections.
The most useful professional depends on the suspected problem:
- A concrete contractor may assess repair access, patching, lifting, leveling, or replacement.
- A drainage specialist may help where runoff or repeated water entry is central.
- A geotechnical professional may be relevant when soil or subgrade behavior requires investigation.
- An independent structural engineer who is not selling the proposed repair may offer a more detached assessment when substantial movement or interaction with the building is suspected.
That does not mean every crack requires an engineer. It means a structural conclusion should be established carefully when a proposed repair depends on it.
Do not diagnose foundation failure from width, pattern, or a photograph alone. A jagged crack can be visually dramatic but stable; a narrow crack can be actively moving. Context and change matter.
Choose the repair objective before choosing a product
“Fix the crack” can mean several different things. Define the objective first:
- Keep water and debris out
- Fill a stable surface opening
- Bond a dry, dormant crack
- Patch missing or crumbling concrete
- Fill a subsurface void
- Raise a settled panel
- Reduce a trip edge
- Restore the intended drainage slope
- Resurface a sound but worn floor
- Replace concrete that cannot reasonably be stabilized or repaired
These objectives are not interchangeable. A surface filler does not restore missing subgrade support. A flexible seal may block debris without transferring structural load. Grinding can remove a lip without stopping the movement that formed it. A coating or tile can change the appearance while leaving settlement or heave untouched.
Use this framework before comparing products:
| Condition | Question to resolve |
|---|---|
| Crack activity | Is it stable, or is it widening, lengthening, or changing height? |
| Moisture | Is the concrete dry, damp, intermittently wet, or actively leaking? |
| Width and depth | Does the product fit the actual opening geometry? |
| Vertical offset | Is a surface repair enough, or must the slab be stabilized or leveled? |
| Surface condition | Are the edges sound, or is the concrete loose, oily, flaking, or crumbling? |
| Repair purpose | Is the goal sealing, bonding, patching, support, leveling, or appearance? |
| Future finish | Will a coating, overlay, adhesive, or tile system be installed later? |
Rigid epoxy materials are generally associated with strong bonding in dry, dormant cracks. If the slab continues moving, however, a rigid repair may separate or a new crack may form beside it.
Flexible concrete sealants and some polyurethane or polyurea formulations may be more appropriate when the priority is keeping out water and debris or accommodating limited movement. Their properties vary considerably, so the material category alone is not enough to select a product. A flexible seal does not provide slab support merely because it can move with the opening.
Much of the published epoxy-versus-polyurethane comparison material concerns injection into foundation walls and other concrete structures, not surface filling of horizontal garage slabs. Injection-oriented manufacturer guidance generally distinguishes rigid epoxy bonding from polyurethane leak sealing while emphasizing crack activity and moisture conditions (SealBoss). Product selection for a garage floor should still come from the technical instructions for the specific horizontal repair material.
Be careful with the word injection. High-pressure polyurethane injection and port-based epoxy injection use specialized methods. They should not automatically be transferred to a garage-floor crack. A pourable floor filler, cartridge sealant, patching compound, slab-lifting material, and structural injection system are different products and procedures.
For any selected material, check the manufacturer’s requirements for:
- Minimum and maximum crack dimensions
- Required depth and use of backer rod
- Dry, damp, or wet substrate limitations
- Oil, grease, dust, and coating removal
- Application and curing conditions
- Layer thickness
- Walking and vehicle-traffic restrictions
- Compatibility with primers, coatings, overlays, adhesives, and paints
- Label and safety-data instructions
Preparation and formulation matter as much as whether the label says epoxy, polyurethane, polyurea, sealant, or patch.
DIY repair for a stable, level, nonstructural crack
DIY filling is most reasonable when the crack appears stable, remains level, is not actively leaking, and has no associated settlement, heave, rocking, or suspected loss of support. The homeowner should also be comfortable following the selected product’s directions precisely.
Before starting, confirm that the crack has been documented. If the condition is changing or uncertain, filling it may erase useful baseline evidence.
A general preparation sequence is:
- Inspect the entire opening. Confirm its width, depth, length, and whether the edges are sound.
- Remove loose material. Brush or vacuum dust, grit, failed filler, and crumbling concrete.
- Clean the surrounding surface. Remove oil or grease when required by the repair product.
- Meet moisture requirements. Some products require dry concrete; others permit damp surfaces. Do not assume.
- Confirm suitable repair geometry. Verify that the filler is intended for the crack’s width, depth, orientation, and expected traffic.
- Protect yourself. Follow the product label and safety data. DAP’s concrete-repair guidance, for example, specifies gloves and eye protection (DAP).
- Apply and finish as directed. Do not improvise layer thickness, joint shape, cure conditions, or return-to-service timing.
For a narrow, stable opening, a compatible concrete crack filler or sealant may improve appearance and keep out dirt or minor moisture. It should not be described as permanent when the cause is unknown.
For wider localized surface damage, a concrete patching material may be more appropriate. Where the product permits, press it into sound, prepared concrete and finish it flush or feather the edges. Do not feather a material more thinly than its instructions allow.
Depth matters. A narrow crack may be too deep for a full-depth bead of sealant. The selected product may require backer rod to control the sealant depth. A deep patch may instead require multiple layers.
DAP’s instructions illustrate why exact dimensions must be attributed to individual products rather than turned into universal concrete rules. Its textured concrete filler and sealant is specified for openings up to 1/2 inch wide by 1/2 inch deep, with backer rod for deeper cracks. Its ready-mixed concrete patch instructions call for 1/4-inch layers where a repair is deeper than 1/2 inch, up to that product’s stated maximum total depth (DAP’s concrete-repair instructions).
Those dimensions do not determine whether a crack is structural. They define the manufacturer’s application limits for named materials.
After application, follow the selected product’s instructions for curing, painting, coating, walking, and parking. There is no universal return-to-service schedule across cementitious patches, sealants, epoxies, polyurethanes, and polyureas. The applicable schedule is the one supplied for the specific product and site conditions.
Set realistic expectations. Filling can make a stable crack easier to clean, improve its appearance, and limit entry of water or debris. It cannot guarantee that the opening will never return, especially if the slab moves again.
When filling is not enough: displacement, water, settlement, and heave
A crack with vertical displacement is no longer just an opening to fill. Before grinding, leveling, patching, or coating, investigate why the two sides are at different heights and whether the condition is changing.
Grinding can reduce a raised edge or trip lip. It cannot correct settlement, heave, erosion, or lost support. If movement continues, the offset may return or appear elsewhere. The supplied evidence does not support a complete safety procedure for DIY concrete grinding, so this article does not provide one. When grinding is contemplated, consult a qualified concrete professional rather than relying on an improvised dust-control setup or a general crack-filling tutorial.
Slab lifting may be an option for some settled panels. Material is placed beneath the slab to fill space and raise the panel toward its intended elevation. Suitability depends on why support was lost, the slab’s condition, access, drainage, and whether the underlying material can provide durable support. It is one possible repair path, not a universal solution.
Drainage may need correction before or alongside lifting. Look beyond the crack to gutters, downspouts, grading, slab-edge runoff, plumbing leaks, recurring pooling, and water moving beneath or alongside the garage. Raising a panel without addressing continuing erosion can leave the cause in place.
Heave requires a different approach. If a section has been pushed upward, filling beneath it or raising surrounding sections may not address the expanding soil, frost action, or other force responsible. The first task is to determine whether the observed displacement is more consistent with uplift, downward settlement, or another condition—and to recognize when surface observations are insufficient.
Sectional replacement may be considered where damage is concentrated in an area that cannot reasonably be stabilized or patched. Complete replacement may enter the discussion when cracking and deterioration are extensive or the slab cannot be returned to usable support and slope. No single crack width establishes when replacement is necessary.
Resurfacing, coatings, and floor coverings are finish options for a sound, stable substrate. They are not repairs for active movement. A new surface can hide the evidence temporarily while the underlying crack continues to open or move.
Use this sequence:
- Investigate the cause.
- Correct drainage or support problems.
- Stabilize or level the slab where necessary.
- Repair the crack or damaged surface.
- Apply a coating, overlay, or covering only after the substrate is suitable.
Scope and cost depend on crack geometry, displacement, site access, local labor, drainage work, lifting requirements, demolition, disposal, and finish restoration. A universal price promise would ignore most of what determines the work.
Reduce recurrence and avoid repairs that hide the real problem
Some cracking risk is controlled when the slab is built. Relevant construction measures include:
- Suitable subgrade preparation and compaction
- A concrete mixture appropriate for the application
- Controlled placement, finishing, and curing
- Reinforcement where specified
- Properly planned and timed control joints
- Drainage that does not undermine slab edges or saturate vulnerable areas
An existing homeowner cannot change the original installation without major work, but manageable conditions still matter. Watch where roof and surface water go. Limit persistent pooling. Address water reaching slab edges. Investigate new dips, raised areas, or rocking panels rather than repeatedly filling the visible crack.
Water can worsen deterioration in several ways. It may carry away supporting material, enter cracks, participate in freeze-thaw cycling where saturated concrete freezes, and carry deicing salts associated with surface scaling.
Coatings, overlays, and tiles can conceal a stable cosmetic defect, but they can also conceal recurrence. They do not stabilize an actively moving slab.
Before committing to a finish, confirm that the crack filler and coating system are compatible. Check both manufacturers’ instructions or obtain written direction from the installer.
Use this pre-coating checklist:
- [ ] The crack has been photographed and measured.
- [ ] Growth and vertical movement have been assessed.
- [ ] The source of water or recurring dampness has been investigated.
- [ ] Settlement, heave, or displacement has been corrected where necessary.
- [ ] Loose or deteriorated concrete has been addressed.
- [ ] The repair has cured according to its instructions.
- [ ] Filler, primer, adhesive, and coating compatibility has been confirmed.
- [ ] The floor’s drainage and intended vehicle use have been considered.
The durable rule is simple: diagnose first, stabilize second, repair third, finish last.
Frequently asked questions
Does a crack in my garage floor mean the house foundation is failing?
No. A garage-floor crack by itself does not prove that the house foundation is failing. Garage slabs and foundations can be designed and connected in different ways, and a surface crack may result from curing shrinkage, joint behavior, local slab movement, or another condition limited to the floor.
Concern increases when the crack is growing, vertically displaced, wet, connected to a wall, or accompanied by sticking doors, sloping surfaces, or cracks elsewhere. Those symptoms justify a broader assessment, but they still do not establish a diagnosis from appearance alone.
Is a garage-floor crack wider than 1/8 inch automatically structural?
No. Approximately 1/8 inch is a screening rule of thumb used by several commercial inspection and repair sources, not a universal structural threshold. A wider crack may be stable and level, while a narrower crack may deserve attention if it is widening, leaking, or developing vertical offset (Epp Foundation Repair).
Evaluate width together with change over time, displacement, moisture, location, slab slope, and symptoms elsewhere. Product labels may also use width categories, but those normally describe application limits rather than structural significance.
Should I use epoxy or polyurethane for a garage-floor crack?
Choose according to the condition, product formulation, and repair objective—not the material name alone. Rigid epoxy is generally associated with bonding dry, dormant cracks. Flexible concrete sealants and certain polyurethane or polyurea products may be better suited to water sealing or limited movement.
Formulations vary. A polyurethane foam intended for high-pressure wall injection is not equivalent to a cartridge sealant for a horizontal floor. Injection guidance emphasizes checking whether a crack is active or dormant and dry, damp, or leaking before choosing a material, but the final choice for a garage slab must follow the specific floor-repair product’s instructions (MABI USA).
Neither material restores missing subgrade support. If the slab is settling, heaving, or rocking, address that condition before selecting a surface filler.
Can I apply an epoxy coating, overlay, or floor tile over cracked concrete?
Possibly, if the slab is sound and stable and the crack has been assessed and repaired appropriately. First investigate movement, moisture, displacement, and drainage. A coating, overlay, or tile can improve appearance, but it does not correct settlement, heave, or a void beneath the slab.
Confirm the filler’s cure requirements and compatibility with the intended primer, coating, adhesive, or tile system. If movement continues, the crack may telegraph through the finish, reopen, or damage a rigid overlay.
Why did my repaired garage-floor crack reopen?
The slab may have continued moving, or the repair may not have matched the condition. Possible explanations include continuing settlement or heave, recurring water or erosion, a rigid filler in an active crack, inadequate cleaning, unsuitable moisture conditions, incorrect repair depth, or incompatibility with the surrounding concrete or coating.
Reopening does not automatically mean the filler was defective. It may show that a surface repair was used where support, drainage, or movement needed attention first.
The practical hierarchy
Document the crack before hiding it. Check for growth, vertical displacement, moisture, drainage changes, rocking, altered slope, and related symptoms elsewhere. Then decide whether the condition can be monitored, cosmetically filled, or should be professionally evaluated.
A stable surface crack and an actively moving slab are different problems. Identify and correct water or support issues, stabilize or level the slab where necessary, repair it with a condition-compatible material, and only then coat or cover the floor.