
A Low-Risk Routine for a Cleaner Epoxy Garage Floor
Identify the floor system before adding water, then remove grit dry and try warm water. Use a coating-labeled pH-neutral cleaner only when needed.
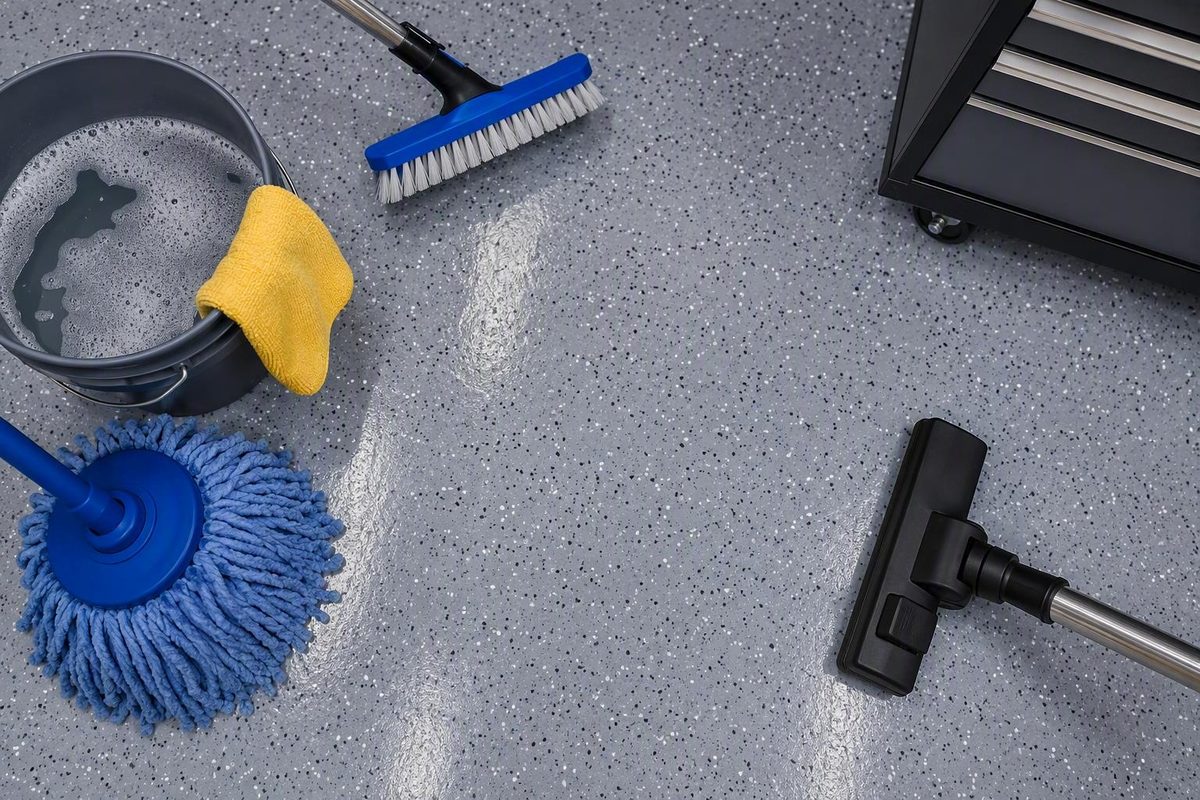
Knowing how to clean epoxy floor coating safely starts with restraint. The goal is not to find the strongest chemical or fastest machine; it is to remove contamination without scratching the finish, leaving residue, softening a topcoat, or forcing water beneath a damaged edge.
The safest general sequence is straightforward: identify the floor system, remove loose grit while dry, try warm water, add a properly diluted pH-neutral cleaner labeled for the coating only when needed, agitate with soft tools, remove the dirty solution, rinse as directed, and dry completely. Ammonia, solvents, specialty stain removers, powered scrubbers, steam, and pressure washing are coating-dependent exceptions rather than universal shortcuts.
Before Cleaning: Identify the Surface and Inspect Its Condition
A garage floor that looks like “epoxy” may not have exposed epoxy at the surface.
Find the installer’s maintenance sheet, coating manufacturer, product label, invoice, or warranty paperwork if possible. Those instructions should override general advice, especially regarding:
- Cleaner chemistry and dilution
- Maximum contact or dwell time
- Rinsing requirements
- Approved brushes and pads
- Automatic-scrubber settings
- Pressure washing or steam cleaning
- Wax, polish, or recoating products
This coating-specific approach matters because manufacturer guidance is normally written for particular resinous-floor systems. For example, the Sherwin-Williams maintenance guide varies cleaner and equipment selection by flooring system, traffic, contamination, floor size, and texture.
For a recently installed floor, do not assume it is ready for wet cleaning because it feels hard or supports foot traffic. Confirm the required cure stage with the installer or product instructions.
Before adding water, inspect the entire floor—particularly beneath mats, cabinets, workbenches, parked tires, and equipment. Look for:
- Peeling, lifting, or loose edges
- Bubbles or blisters
- Hot-tire pickup
- Cracks and failed seams
- Chips, pinholes, or exposed concrete
- Soft, tacky, or discolored areas
- Moisture appearing beneath or through the coating
These are not ordinary dirt problems. Stronger cleaner and harder scrubbing will not rebond a failed coating to the slab. Water may also enter cracks, seams, exposed edges, and other damaged sections, so clean cautiously around them and arrange a repair assessment when failure is evident.
Next, identify what is on the floor. Ordinary dust, oily film, automotive fluids, road salt, dried paint, adhesive, rust, and unidentified chemicals require different responses.
If a spill is unknown, pause routine cleaning. Identify the substance, consult its container label and safety data sheet, use the protective equipment specified there, and seek qualified help if its hazard or coating compatibility remains unclear. Do not invent a neutralizing mixture for an unidentified chemical; coating-care guidance likewise recommends identifying unknown substances and consulting the applicable safety data sheet before selecting a cleanup method.
Before using any new cleaner, stain remover, pad, or machine setting, perform a concealed-area test:
- Dilute and apply the cleaner exactly as intended.
- Use the proposed mop, brush, or pad with light pressure.
- Keep contact within the product and coating limits.
- Remove and rinse the solution as directed.
- Let the area dry completely.
- Compare its color, gloss, hardness, and feel with the surrounding floor.
Stop if the test area softens, becomes tacky, transfers color to a cloth, turns dull, changes color, or develops an altered texture.
Use the gloves and eye protection specified on the cleaner or spill label, keep children and pets away, and control access to the wet floor. Cleaning solutions and water can make a smooth coating slippery; commercial epoxy-floor guidance specifically warns that soap residue can increase slipperiness when wet.
The Safest Step-by-Step Method for Routine Cleaning
Basic supplies
- Soft broom, microfiber dust mop, or suitable vacuum
- Microfiber or sponge mop
- Soft nylon brush for spots and textured areas
- Two buckets, if available
- Warm water
- Properly diluted pH-neutral cleaner labeled safe for the installed coating
- Wet vacuum, squeegee, clean mop, or absorbent cloths
- Label-specified gloves and eye protection
Step 1: Clear and prepare the floor. Move vehicles, bins, tools, portable shelving, mats, and other movable items. Inspect beneath cabinets, benches, appliances, and equipment rather than cleaning only the open center. Protect garage-door sensors, stored materials, electrical equipment, drywall, and anything else that should not get wet.
Step 2: Remove dry debris. Sweep, dust-mop, or vacuum the entire floor before adding water. Pay attention to corners, control joints, wall edges, and textured areas. Sand and grit trapped beneath a wet mop—or later beneath a vehicle tire—can act as abrasives and gradually mark or dull the finish.
Check the vacuum head before use. A clean, non-marking floor attachment is preferable to a damaged tool with exposed metal or hard grit embedded in its wheels.
Step 3: Begin with warm water. For light, non-oily soil, try warm water alone. This is the lowest-risk first attempt because it introduces no unnecessary cleaner and leaves less potential residue. If water does not release the soil, move to a properly diluted, pH-neutral, non-abrasive product specifically labeled safe for epoxy or the installed topcoat.
Step 4: Work in manageable sections. Do not flood the entire floor and then try to catch up. Apply cleaning solution only to an area you can agitate and remove before it dries. Follow both the cleaner label and the floor-system instructions for dilution, water temperature, dwell time, and rinsing. Do not borrow a dwell time from another product or coating.
Step 5: Agitate gently. Use overlapping passes with a microfiber or sponge mop. For isolated dirt or recessed texture, use a soft nylon brush. Apply only enough pressure to release contamination; heavy pressure can turn loose grit into an abrasive.
Rinse the mop frequently. With two buckets, keep cleaning solution in one and use the other to rinse dirty tools. Change dirty water instead of continuing to spread gray solution across the floor.
Step 6: Remove the dirty solution. Use a wet vacuum, squeegee, clean mop, or absorbent cloth. Removal is a separate cleaning step—not simply pushing liquid toward another part of the garage. For textured floors or oily contamination, extraction with a wet vacuum is often more controlled than relying on a mop alone.
Step 7: Rinse when required. Use clean water if the cleaner label calls for rinsing or visible residue remains. Change the rinse water frequently. A “rinse” performed with already-dirty water can redeposit soil and cleaner.
Step 8: Remove water and dry completely. Squeegee, extract, or mop up standing water. Dry edges, joints, low spots, cracks, and the area near the garage door. Airflow can speed final drying, but it does not replace removing puddles first. Wait until the floor is fully dry before returning mats, parking vehicles, or restoring normal traffic.
A manufacturer-oriented model describes five core stages: sweep, apply, agitate, allow the approved dwell time, and remove. The Sherwin-Williams resin-floor guide documents this five-stage process. A homeowner workflow commonly adds explicit rinsing and drying to address remaining cleaner, dirty water, and puddles. Whether rinsing is mandatory depends on the selected product; drying remains a sensible final control.
Quick reference
- Dry-clean first.
- Use the least aggressive compatible cleaner.
- Never let cleaner dry on the surface.
- Remove dirty solution and residue.
- Dry the floor completely.
Which Cleaners Are Safe—and Which Advice Is Coating-Dependent?
Warm water is the conservative first choice for light dirt. If that is insufficient, use a properly diluted pH-neutral product labeled safe for the exposed coating or topcoat. The dilution and contact time should come from that cleaner’s label and the floor-system instructions—not from a universal ounces-per-gallon recipe.
For oil and greasy contamination, an epoxy-compatible degreaser may be appropriate. Use it at the approved dilution, agitate gently, and remove it before it dries. The word “degreaser” does not establish that a product is suitable for every resin floor.
| Cleaner | Routine use? | Compatibility status | Principal risk |
|---|---|---|---|
| Warm water | Yes, for light non-oily soil | Lowest-risk first attempt | May not remove grease or bonded residue |
| pH-neutral epoxy-safe cleaner | Yes, when water is insufficient | Preferred when labeled for the coating | Incorrect dilution or incomplete removal can leave haze |
| Compatible degreaser | Only for oily contamination | Conditional; label and coating must permit it | Can soften, dull, or leave residue if too strong or allowed to dry |
| Dish soap | Not the conservative default | Disputed and formulation-dependent | Hazy, dull, streaky, or slippery soap film |
| Ammonia | No, unless expressly approved | Strongly coating-dependent | Conflicting guidance; concentration and alkalinity may affect some systems |
| Acidic cleaner | Generally no | Use only with explicit approval | May discolor or reduce gloss |
| Bleach | Generally no | Requires exact coating and product approval | Concentration and contact may discolor or degrade a finish |
| Solvent | Not for routine cleaning | Localized use only if expressly approved | Softening, tackiness, color loss, or delamination |
| Powdered abrasive | No | Poor default for coated floors | Scratching and permanent gloss loss |
Ammonia is the clearest example of conflicting published advice. Nilfisk discusses properly diluted ammonia while warning against concentrated ammonia and harsh chemistry. By contrast, other epoxy-care guidance advises avoiding ammonia, and some installer articles are internally inconsistent about it.
That disagreement cannot be resolved by choosing one household dilution and declaring it universally safe. Use ammonia only when the manufacturer of the installed coating or topcoat explicitly permits it and supplies suitable directions. Otherwise, choose a coating-approved neutral cleaner.
Dish soap is also disputed. Some published guidance permits a small amount, but soap-heavy products can leave a film that looks cloudy, reduces apparent gloss, or becomes slippery when wet. A coating-approved pH-neutral cleaner is the more conservative default, particularly when the floor already has haze or streaks.
Do not assume a named all-purpose cleaner is compatible merely because one installer recommends it. The current label—not the brand name alone—must identify the relevant surface use, dilution, and precautions.
Unless the coating manufacturer approves the exact product and method, broadly avoid:
- Vinegar and citrus cleaners
- Strong acidic cleaners
- Concentrated bleach or ammonia
- Harsh solvents
- Highly alkaline cleaners
- Scouring powders
- Heavy soap formulations
Collect questionable wastewater and check the cleaner label, spill information, and locally applicable disposal instructions rather than assuming that dilution makes it harmless.
Never combine ammonia, bleach, acids, degreasers, or other cleaning products. Use one coating-approved product at a time, with the ventilation and protective equipment its label specifies.
Choose Tools for Smooth, Textured, and Large Floors
For a small, smooth garage floor, a simple hand-tool kit is usually sufficient:
- Soft broom or microfiber dust mop
- Vacuum with a suitable floor attachment
- Microfiber or sponge mop
- Soft nylon spot brush
- Foam or rubber squeegee
- Wet vacuum or clean absorbent mop
Microfiber and sponge-style tools are conservative defaults because they provide broad, soft contact and are easy to rinse. Guidance on cotton and string mops varies. Some installers accept them, while others discourage them because they can leave lint, produce streaks, or move dirty solution without collecting it effectively. If a string mop is approved for your floor, keep it clean and rinse it frequently.
Texture changes the job. A flat mop may glide over raised aggregate while leaving dirt in recessed areas. Use a soft-to-medium nylon deck brush or a manufacturer-approved machine brush that reaches the profile without cutting or polishing away the finish. “Medium” should describe a tool approved for that system—not permission to use the stiffest brush available.
Large commercial areas may justify an automatic scrubber. The floor-system instructions should govern its brush or pad, rotational speed, down-pressure, chemical, solution flow, and extraction settings. Start conservatively and test an inconspicuous area.
Pad color is not a universal safety code. One resin-floor manufacturer may list selected light-duty pads for its own systems, but that does not prove that every pad of the same color is safe on another topcoat. Confirm the exact pad and machine combination against the installed system.
| Floor and soil condition | Preferred dry tool | Preferred agitation tool | Liquid-removal method |
|---|---|---|---|
| Small, smooth floor; routine dust | Soft broom, microfiber dust mop, or suitable vacuum | Microfiber or sponge mop | Squeegee, clean mop, or wet vacuum |
| Small, smooth floor; oily spot | Vacuum surrounding grit first | Soft nylon spot brush with approved degreaser | Absorbent cloth or wet vacuum |
| Textured floor; routine soil | Soft broom or vacuum that reaches the profile | Soft-to-medium nylon deck brush | Wet vacuum preferred; squeegee if effective |
| Textured floor; oily contamination | Vacuum and contain bulk material | Approved nylon brush with compatible degreaser | Controlled wet extraction |
| Large, smooth commercial floor | Sweeper or dust-control equipment | Approved auto-scrubber with soft brush or non-abrasive pad | Machine extraction |
| Large, textured commercial floor | Suitable sweeper or vacuum | Manufacturer-approved cylindrical or nylon brush | Auto-scrubber extraction or wet vacuum |
Avoid wire brushes, wire-bristle brooms, steel wool, metal scrapers, hard-bristled brushes, scouring powders, and aggressive abrasive pads as general defaults.
For a raised paint or adhesive deposit, a plastic scraper may help lift loose material. Hold it at a shallow angle, work slowly, and stop if it gouges or whitens the coating. A plastic edge is not automatically harmless, so test it first.
Melamine sponges are coating-dependent. Some installer guidance recommends them for tire marks, while other epoxy-floor guidance discourages them as abrasive. Because they clean partly through fine abrasion, do not make them the first choice. Start with microfiber and an approved cleaner, and use a melamine sponge only if the coating manufacturer permits it after a concealed-area test.
How to Remove Oil, Tire Marks, Road Salt, Rust, Paint, and Other Stains
Stain treatment should escalate by contamination type, not frustration level. Start by removing the bulk material, then use the least aggressive compatible cleaner and tool.
| Contaminant | Immediate action | Cleaner category | Suitable tool | Removal method | Stop or escalate when |
|---|---|---|---|---|---|
| Fresh oil, grease, antifreeze, or automotive fluid | Contain, blot, or absorb; do not spread it | Approved diluted degreaser | Absorbent cloth and soft nylon brush | Collect bulk material, agitate locally, then extract before drying | Coating softens, color transfers, or spill may be hazardous |
| Tire marks | Remove grit and wet the mark | Warm water and neutral coating-safe cleaner; approved mild degreaser if needed | Microfiber, then soft nylon if approved | Wipe, rinse as directed, and dry | Mark remains but gloss begins changing |
| Road salt | Sweep dry crystals and sand | Warm water; neutral cleaner if oily grime is present | Microfiber mop or soft brush | Dissolve in sections and wet-vac or squeegee away | Coating is cracked or lifted, or residue returns from damaged areas |
| Rust | Remove surrounding grit | Mild rust remover specifically labeled for the installed coating | Soft cloth or approved non-abrasive tool | Spot-treat within label time and rinse immediately as directed | Discoloration spreads or gloss changes |
| Dried paint or adhesive | Lift loose solids gently | Manufacturer-approved localized solvent only if necessary | Plastic scraper and soft cloth | Collect solids; spot-treat and remove approved solvent | Coating softens, becomes tacky, or transfers color |
| Unknown chemical | Isolate the area and identify it | Determined by label and safety data sheet | Substance-specific equipment | Contain and collect according to qualified guidance | Identity, hazard, or compatibility is uncertain |
| General embedded dirt | Dry-clean first | Neutral coating-safe cleaner | Microfiber or soft nylon brush | Agitate gently, remove, rinse as directed, and dry | Repeated cleaning changes the coating but not the stain |
Oil and automotive fluids: Do not mop an oil-covered floor as if it were dusty. That spreads contamination and loads the mop with material it cannot effectively collect. Blot liquid or cover it with a compatible absorbent, collect the bulk material, and then treat the remaining film with an approved diluted degreaser. Agitate gently with soft nylon and extract the dirty solution before it dries.
Tire marks: Begin with warm water and a neutral coating-safe cleaner applied with microfiber. If the mark persists, spot-test an approved mild degreaser. Avoid abrasive powder and aggressive scrubbing.
Road salt: Sweep up sand, grit, and dry crystals first. Use warm water to dissolve the remaining white residue, work in small sections, and remove the salty water with a wet vacuum or squeegee. During winter, repeat this process as vehicles track in new salt and sand rather than allowing layers to accumulate. Regional coating guidance likewise recommends sweeping before using warm water to dissolve road-salt residue.
Rust: Recommendations vary substantially. Acidic rust removers may affect some finishes, while a product approved for one proprietary coating may be inappropriate for another. Use only a mild rust remover specifically labeled safe for the installed epoxy or topcoat. Spot-test it, observe the stated contact limit, and rinse immediately when directed. If no compatible product is identified, consult the coating manufacturer or installer.
Dried paint and adhesive: Use a plastic scraper to lift loose solids without digging into the floor. A solvent should be a localized last resort and used only when the coating manufacturer approves that exact solvent and method. Test first, use minimal contact, and remove it promptly as instructed.
Unknown chemicals: Do not apply an improvised neutralizer. Identify the substance and review its safety data sheet before choosing containment, cleanup, protective equipment, or disposal procedures. Obtain professional assistance when the substance, exposure, or reaction risk is unclear.
Repeated scrubbing cannot always reverse a stain that has migrated into or chemically altered the topcoat. Stop if the floor becomes soft, tacky, faded, rough, or increasingly dull. A removable deposit sits on the surface and should respond to suitable cleaning; peeling, bubbling, lifting, hot-tire pickup, and exposed concrete indicate coating damage or adhesion failure.
Rinsing, Drying, and the Pressure-Washer Question
Advice about rinsing can appear contradictory because two different jobs are often being discussed.
For ordinary neutral-cleaner residue, a controlled clean-water rinse is appropriate when the product instructions require it or residue remains. Remove that water using a squeegee, wet vacuum, clean mop, or cloth.
For grease-heavy or chemically contaminated wastewater, spraying more water across the floor may spread or redeposit contamination. Collect or extract the dirty solution instead of pushing it toward landscaping or an unidentified drain.
This is why a garden hose is not a universal removal tool. It may be suitable for a manufacturer-approved clean-water rinse in a controlled area, but it can also move oil, salt, chemicals, and cleaner into places where they should not go.
Remove standing water after rinsing. Complete removal helps limit cleaner haze, streaks, mineral spots, and the immediate slip hazard of a wet surface. Give extra attention to:
- Perimeter edges
- Cracks and chips
- Expansion and control joints
- Seams and transitions
- Pinholes
- Low spots
- Lifted or exposed sections
Pressure washing should be an exception, not routine maintenance. First try dry cleaning, hand mopping, soft agitation, and wet extraction. Published pressure limits conflict, and settings intended for bare concrete are not proof of safety on a coating. Therefore, there is no single PSI value that can be promised safe for every epoxy floor.
If the coating manufacturer allows pressure washing:
- Use its documented pressure limit.
- Fit a wide fan tip.
- Maintain the stated distance from the floor.
- Keep the nozzle moving continuously.
- Test an inconspicuous area.
- Use only enough pressure to release the contamination.
- Collect contaminated wastewater appropriately.
These precautions align with coating-specific guidance that calls for low pressure, a wide fan tip, continuous movement, and avoidance of seams, edges, joints, and damaged areas.
Do not use a concentrated jet or hold the spray in one location. Avoid directing pressure at seams, expansion joints, perimeter edges, cracks, chips, lifted areas, pinholes, or exposed concrete.
High-heat steam cleaning is also coating-dependent and is expressly discouraged by some epoxy-care guidance. Avoid it unless the installed system’s manufacturer specifically approves the temperature, equipment, and process.
A Cleaning Schedule Based on Use, Weather, and Visible Soil
There is no correct fixed schedule for every epoxy garage floor. Cleaning frequency should respond to vehicle traffic, foot traffic, workshop activity, floor texture, weather, visible grit, spills, and the rate at which residue accumulates.
Use this adjustable framework:
| Trigger | Suggested response |
|---|---|
| Liquid, oil, grease, or chemical spill | Contain and address immediately |
| Visible sand, grit, or road debris | Sweep, dust-mop, or vacuum promptly |
| Light visible soil or footprints | Mop with warm water; add approved neutral cleaner if needed |
| Oily film or tire residue | Spot-treat with a compatible cleaner rather than waiting for a whole-floor wash |
| Embedded dirt or recurring residue | Perform a deeper section-by-section clean |
| Winter salt and snowmelt | Increase dry-debris removal and extract salty water as needed |
| Cracks, lifting, chips, or discoloration | Inspect and arrange repair advice rather than intensifying cleaning |
Published maintenance schedules range from weekly light mopping to monthly or quarterly deeper cleaning, while busy commercial floors may need daily debris removal. These are reference ranges rather than guarantees. One coating-care guide presents daily dry removal for high-traffic areas, weekly light cleaning, and monthly deeper cleaning as a use-dependent framework. A lightly used residential garage may need far less wet cleaning than a workshop or fleet area.
Spills should not wait for the next scheduled cleaning. Promptly contain oil, grease, automotive fluids, and other materials that may stain the surface or make it slippery. Likewise, remove sand and grit when visible, especially in tire paths where vehicle weight can grind particles against the coating.
Winter requires a more responsive routine:
- Sweep tracked-in sand and salt frequently.
- Remove snowmelt before it repeatedly dries.
- Dissolve white salt residue with warm water.
- Extract or squeegee away the resulting salty water.
- Clean mats before they become saturated reservoirs of grit and brine.
Use clean entrance mats and work-area protection to intercept debris and drips. Lift and clean beneath mats periodically; leaving abrasive particles trapped underneath defeats their purpose.
Place suitable protection beneath heavy equipment and use care when moving toolboxes, jacks, machinery, and metal-edged items. Remove grit from wheels and pads before moving them across the floor rather than dragging equipment over debris.
Periodically inspect the coating in dry, even light. Look for cracks, chips, lifting, discoloration, unusual moisture, or loss of adhesion. The right interval depends on use and condition; the point is to catch repair issues before they are mistaken for stubborn dirt.
Troubleshooting Haze, Dullness, Slipperiness, and Coating Failure
If the floor looks cloudy or streaky after mopping, first suspect removable residue rather than immediately reaching for a stronger cleaner. Common causes include:
- Too much cleaner
- Soap-heavy products
- Dirty rinse water
- A mop that redistributed soil
- Cleaner allowed to dry
- Incomplete rinsing
- Mineral deposits left by standing water
Test a small area with clean warm water. Use fresh microfiber, change the water frequently, and remove it promptly with a wet vacuum, squeegee, clean mop, or absorbent cloth. Dry the test area fully before judging the result. If it becomes clearer, repeat the controlled rinse over the affected floor.
Soap-heavy cleaners deserve particular suspicion because they can leave a gloss-reducing film and create a slippery wet surface. The answer is usually better residue removal—not adding another product on top.
For white road-salt residue, sweep away dry grit first. Dissolve the remaining salt with warm water, then extract or squeegee away the solution. Letting the same salty water dry on the floor simply deposits the minerals again.
Distinguish residue from damage:
| Observation | More consistent with residue | More consistent with coating damage |
|---|---|---|
| Improves after clean-water rinse | Yes | No |
| Changes when viewed wet versus dry | Often | Sometimes |
| Scratches visible in angled light | No | Yes |
| Surface feels soft or tacky | No | Yes |
| Color transfers to a cloth | No | Yes |
| Peeling, bubbling, or exposed concrete | No | Yes |
| Permanent discoloration after testing | Unlikely | Yes |
| Loose edge lifts during gentle cleaning | No | Yes |
Do not polish, wax, apply an acrylic finish, or install another coating merely to hide dullness unless the floor-system manufacturer approves the material and required preparation.
Stop cleaning and reassess when:
- A cleaner causes tackiness or color transfer.
- A stain spreads during treatment.
- The coating lifts under gentle cleaning.
- Cracks or exposed concrete admit water.
- The surface becomes increasingly dull with each pass.
- Repeated clean-water rinsing produces no improvement.
Adhesion failure, hot-tire pickup, persistent bubbling, peeling, widespread permanent gloss loss, and suspected moisture-related problems warrant assessment by the installer or a coating professional. Cleaning cannot rebuild a failed bond.
Use this compact diagnostic sequence:
- Rinse-test a small area for removable residue.
- Dry completely and inspect under even or angled light.
- Compare the area with an inconspicuous section.
- Stop chemical escalation if the appearance does not improve.
- Seek repair advice when the coating itself is soft, lifted, exposed, or permanently altered.
Can I use ammonia to clean an epoxy floor?
Only if the manufacturer of the installed epoxy or topcoat expressly permits it and provides directions. Published recommendations conflict, so no household ammonia dilution can be treated as universally safe.
When the floor system is unknown, use warm water first and then a properly diluted pH-neutral cleaner labeled for the coating. Never mix ammonia with another cleaning chemical.
Can I use dish soap or an all-purpose cleaner on epoxy?
Do not assume either is universally compatible. Dish-soap guidance varies, and soap-heavy formulas can leave haze, streaks, reduced apparent gloss, or slippery residue. A brand name alone also does not establish compatibility with every topcoat.
The conservative choice is a pH-neutral cleaner whose current label supports the installed coating. Dilute it as directed, test it in a concealed area, and remove it before it dries.
Can an epoxy garage floor be pressure washed?
Possibly, but only as a coating-approved exception. No single PSI limit is guaranteed safe for every system.
Start with sweeping, warm-water mopping, soft agitation, and wet extraction. If the manufacturer permits pressure washing, follow its pressure limit, tip, distance, and wastewater instructions. Keep the nozzle moving and avoid edges, seams, joints, cracks, lifted coating, and exposed concrete.
How often should I deep-clean an epoxy garage floor?
Deep-clean when traffic, workshop activity, weather, texture, or visible residue justifies it—not simply because a fixed date has arrived.
Address spills immediately, remove visible grit promptly, and lightly mop when the floor is soiled. A deeper clean is appropriate when ordinary mopping no longer removes embedded dirt, oily film, salt residue, or recurring haze.
Why does my epoxy floor look cloudy or streaky after mopping?
Excess cleaner, soap film, dirty rinse water, mineral deposits, or solution that dried on the surface are common first suspects. Re-mop a test area with clean warm water, remove the water promptly, and let the area dry completely.
If the test area clears, rinse the remaining floor in controlled sections. If it does not—or the floor is scratched, discolored, soft, tacky, bubbling, or peeling—stop adding chemicals and seek a coating assessment.
The low-risk hierarchy is simple: check the installed system’s instructions, remove grit dry, try warm water, use a properly diluted coating-approved neutral cleaner only when needed, clean with soft tools, remove residue and water, and escalate cautiously. Stronger chemicals and pressure are not substitutes for identifying the contaminant or recognizing coating failure. If the floor is peeling, bubbling, lifting, softening, or exposing concrete, stop cleaning and seek repair advice.