
Reconnect the Opener Without Forcing an Unsafe Door
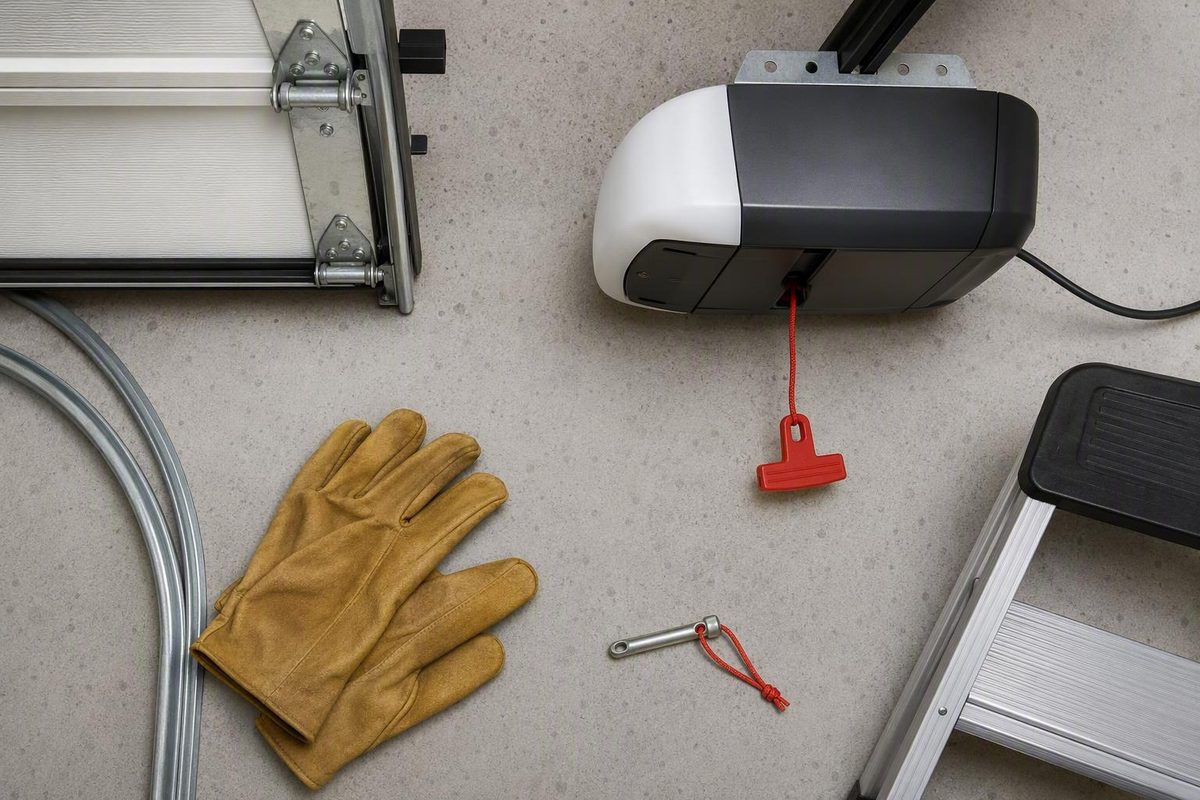
Quick answer: close, re-engage, reconnect, and test
Do not attempt to reconnect the opener if the garage door is open or partly open, stuck, crooked, off-track, frozen, binding, unexpectedly heavy, slamming, or visibly damaged. A weak or broken spring or cable can allow an open door to fall or shift after the opener is disconnected, and the opener is not designed to lift the full weight of a door with a failed counterbalance system. Keep everyone clear and arrange qualified service instead. Emergency-release safety guidance identifies these conditions as reasons not to proceed.
If the door is already fully closed, stable, level, and apparently undamaged, resetting it usually means mechanically reconnecting the door to the opener. It generally does not mean resetting the opener’s electronics.
Use this model-aware sequence:
- Clear the area. Move people, pets, vehicles, tools, ladders, and stored objects away from the door and its travel path.
- Identify the opener. Read the brand and full model number from an externally visible label on the motor unit.
- Find the exact manual. Use the manufacturer’s official website or support portal and search for the complete model number. The manual’s emergency-release or trolley-reconnection instructions control.
- Confirm that the door is fully closed and even. Do not continue if either side is raised or the door appears unstable or damaged.
- Place the release latch in its documented engagement position. Follow the precise motion shown in the manual. Do not guess which way to pull the cord.
- Reconnect the trolley and carriage by the documented method. Depending on the opener, the manual may specify manual coupling or allow the powered carriage to meet the trolley.
- Confirm physical engagement. A click may be useful, but verify that the two parts remain connected.
- Test from the wall control. Run one observed opening-and-closing cycle.
- Stop at the first abnormal sign. Grinding, binding, uneven movement, slamming, or renewed disconnection requires service rather than more testing.
There is no reliable universal cord direction. Published generic instructions conflict: some say to move the cord toward the door, while others say toward the motor or opener. Designs and instructions can vary, so the current manual for the exact model must determine the correct latch position.
Use the wall control—not a handheld remote—for the first powered test. Do not stand beneath the door or reach toward moving parts.
What the test result means
- One smooth opening-and-closing cycle: The connection is likely restored.
- The motor, chain, belt, or carriage moves but the door remains still: The trolley is still disengaged, or the coupling hardware is damaged or misaligned.
- The door moves unevenly, binds, shakes, slams, grinds, or disconnects again: Stop operating it and arrange service.
- You hear a click but cannot confirm continued coupling: Do not assume the reset succeeded.
Success requires more than a click. The trolley must remain engaged while the door completes one smooth, controlled opening-and-closing cycle.
What pulling the emergency release actually changed
The red cord generally operates a release latch on the opener trolley. Pulling it separates the door-connected trolley from the motor-driven carriage, allowing the door to move independently of the automatic opener when the door’s springs, cables, rollers, and tracks are functioning properly. This release-and-reset explanation distinguishes the door trolley from the automated carriage.
That is a mechanical disconnection, not necessarily an electronic reset. Re-engaging the door normally does not require:
- Erasing or reprogramming remotes
- Pairing a wireless keypad
- Changing travel limits
- Adjusting opener force
- Realigning photo-eye sensors
- Resetting a circuit board
- Replacing the wall control
Those procedures address different symptoms. If the opener worked before the cord was pulled and its drive now moves while the door stays still, begin with the mechanical connection rather than changing programming or travel settings.
The relevant parts are:
- Opener rail: The long rail running from the motor unit toward the door.
- Carriage: The component moved along the rail by the opener drive.
- Trolley: The door-connected component that couples to the carriage on many conventional rail openers.
- Release lever or latch: The mechanism that connects or separates the trolley and carriage.
- Red emergency-release cord: The cord and handle used to operate the latch.
- Door arm: The rigid or curved arm connecting the trolley assembly to the top of the door.
Manufacturers do not always use these terms in the same way. A manual may call the entire sliding assembly the “trolley,” or it may distinguish between inner and outer trolley components. The practical distinction is between the part moved by the opener and the part attached to the door.
A model-neutral arrangement looks like this:
                 Ceiling-mounted motor unit
                         [ OPENER ]
                             |
Rail toward door  =========================================
                    [moving carriage]
                           ⇅ coupling point
                    [door trolley]
                       [release latch]
                             |
                       red release cord
                             |
door arm \
[GARAGE DOOR]
The diagram intentionally does not show a universal pull direction. The correct latch movement must come from the applicable manual.
The emergency release also does not repair the condition that prompted its use. It cannot restore utility power, repair a failed opener, replace a broken spring, reset a displaced cable, straighten a track, or free a frozen door. It only separates the door from the opener drive.
That explains a common symptom: the opener motor runs and the chain, belt, or carriage travels, but the door remains stationary. The drive may be operating while the door is still uncoupled. If the latch appears engaged but the door remains still, the trolley, carriage, latch, fasteners, or door arm may be damaged or misaligned.
Safety check before touching the latch again
A homeowner reconnection attempt is appropriate only when the door is fully closed, stable, evenly seated in its tracks, and free of obvious damage. Clear the space around the door and beneath its path before inspecting or testing anything. General reset guidance likewise calls for closing the door, checking for damage, and clearing people and objects before operation.
Stop immediately if you see or experience any of these conditions
- The door is open or partially open.
- It is stuck, jammed, or frozen to the floor.
- One side sits higher than the other.
- A roller is outside its track.
- The door binds or catches.
- The door feels unexpectedly heavy.
- It drops, slams, or cannot be controlled.
- A loud bang occurred before the problem appeared.
- A spring has a visible gap or appears displaced.
- A lift cable is loose, frayed, displaced, or hanging.
- A track, opener rail, bracket, hinge, door arm, or door section is bent.
- The release cord, handle, latch, trolley, or carriage is damaged.
- The opener produces grinding or another abnormal noise.
- The trolley engages and then releases again.
An open door is particularly hazardous. The spring system counterbalances much of the door’s weight. If a spring or cable has failed, disconnecting or repositioning components may allow the door to fall, twist, or shift. An opener is not a substitute for a functioning spring system and should not be used to muscle through abnormal weight or resistance. A door stuck open is a professional-service condition, not a candidate for a generic do-it-yourself lowering procedure. The cited safety guidance specifically warns about open doors, failed springs and cables, abnormal weight, and off-track conditions.
What you may inspect
With the door fully closed and stable, disconnect power to the opener before putting your hands near the rail or coupling components. From a safe position, look for:
- A trolley and carriage that appear intact
- A latch that is not visibly bent or broken
- A door arm with secure, straight connections
- An opener rail that is not bent or displaced
- Hardware that has not pulled away from the door
- An intact release cord and handle
This is a visual check, not permission to dismantle the door. Do not loosen, wind, unwind, stretch, clamp, or adjust springs. Do not reset lift cables, straighten loaded tracks, or repair structural door hardware as part of an emergency-release reset.
If inspection would require standing beneath an unstable door, leaning over the door, reaching around moving parts, or working from an unsafe ladder position, stop and obtain service.
Identify the opener before choosing a cord direction
The answer to “Which way should I pull the cord?” depends on the opener’s documented release mechanism.
For example, one chain-drive guide directs the user to pull the cord toward the opener. It also contains inconsistent language elsewhere, illustrating why a generic direction should not override the model manual. See the chain-drive reconnection instructions.
A different general guide directs the user to pull toward the garage door. See the contrasting emergency-release instructions. The conflict establishes that published generic directions are not interchangeable; it does not establish which direction is correct for your opener.
Before manipulating the latch again, identify:
- The manufacturer or brand
- The complete model number
- The drive arrangement, if stated
- Whether the opener is ceiling-mounted on a rail or mounted beside the door
- The manual’s illustration of the release mechanism
- The manual’s terminology for “connected,” “engaged,” “manual,” and “disconnected”
Use this lookup process:
- Find an externally visible product label on the opener housing.
- Photograph or copy the entire model number, including letters, dashes, and suffixes.
- Go to the manufacturer’s official support or manual-search page.
- Search for that exact number rather than relying only on the brand name.
- Compare the manual’s diagram with the actual mechanism before moving the latch.
- If the manual and hardware do not match, stop and seek model-specific support.
Use this hierarchy of instructions:
- The current owner’s manual for the exact model
- Official model-specific manufacturer support
- Generic guidance only for universal precautions, such as closing the door, clearing the area, disconnecting power before hands-on inspection, and stopping when movement is abnormal
A conventional ceiling-mounted opener commonly uses a carriage moving along a rail and a trolley connected to the door. That does not mean every brand or model uses the same release-lever position or reconnection sequence.
Wall-mounted or jackshaft openers are important exceptions because they do not use the same conventional ceiling-rail arrangement. Their release and reconnection procedures may differ. Screw-drive, direct-drive, and otherwise unfamiliar systems may also have mechanisms that do not match generic trolley instructions.
Do not rely on a photo merely because its cord or trolley looks similar. Compare the mechanism and model designation with the manual’s illustration. Avoid any diagram that presents one connected or disconnected latch position as universal.
Two ways a compatible rail-mounted opener may reconnect
These methods apply only to a compatible ceiling-mounted rail opener with a door that is fully closed, stable, aligned, and mechanically sound. The area must be clear, and the latch must first be placed in the engagement position specified by the exact model manual.
Do not apply these generic options to an open door, a wall-mounted opener, an unfamiliar mechanism, or a system showing spring, cable, balance, track, or structural trouble.
Method 1: Manual coupling
Use manual coupling only if the exact opener manual documents it.
- Confirm that the door is fully closed. The bottom should rest evenly at the floor.
- Disconnect opener power. Do this before placing your hands near the rail, carriage, trolley, latch, or door arm.
- Inspect the visible components. Stop if anything is bent, cracked, loose, displaced, or broken.
- Set the latch to its documented engagement position. Follow the model illustration rather than a generic cord direction.
- Follow the manual’s coupling step exactly. Some mechanisms may reconnect when documented components are brought together.
- Do not raise or reposition the disconnected door under this generic procedure. Move the door only if the exact manual explicitly instructs you to do so and the door remains controlled.
- Do not force engagement. Stop if the components do not meet or couple as shown.
- Keep your hands clear before restoring power.
Do not yank the cord, strike the trolley, pry the latch, bend a hook, or force the door to make the parts meet. If the trolley and carriage are separated along the rail and the manual does not clearly explain how to align them, use only a documented opener-assisted procedure or arrange service.
Method 2: Opener-assisted coupling
Some compatible openers may reconnect when the powered carriage meets a correctly positioned trolley. Use this method only when the model documentation permits it. General release-and-reset guidance describes both manual and powered reconnection on compatible trolley systems. The illustrated guide shows the two approaches.
- Complete the closed-door safety check.
- Disconnect power before inspecting the latch, trolley, carriage, rail, and door arm.
- Put the latch in the engagement position specified by the manual.
- Remove your hands, tools, and ladder from the mechanism and door path.
- Restore power.
- Stand at the wall control with an unobstructed view of the door and rail.
- Operate the control as the manual directs while watching the carriage approach the trolley.
- If the components fail to align or engage, stop the opener immediately using its normal wall-control operation.
- If they couple, proceed to one controlled full-cycle test.
A click can be a useful engagement cue, but it is not proof that the coupling will hold. Confirm visually that the trolley and carriage move together once operation begins.
If the first documented attempt fails, stop and recheck the manual. Do not repeatedly cycle the opener, pull the cord in random directions, hold the control while components grind, or bend the latch.
Keep the handheld remote out of the process until the wall-control test succeeds. Testing from the wall control makes it easier to observe the connection and stop operation if the door behaves abnormally.
How to confirm the garage door is truly reconnected
Confirm the reset at three levels:
- Initial engagement: The latch seats or produces the expected click.
- Sustained coupling: The trolley remains physically connected to the moving carriage.
- Controlled travel: The door completes one smooth opening-and-closing cycle.
Before testing, clear everyone and everything from the opening, the floor beneath the door, and the area around the rail. Stand where you can see the door and trolley without standing under the door.
Observe the opening movement
Use the wall control and watch for:
- The carriage and trolley moving together
- Both sides of the door rising evenly
- Rollers remaining in their tracks
- Smooth, controlled travel
- No unusual bending or jerking at the door arm
- No movement of the latch toward disconnection
- No grinding, scraping, popping, or repeated clicking
Stop immediately if the carriage moves without the door, one side rises before the other, the door binds, or the trolley releases again.
Observe the closing movement
If the door opens smoothly, use the wall control to close it while maintaining a clear view. Look for:
- Even movement on both sides
- No hesitation or binding
- No shaking or slamming
- No renewed disconnection
- A controlled stop at the floor
A successful opening alone is not enough. The connection must remain secure when direction reverses.
After one smooth full cycle, the mechanical connection is likely restored. You may then test the remote from an appropriate position. If the wall control works but the remote does not, that points to a separate control or programming issue rather than failed trolley engagement.
Do not use repeated cycles as a generic cure. Some sources describe automatic coupling after powered operation, but there is no universal cycle count. Follow the exact manual and stop when the documented procedure fails.
Troubleshooting by symptom
Do not troubleshoot by applying more force. Match the observed symptom to the safest next step.
| Symptom | What it may mean | Safe next action |
|---|---|---|
| The motor, chain, belt, or carriage moves, but the door stays still | The latch remains disengaged, or the trolley, carriage, coupling, or door arm is damaged or misaligned | Stop the opener. With power disconnected and the door fully closed, inspect only for obvious disengagement or damage. Do not force the parts together. |
| There is no engagement click | The latch may not be in the model-specific engagement position, or the trolley and carriage may not be meeting correctly | Confirm that the door is fully closed and recheck the exact manual instead of guessing at cord direction. |
| The trolley clicks but disconnects again | The latch may be worn or bent, the parts may be misaligned, or the door may be imposing abnormal load | Stop testing and arrange service. |
| The door is hard to move, binds, sits unevenly, or feels unusually heavy | A spring, cable, counterbalance, roller, or track problem may exist | Stop. Do not reconnect the opener to make the motor overcome the resistance. |
| The door opens after reconnection but will not close | Mechanical coupling may be intact; a blocked or misaligned photo eye may also prevent powered closing | First verify sustained coupling and safe, even movement. Then check the photo eyes according to the opener manual. |
| The opener has no power | Powered reconnection is unavailable, and the electrical or supply problem remains unresolved | Use only the model’s documented manual method. Do not open electrical housings or improvise wiring. |
| The release cord or handle is damaged or missing | The release mechanism may not be controllable as designed | Do not substitute wire, improvised rope, or makeshift knots. Arrange repair. |
| The latch, trolley, carriage, rail, or door arm is bent or broken | The coupling cannot be assumed to hold | Stop and arrange repair rather than bending, tying, bypassing, or forcing the component. |
| The door shakes, grinds, pops, or slams | The fault extends beyond a simple latch-position problem | Keep the area clear and stop operating the opener. |
| The door reconnects but releases again | The latch may be damaged, alignment may be wrong, or door resistance may be abnormal | Do not keep resetting it. Have the door and opener inspected together. |
A moving carriage that leaves the door behind points first to the coupling—not automatically to travel limits or remote programming. The opener may be traveling normally while mechanically disconnected.
A latch that catches and then releases is more concerning than one that never catches because the connection is not remaining secure during movement. Do not continue testing it.
If a mechanically reconnected door opens but will not close, first verify that the coupling remains secure and the door stays even. Once those conditions are established, check for an obstructed or misaligned photo eye using the model manual. Reset guidance identifies photo-eye obstruction or misalignment as a possible separate cause of failure to close.
Do not apply lubricant as a universal remedy. The evidence does not establish one product or lubrication point as appropriate across all opener designs. Use only maintenance products and locations specified by the manufacturer.
When to stop and call a garage-door technician
Stop troubleshooting and arrange qualified service if:
- The door is stuck open or cannot be placed fully down and stable.
- It feels unexpectedly heavy.
- It is crooked, uneven, binding, jammed, or off-track.
- A loud bang preceded the problem.
- A spring has a visible gap or other apparent damage.
- A lift cable is loose, frayed, displaced, or broken.
- The door drops or slams.
- The opener rail, door arm, bracket, hinge, or structural hardware is bent.
- The trolley, carriage, release latch, cord, or handle is damaged.
- The system grinds, pops, shakes, or makes another abnormal noise.
- The latch reconnects and then releases again.
- The door moves unpredictably under power.
- The carriage moves but the door remains still after the documented procedure.
- The mechanism will not engage after following the exact model instructions.
- You cannot identify the opener or verify the correct procedure.
- Safe inspection would require standing beneath an unstable door.
- The actual hardware does not match the manual’s illustration.
These symptoms may involve the counterbalance system, cables, tracks, rollers, trolley, carriage, door arm, rail, or opener—not merely the red cord. Guidance for re-engaging a door likewise advises stopping when it is heavy, stuck, uneven, grinding, slamming, or repeatedly disconnecting. See the re-engagement safety limits.
Keep people, pets, vehicles, and stored property away from an abnormal door. Avoid further opener cycles. Spring and cable work falls outside an emergency-release reset and should not be treated as a homeowner reconnection task.
Service is especially important when the door cannot be placed fully down and stable. A generic lowering or reconnection procedure cannot account for the condition of the springs, cables, rollers, and tracks supporting an open door.
The rule is simple: if the door itself does not move smoothly and predictably, do not reconnect the opener in an attempt to make the motor overcome the fault.
For a fully closed, mechanically sound door, identify the opener, follow its model-specific latch instructions, reconnect the trolley and carriage without force, and verify the result with one observed full cycle from the wall control. If the door is open, heavy, uneven, damaged, noisy, off-track, repeatedly disconnecting, or still uncoupled after the documented procedure, stop operating it and arrange qualified service.
Frequently asked questions
Is reconnecting the trolley the same as resetting or reprogramming the garage door opener?
No. Reconnecting the trolley is normally a mechanical task that restores the physical coupling between the door and the opener’s moving carriage.
Resetting electronics, programming a remote, pairing a keypad, changing travel limits, and troubleshooting sensors are separate procedures. If the carriage moves but the door does not, investigate the mechanical coupling first.
Should I pull the emergency-release cord toward the door or toward the opener?
Use the direction specified in the current manual for the exact opener model. There is no universal answer.
Generic instructions conflict, and release-latch positions vary. Do not repeatedly yank the cord in different directions. If you cannot find the correct manual or the hardware does not match its illustration, obtain model-specific support.
Can I press the wall button to reconnect the garage door automatically?
Possibly. Some compatible rail-mounted openers reconnect when the correctly positioned latch and powered carriage meet. Others require manual coupling or a different sequence.
Before operating the wall control, the door must be fully closed, stable, aligned, and visibly undamaged. Clear the travel path and keep your hands away from the mechanism. Stop immediately if the carriage passes without engaging, the door moves abnormally, or the system makes an unusual noise.
Why does the opener run while the garage door does not move?
The motor can move the chain, belt, or carriage while the door-connected trolley remains disengaged. That is a common sign that the door and opener are still mechanically uncoupled.
If the latch appears connected but the door remains stationary, the trolley, carriage, latch, fasteners, or door arm may be damaged or misaligned. Stop the opener and perform only a visual inspection with power disconnected and the door fully closed.
What should I do if the garage door is stuck open or feels unusually heavy?
Keep everyone and everything clear, stop operating the opener, and arrange qualified service. Do not pull the release again, attempt a generic lowering procedure, or reconnect the opener so its motor can try to carry the load.
A stuck-open, heavy, crooked, or unstable door may have a spring, cable, counterbalance, or track problem. Leave spring, cable, track, and structural repairs to a garage-door technician.