
A Safety-First Owner’s Guide to Identifying and Troubleshooting the Overhead Door Odyssey 1000
Model 7030 instructions do not automatically apply to 7030H, 7030HB or 7130. Match the exact model and revision before programming or ordering parts.
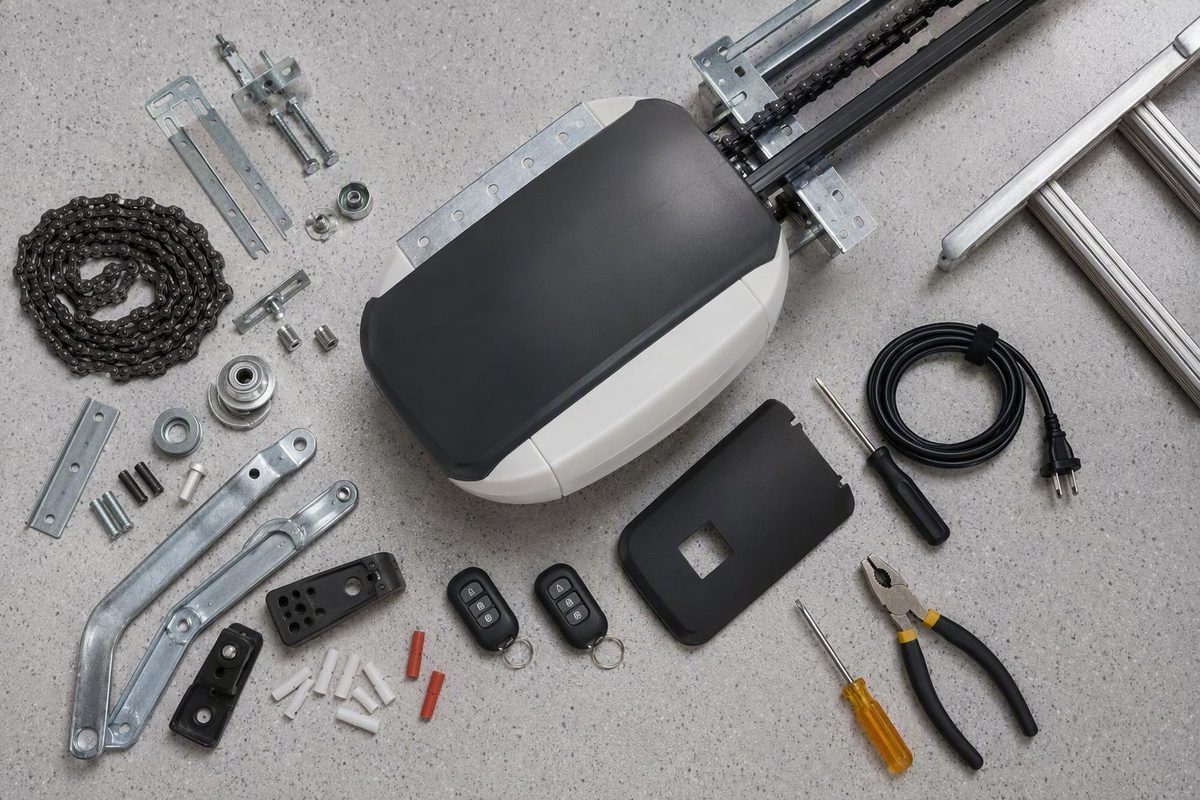
The Overhead Door Odyssey 1000 is not one universally identical opener. It was sold in belt- and chain-drive configurations, appears under several model designations in service material, and may have optional connected-control or battery equipment.
Identification therefore comes first. Before programming a remote, interpreting an LED pattern, or ordering a circuit board, record the complete model and production information from the opener. Then match the instructions and replacement components to that exact unit.
Editorial note: This guide distinguishes manufacturer specifications from dealer summaries and third-party troubleshooting advice. It was updated on August 21, 2026, but it does not replace the owner manual for the exact opener or an on-site assessment of the door, tracks, counterbalance system, and hardware. The supplied manufacturer page provides access to product literature, owner-manual resources, warranty documents, and programming videos, but the evidence available for this article does not reproduce the controlling manual or warranty terms in full.
Odyssey 1000 at a Glance: Verified Features and Important Limits
The Odyssey 1000 is an Overhead Door residential garage-door opener available with either a belt drive or chain drive. Overhead Door specifies a 140V DC motor and lists Safe-T-Beam, DoorDetect, CodeDodger, automatic remote-frequency selection, two-bulb lighting, and vehicle-control compatibility. The manufacturer presents OHD Anywhere smartphone control and battery backup as options rather than equipment guaranteed on every unit. These specifications and feature distinctions appear on the official Odyssey 1000 product page.
Do not convert the 140V DC specification into a horsepower rating. Third-party pages have assigned different horsepower or “HPc” figures to this opener, but the supplied manufacturer evidence does not establish that either figure is equivalent to the documented voltage specification. For model research and parts inquiries, use 140V DC rather than treating conflicting horsepower labels as settled facts.
The two drive configurations are:
- Belt drive: Marketed as the quieter choice, particularly where the garage is beside or below occupied rooms.
- Chain drive: Uses a visible metal-link chain along the rail.
The noise distinction is manufacturer and dealer positioning, not the result of an independent comparative test supplied here. Drive construction may affect the sound owners hear, but the evidence does not support a measured noise advantage or claims such as “whisper quiet.”
Standard systems versus optional equipment
| Core opener systems and documented features | Optional or configuration-dependent equipment |
|---|---|
| Belt- or chain-drive configuration | OHD Anywhere connected control |
| 140V DC motor | Battery backup |
| Safe-T-Beam infrared safety system | Related accessory hardware |
| DoorDetect operational monitoring | Equipment added after the original installation |
| CodeDodger changing-code access | Configuration-specific connected electronics |
| Automatic selection of 315 or 390 MHz | |
| Support for two 100-watt bulbs | |
| HomeLink and Car2U compatibility |
The 315/390 MHz frequency selection and support for two 100-watt bulbs are manufacturer-listed specifications. The table describes the product platform; it does not establish the package contents or installed accessories for an individual opener.
Several specifications commonly requested by shoppers cannot be responsibly stated from the supplied evidence. These include maximum supported door weight, exact door dimensions, rail lengths, opening speed, current price, installation cost, and universal suitability for a particular door.
The name “Odyssey 1000” is not enough to determine whether an opener is suitable for a door. Compatibility also depends on the door, rail and track arrangement, available clearances, installed hardware, and required accessories. For an inherited or secondhand unit, verify the complete system rather than assuming the powerhead alone makes it suitable.
Identify Your Exact Model and Drive Before Using Instructions
Official Overhead Door programming material identifies the Odyssey 1000 as Model 7030. A retailer associates the product with Models 7030 and 7130, while a separate troubleshooting guide covers 7030, 7030H, and 7030HB. These references establish that several designations appear in product-family material; they do not prove that the variants are identical. The retailer’s clean, canonical Odyssey 1000 collection page identifies Models 7030 and 7130, while the third-party Odyssey troubleshooting guide expressly names 7030, 7030H, and 7030HB.
Do not invent undocumented distinctions among 7030, 7030H, 7030HB, and 7130—but do not assume interchangeability either.
What to record
Before selecting instructions, calling for service, or ordering a part, record:
- The complete model designation.
- All production, serial, or date information visible on the opener.
- Whether the rail uses a belt or metal-link chain.
- The number printed on any component being considered for replacement.
- Any installed battery or connected-control equipment.
- The symptom and when it occurs.
- The color, state, and behavior of both powerhead LEDs.
The supplied evidence does not establish where the model label is located on every Odyssey 1000 or how to decode its production information. Inspect only the safely accessible exterior of the powerhead. Do not remove covers or expose energized components merely to search for a label. If the identifying information cannot be found or interpreted safely, photograph the accessible labels and exterior components for an authorized distributor or trained technician.
Distinguishing belt drive from chain drive
Look along the opener rail from the powerhead toward the door:
- Connected metal links indicate a chain drive.
- A continuous belt indicates a belt drive.
This observation is sufficient to document the visible drive type. It does not establish belt material, rail length, carriage compatibility, or whether one drive assembly can replace another.
Pre-service worksheet
| Field | Your information |
|---|---|
| Product name | Odyssey 1000 |
| Complete model | |
| Production/serial information | |
| Drive type | Belt / chain / uncertain |
| Observed symptom | |
| When the symptom occurs | |
| Round LED | Off / steady / flashing / color |
| Long LED | Off / steady / flashing / color |
| Installed component number | |
| Optional battery equipment present? | Yes / no / uncertain |
| OHD Anywhere equipment present? | Yes / no / uncertain |
| Recent changes | Bulb, power outage, lost remote, repair, obstruction, other |
| Door condition | Moves normally / binds / appears unbalanced / uncertain |
Model and revision matching is especially important for circuit boards, encoders, programming procedures, and LED interpretations. A symptom combined with an LED state is useful evidence, but neither is a complete diagnosis by itself.
Safety, Security, Lighting, and Connected Features
The Odyssey 1000’s named features perform different jobs. Understanding those jobs helps prevent two common mistakes: assuming that every feature is an optional add-on, or assuming that every possible accessory came with every opener.
Safe-T-Beam
Safe-T-Beam uses an infrared beam across the garage-door opening. If an object interrupts the beam while the door is closing, the opener stops and reverses the door. It is an entrapment-protection system, not merely a convenience sensor.
Keep the beam path clear and follow the applicable manual when cleaning or aligning the sensors. Do not disable, bridge, casually relocate, or permanently bypass the system. A door that closes only while the wall button is held needs diagnosis; that behavior is not permission to continue operating indefinitely without functioning protection.
DoorDetect
DoorDetect monitors door operation and can stop the opener when it recognizes a significant operational change. It is a monitoring function, not a diagnostic tool that identifies one failed part.
Inspect only for an obvious condition that can be observed safely. If the door does not move normally, stop using it and arrange service rather than defeating the monitoring function or increasing force indiscriminately.
CodeDodger and frequency selection
CodeDodger changes access codes instead of relying on one fixed transmitted code. That security function is separate from radio-frequency selection.
The opener automatically seeks either 315 MHz or 390 MHz for compatible remote operation. Automatic frequency selection does not make every remote compatible, and it does not eliminate programming. A compatible transmitter must still be enrolled using the procedure for the opener and remote generation.
Lighting and possible interference
The Odyssey 1000 lighting system supports two 100-watt bulbs. Wattage is only one compatibility consideration; consult the opener documentation and markings near the sockets before choosing replacements.
Third-party troubleshooting guidance identifies some LED bulbs as a possible source of radio interference and reduced remote range. If a range problem begins immediately after a bulb change, treat the timing as diagnostic information. Any bulb removal or replacement should be done only while the opener is idle and in accordance with the applicable instructions. Never exceed the marked socket rating.
HomeLink and Car2U
Manufacturer material lists compatibility with HomeLink and Car2U without an external repeater or bridge. Compatibility does not mean a vehicle will operate the door before enrollment.
Programming can vary with the vehicle year and installed transmitter system. Check both the vehicle instructions and the opener resource before repeatedly erasing or relearning devices.
OHD Anywhere and battery backup
OHD Anywhere provides optional smartphone-connected control. Battery backup may be supplied in a pre-installed configuration or added later where applicable. The authorized dealer’s Odyssey 1000 overview treats both as optional equipment.
An Odyssey 1000 product name, wall console, or ordinary remote does not prove that either option is present. Verify the physical hardware and compatibility with the exact model and production revision. Do not infer current app support, router requirements, subscription terms, or long-term service availability merely because the product family supports OHD Anywhere.
Likewise, do not assume a battery is installed because battery-related equipment appears in a catalog. If inspection would require opening an enclosure or exposing electrical components, consult the matching manual or use professional service.
Manuals and Programming Resources for Remotes, Keypads, and Vehicles
Use official Overhead Door programming material before relying on a generic “learn button” sequence.
Overhead Door’s official programming page identifies the Odyssey 1000 as Model 7030 and provides video resources covering:
- Model 7030 opener programming
- Odyssey and Destiny operating-speed changes
- CodeDodger 1 remote programming
- CodeDodger wireless-keypad programming
- HomeLink programming
The source page lists video titles and links, but the supplied text does not reproduce the complete procedures. This guide therefore does not invent button sequences, LED confirmations, or timing instructions. Open the relevant official resource and confirm its model coverage before following it.
The manufacturer product page also points owners toward manuals and warranty material, but a direct, revision-verified first-party manual URL was not included in the supplied evidence. If the exact model or manual revision remains uncertain, obtain the controlling document through Overhead Door or an authorized distributor before changing limits, speed, force, or stored-device settings.
A safe programming workflow
- Confirm the complete opener model. Do not stop at “Odyssey 1000.”
- Identify the device. Record the remote, keypad, or vehicle-control model when available.
- Confirm compatibility. Automatic frequency selection cannot make an incompatible transmitter compatible.
- Choose model-specific instructions. Prefer official material expressly covering the opener and device generation.
- Read the entire procedure first. Some programming modes have timing limits or can affect stored devices.
- Keep the doorway clear. Programming may cause the door to move.
- Test from a safe position. Keep the door in sight and keep people and objects outside its path.
Official programming material specifically identifies Model 7030. Do not automatically apply its instructions to 7030H, 7030HB, or 7130 unless the documentation expressly includes those models.
If one remote does not work
Start by comparing controls:
- If the wall control and other remotes work, focus on the failed remote, its battery, its programming, or its compatibility.
- Replace the battery with the specified type and orientation.
- Check for a stuck or physically damaged remote button.
- If the remote remains inoperative, use the model-appropriate official programming resource.
- If no remotes work but the wall control does, consider lost programming, interference, or an opener-side receiver issue rather than assuming every remote failed simultaneously.
Automatic 315/390 MHz selection occurs only within compatible operation. It is not a substitute for enrolling the transmitter.
If a remote is lost or stolen
Third-party Odyssey guidance recommends erasing stored remotes and programming only the transmitters still controlled by the owner. That is a security response, but the actual erase procedure must come from documentation applicable to the exact model and revision.
Do not press programming controls at random. Doing so may erase working devices without resolving the missing-remote risk. If the correct procedure cannot be verified, ask an authorized distributor to identify the applicable manual.
Symptom-First Troubleshooting: Safe Checks an Owner Can Make
Stop before troubleshooting becomes door repair. Do not adjust or repair springs, cables, tracks, counterbalance hardware, structural brackets, or an unsupported, crooked, or unbalanced door. The third-party Odyssey guide limits owner checks to matters such as power, controls, carriage engagement, visible drive condition, obstructions, and sensor alignment, and directs suspected spring or door-hardware faults to trained service.
Disconnecting the opener from the door does not automatically make the door safe. If the door’s balance or hardware condition is uncertain, do not release the carriage while the door is open.
No response from the wall control
Begin with accessible status and power checks:
- Check whether Sure-Lock is enabled.
- Confirm that the opener is plugged in.
- If appropriate, verify the outlet using a safe, known-working device.
- Check the applicable breaker or fuse.
- Inspect accessible wall-control terminal connections without opening energized equipment.
- Look for visible reversed, broken, cut, pinched, or shorted control wiring.
These checks follow the model-specific sequence in the third-party Odyssey 1000 troubleshooting guide. Stop if inspection requires opening the powerhead, working near line voltage, or tracing concealed wiring.
If power is present but the wall control remains unresponsive, the fault could involve the console, low-voltage wiring, terminals, powerhead electronics, or another system state. Do not order parts until the failure has been narrowed down.
The motor runs, but the door does not move
From the floor, check whether:
- The carriage appears engaged with the rail drive.
- The belt or chain is visibly broken.
- The belt or chain has come off a pulley.
- A moving drive component is failing to transfer motion to the carriage.
Stop before disassembling the rail, powerhead, pulley, sprocket, or tensioning system. A disconnected or damaged drive does not rule out a separate door-balance or hardware problem.
The wall control works, but remotes do not
Test all available remotes:
- Only one fails: Replace its battery, inspect it for damage, and reprogram it using the correct instructions.
- All fail: Consider lost programming, interference, or a persistent receiver fault.
- A remote works only very close to the opener: Treat the symptom as a range problem before assuming the circuit board has failed.
If the issue began after a power event, accessory installation, bulb replacement, or programming attempt, include that detail in your service notes.
Remote range is unusually short
Try these low-risk checks:
- Change the remote’s position inside the vehicle.
- Replace the remote battery.
- Check whether the opener antenna is visibly hanging in its intended accessible position rather than folded against the housing.
- Consider nearby radio interference.
- Note whether the problem began after installing LED bulbs.
- Compare more than one remote to see whether the problem follows one transmitter or affects the entire system.
Battery condition, transmitter placement, antenna position, and local interference can produce symptoms similar to receiver failure. Short range alone does not prove that a circuit board needs replacement.
The door reverses or refuses to close
Begin with the opening and safety sensors:
- Remove visible obstructions.
- Clean both Safe-T-Beam lenses gently.
- Confirm that the sensors face one another and remain securely positioned.
- Look for visible loose, cut, or damaged sensor wiring.
- Note whether bright light or a nearby sensor installation coincides with the problem.
- Check whether the door contacts the floor, framing, stored objects, track area, or weather seal unexpectedly.
Do not bypass Safe-T-Beam, relocate the sensors to defeat detection, or increase opener force as a general response to reversal.
Treat this only as a temporary, continuously supervised workaround when closure is immediately necessary—not as a repair. Keep the doorway fully visible, release the button if anything enters the opening, and arrange correction of the underlying fault. This model-qualified caution comes from the dealer’s Odyssey 1000 troubleshooting article.
The door opens or closes only partway
Look for visible evidence of:
- Door binding
- Bent or damaged hardware
- A roller or hinge problem
- A track obstruction
- A visibly damaged spring or cable
- A crooked door
- Heavier or uneven movement
- Incorrect travel limits after programming or service
Do not compensate for binding, imbalance, or damaged hardware by increasing opener force. Force and travel settings affect how the opener responds to resistance and must be handled under the exact manual. If the door’s movement or balance is questionable, stop operating it and call a trained garage-door technician.
The opener activates unexpectedly
Check for:
- A stuck wall-console button
- A remote compressed in a drawer, console, pocket, or bag
- A damaged transmitter button
- A keypad problem
- A remote that is lost or no longer controlled by the owner
If a remote is missing, use the model-specific procedure to erase stored transmitters and program only the devices still in your possession. Persistent unexplained activation can involve controls, wiring, radio reception, or electronics and warrants professional diagnosis.
When to stop and call for service
Arrange trained service when:
- A spring or cable is broken, loose, displaced, or suspicious.
- The door is crooked, jammed, unsupported, or unbalanced.
- Tracks, rollers, hinges, brackets, or structural fixtures are damaged.
- The belt or chain requires disassembly or tensioning.
- The door repeatedly reverses after the opening and sensors have been checked.
- An electronic error returns after the documented reset.
- The opener continues to activate unexpectedly after controls have been checked.
- The door cannot be moved safely.
- The unit cannot be matched to the correct instructions.
Owner troubleshooting should collect evidence and resolve simple power, control, obstruction, or sensor issues. It should not turn an uncertain fault into hazardous mechanical or electrical work.
What the Round and Long Powerhead LEDs Can—and Cannot—Tell You
Odyssey 1000 powerhead LEDs can narrow the search, but the available tables are third-party diagnostic aids—not one universal manufacturer table for every model and production revision.
Two sources inform the summary below:
- An authorized regional dealer guide dated December 8, 2014, covering the Odyssey 1000 as Model 7030.
- A newer parts-retailer guide covering 7030, 7030H, and 7030HB. The supplied evidence does not establish that guide’s publication date, official revision mapping, or applicability to Model 7130.
The sources disagree on some red-light combinations. The 2014 Odyssey LED guide associates steady red lights with more than one possible condition, while the newer retailer guide separates steady and flashing red states.
| Round LED | Long LED | Third-party interpretation and source qualification | Appropriate response |
|---|---|---|---|
| Off | Off | Both guides allow this as normal operation | If the opener works normally, the LEDs being off do not establish a fault |
| Steady red | Steady red | Newer guide: improperly set limits; 2014 guide also associates the combination with a program or component error | Verify the exact guide before changing limits; seek service if the condition persists |
| Flashing red | Flashing red | Newer guide: program error or component failure | Use the documented five-second power reset; arrange service if the indication returns |
| Flashing blue | Off | Unprogrammed remote | Follow the applicable remote-programming instructions |
| Flashing purple | Off | Unprogrammed remote; CodeDodger version details may matter | Identify the remote generation and use matching instructions |
| Flashing red | Off | Safe-T-Beam obstruction or signal interference | Clear the path, clean and align the sensors, and inspect visible wiring |
| Off | Flashing red | 2014 guide: possible door contact during travel or a detected door-component problem | Check for obstructions; stop for suspected spring, track, roller, hinge, or fixture damage |
| Off | Steady red | Thermal cutout | The cited guide says not to unplug the opener; wait for the indication to clear |
| Steady purple | Steady purple | Newer guide: component error | Use a trained door-system technician |
| Flashing purple | Flashing purple | Newer guide: radio-receiver error | Try the documented five-second reset; obtain service if the fault persists |
Important interpretation limits
Both LEDs off: This can be normal. If the opener is unresponsive, however, dark LEDs do not prove that the outlet, wall control, wiring, or electronics are sound.
Both steady red: The newer guide identifies improperly set limits, while the 2014 guide also connects this state with a program or component error. Do not buy a board or alter limits until the documentation has been matched to the opener.
Both flashing red: The newer guide associates this with a program error or component failure and suggests disconnecting power for five seconds before reconnecting. If the indication returns, the reset has not repaired the underlying fault.
Flashing blue or purple round light with the long light off: The supplied guides point toward an unprogrammed remote. CodeDodger generations may require different procedures, so the color is not itself a programming sequence.
Flashing red round light with the long light off: This directs attention to Safe-T-Beam obstruction, alignment, wiring, or signal interference. Begin with the doorway and sensors—not force adjustment.
Flashing red long light with the round light off: The older guide associates this with door contact during travel or a detected door-component problem. If springs, tracks, rollers, hinges, or fixtures appear damaged, stop operating the system rather than attempting repair.
Steady red long light with the round light off: The dealer guidance identifies this as thermal cutout and says not to unplug the opener while waiting for the indication to clear. Repeated thermal cutout still requires diagnosis.
Purple combinations: The newer guide treats both LEDs steady purple as a component error and both flashing purple as a receiver error. Persistent purple indications belong with a trained technician.
An LED pattern identifies, at most, a fault category. It does not conclusively identify one failed component and should never be the sole basis for ordering electronics.
Replacement Parts: Verify Compatibility Before Ordering
Odyssey 1000 parts listings cover many systems:
- Safe-T-Beam sensors
- Belt-drive components
- Chain-drive components
- Carriages
- Pulleys and tensioning parts
- Motors
- Circuit boards
- Encoders
- Light sockets and lighting components
- Mounting brackets
- Battery-backup equipment
The breadth of a retailer collection is not proof that every listed component fits every Odyssey 1000. Multiple circuit boards and encoders are listed for the product family, demonstrating why the model name alone is insufficient.
Match four data points
Before ordering, match:
- Exact opener model
- Belt or chain drive
- Production information
- Number printed on the installed component
Do not substitute a product photograph for this matching process. Housings and connectors can look similar while internal electronics, firmware, or compatibility differ.
Retailer-listed examples
The following numbers appear in the retailer’s Odyssey 1000 collection and are reproduced only as catalog references—not universal fit declarations. The collection lists a 38727A motor, 36773R.S carriage, 37557R.S chain-drive bullet assembly, 37556R.S belt-drive bullet assembly, 37561 belt and bullet assembly, and circuit boards 38877R.S, 39991R.S, and 39733R.S on the retailer’s model and parts page.
| Component | Retailer-listed number |
|---|---|
| Motor | 38727A |
| Carriage | 36773R.S |
| Chain-drive bullet assembly | 37557R.S |
| Belt-drive bullet assembly | 37556R.S |
| Belt and bullet assembly | 37561 |
| Circuit board | 38877R.S |
| Circuit board | 39991R.S |
| Integrated Wi-Fi circuit board | 39733R.S |
The supplied listing does not map every component to every production period, suffix, or drive configuration. It also lists multiple encoders, reinforcing the need to compare the number on the installed part.
A parts page cannot diagnose an opener. A flashing error may involve programming, wiring, sensors, radio reception, another electronic component, or the door itself. Replacing a circuit board merely because it appears in a collection may leave the original fault unchanged.
Odyssey 1000 versus Destiny 1200
A third-party retailer maintains an Odyssey 1000 and Destiny 1200 parts-diagram category. That grouping may simplify catalog navigation, but it does not establish component-level interchangeability.
Compatibility must be confirmed for the specific part. A shared category, similar appearance, or adjacent diagram is not sufficient evidence.
Before purchasing electronics or drive parts
Provide the seller, authorized distributor, or technician with:
- Complete opener model
- Production or serial information
- Drive type
- Existing component number
- Photographs of labels and connectors when requested
- The symptom and both LED states
This is particularly important for circuit boards, encoders, connected-control parts, battery equipment, motors, and belt or chain assemblies. Prices, discounts, stock labels, and product availability can change and should not be used as compatibility evidence.
If the installed number cannot be read or the electronics revision cannot be confirmed, obtain a diagnosis before buying speculative parts.
Warranty, Repair, or Replacement: What the Evidence Supports
Published summaries consistently advertise:
- Limited lifetime motor coverage
- Limited lifetime gearbox coverage
- Five-year limited parts coverage
- One-year accessory coverage
The manufacturer’s product summary reports those periods and also advertises limited lifetime belt coverage on the official Odyssey 1000 page. An authorized dealer instead reports 15 years limited for the belt while listing the same lifetime motor and gearbox, five-year parts, and one-year accessory periods on its Odyssey 1000 product page.
That belt-warranty conflict cannot be resolved by selecting the more favorable summary. A product-page summary does not establish those terms, and no current coverage should be assumed without the purchase date and applicable warranty document.
A bounded repair-versus-replacement framework
Do not rely on an unsupported universal dollar threshold. Consider these questions instead.
1. Is there an exact diagnosis? Replacing a remote battery or correcting sensor alignment is different from guessing among circuit boards, encoders, receivers, and motors.
2. Can compatibility be verified? Repair becomes less predictable when the electronics revision or required drive component cannot be confirmed.
3. Is the required part available? A catalog entry does not guarantee current stock or continuing support. Confirm availability before committing to related labor.
4. Does the current configuration meet your needs? If battery backup or connected control matters, determine whether the exact opener supports the applicable equipment. Do not assume every Odyssey 1000 can be upgraded identically.
5. What does professional diagnosis reveal? A confirmed single-component failure may support repair. Multiple major faults, unsafe door hardware, uncertain electronics, or repeated unsuccessful parts purchases justify evaluating replacement.
Replacement evaluation is reasonable when the opener revision cannot be established, compatible electronics cannot be confirmed, or several major faults coexist. That is not a universal replacement rule. A technician may find a simple control or sensor issue, while an apparently minor opener symptom may originate in unsafe door hardware.
For warranty decisions, obtain the controlling document through official or authorized support. For service decisions, provide the completed worksheet rather than describing the unit only as an “Odyssey 1000.”
Frequently Asked Questions
Is the Odyssey 1000 a belt-drive or chain-drive opener?
It can be either. The Odyssey 1000 was offered in belt- and chain-drive configurations. Inspect the rail: connected metal links indicate a chain, while a continuous belt indicates belt drive.
The belt version is marketed as the quieter configuration, especially near living space, but the available evidence does not contain independent comparative noise measurements. Record the drive type before ordering a carriage, bullet assembly, pulley, belt, chain, or rail-related component.
Does every Odyssey 1000 include Wi-Fi and battery backup?
No. OHD Anywhere connected control and battery backup are optional or configuration-dependent. They may have been installed with the opener or added later where the particular unit supports them.
Confirm the physical hardware, complete model, and production information before assuming either feature is present. The product-family name does not establish app compatibility, battery equipment, network requirements, subscriptions, or continuing software support.
Why does my Odyssey 1000 motor run but the garage door does not move?
The carriage may be disengaged, or the belt or chain may be broken or off its pulley. Check carriage engagement and visually inspect the drive from the floor.
Do not disassemble or retension the drive based only on that symptom. The door may also have a balance or hardware problem. If the drive is damaged, the door is difficult to move, or springs and cables look abnormal, stop and call a trained technician.
What should I do when the Odyssey 1000 LEDs are red or purple?
Record both LEDs separately: color, steady or flashing state, and whether the other light is off. Then compare that combination with documentation covering the exact model and production revision.
Depending on the pattern, red can point toward limits, programming, Safe-T-Beam interference, door contact, a component problem, or thermal cutout. Purple may indicate an unprogrammed remote, component error, or radio-receiver error. Because the third-party tables disagree on some red states, do not treat color alone as proof that one part has failed.
Can Odyssey 1000 and Destiny 1200 parts be used interchangeably?
Not on the basis of a shared retailer category. Retailers may group Odyssey 1000 and Destiny 1200 diagrams for navigation, but that does not prove that their parts are interchangeable.
Verify the exact opener model, drive type, production information, and installed component number. Obtain confirmation before ordering circuit boards, encoders, motors, drive assemblies, or battery equipment.
Three Steps Before You Program, Repair, or Order Parts
- Identify the unit completely. Record the exact model, production information, drive type, both LED states, and numbers printed on installed components.
- Use matching documentation. Follow an official manual or programming resource that expressly covers the opener and accessory generation.
- Keep DIY work limited. Check power, remote batteries, carriage engagement, visible obstructions, and sensor cleanliness or alignment—but stop at springs, cables, tracks, balance, structural hardware, drive disassembly, or persistent electronic faults.
Optional equipment and LED meanings can vary by configuration or revision, and replacement parts must be verified before purchase. When the door is damaged, unsupported, crooked, or unbalanced—or when an electronic error repeatedly returns—the appropriate next step is a trained garage-door technician.