
Is That Amber Photo-Eye Normal? Diagnose the Sensor Pair Before Adjusting Anything
Related: Garage Door Sensors Flash Red for Several Reasons.
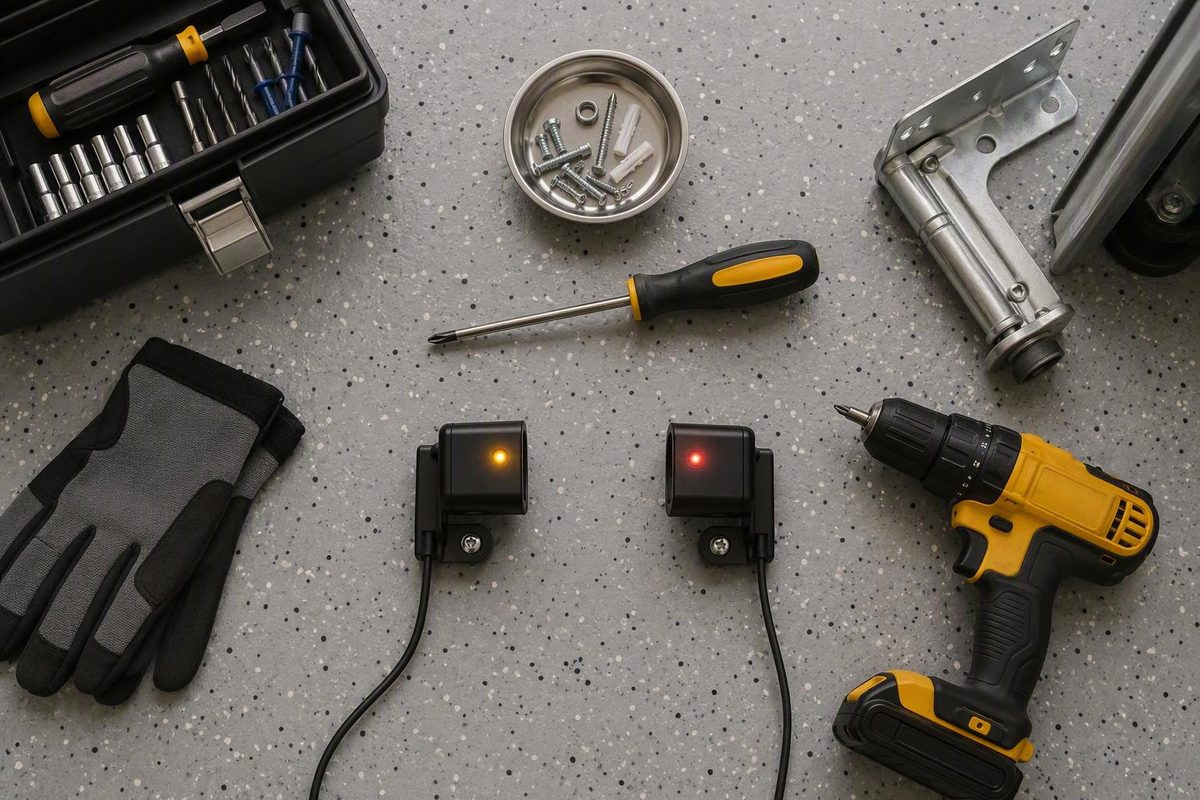
Quick answer: A steady orange light may be completely normal
An orange light on a garage door sensor does not automatically mean the sensor is broken, blocked, or misaligned. On some systems, a steady orange, amber, or yellow LED is the normal status light for the sensor that sends the infrared beam. The sensor opposite it may show steady green because it receives that beam.
Related: Garage Door Sensors Flash Red for Several Reasons.
For the Chamberlain-family systems covered by its support guidance—including relevant Chamberlain, LiftMaster, myQ, and related equipment—the amber LED is on the sending sensor and the green LED is on the receiving sensor. Both should glow steadily once obstructions and alignment problems are corrected. On those supported systems, steady amber plus steady green is likely normal if interrupting the beam also produces the expected photo-eye response. See the Chamberlain Group’s safety-sensor troubleshooting guidance.
Do not apply that color rule to every opener. Manufacturers and models may assign colors differently, and some sending sensors may use another color or have no visible light. Identify the exact model before adjusting or replacing anything.
Four-question triage
- Where is the light? Is it on a floor-level photo eye, the ceiling-mounted opener, or the wall control?
- What is the light doing? Is it steady, blinking, dim, flickering, or intermittent?
- What is the opposite sensor doing? Is its LED steady, unstable, or off?
- Does the photo-eye response work? When the beam is safely interrupted during closing, does the door stop or reverse?
The fourth question is crucial. A steady orange light may show that one sensor has power, but it does not prove that the receiver detects the beam or that the door responds properly when the beam is broken.
How the two safety sensors work together
The small photo eyes near the floor work as a pair across the garage-door opening:
- The sending sensor, or transmitter, projects an invisible infrared beam.
- The receiving sensor detects that beam from the opposite side.
- If the beam is interrupted while the door is closing, the opener should stop or reverse the door.
Because the sensors perform different jobs, their indicator lights do not necessarily match. Amber on one side and green on the other is expected on applicable Chamberlain-family equipment. Other systems may use different colors and status patterns.
An illuminated sending-sensor LED provides only limited information. It may indicate that the unit has power and is attempting to transmit, but it does not establish that:
- the beam reaches the receiver;
- the receiver has power;
- both lenses are clean;
- the brackets are stable;
- the wiring is intact; or
- the opener responds properly to an interrupted beam.
Identify the transmitter and receiver from labels on the housings, the exact model manual, or manufacturer support—not from color alone. General service guides differ in their descriptions of which side may display green, amber, or red, reinforcing the need for model-specific documentation.
Also confirm that the light is actually on a floor-level photo eye. A light on the ceiling-mounted motor unit may indicate an opener, power, battery, or diagnostic condition. A wall-control LED may reflect a control setting, while flashing arrows may communicate an opener-specific code. Those indicators should not be interpreted as sensor LEDs.
The practical check is the photo-eye interruption test. With the doorway clear and your body outside the door’s path, briefly interrupt the floor-level beam as the door closes. The door should stop or reverse. This confirms the opener’s response to the photo-eye interruption; it does not prove that every control, force setting, or mechanical component is fault-free.
Read both lights: a two-sensor diagnostic table
This table lists reasonable next checks, not universal fault codes. Interpret each pattern using the exact opener model, indicator location, and manufacturer instructions.
| Orange or amber sensor | Opposite sensor | Likely interpretation | Next check |
|---|---|---|---|
| Steady | Steady green | Often normal on Chamberlain-family equipment covered by the manufacturer guidance: amber sender and green receiver | Confirm the pattern in the exact model manual, then perform a safe beam-interruption test |
| Steady | Green blinking, flickering, or off | The sender may have power, but the receiver may not detect a stable beam | Remove obstructions; clean both lenses; check alignment, bracket movement, sunlight, visible wiring, and possible sensor failure |
| Blinking, dim, flickering, or intermittent | Any state | Model-dependent; possible unstable power, connection trouble, wiring damage, or sensor trouble | Record the full behavior, inspect only accessible low-voltage wiring, and consult model-specific documentation |
| Off | Off | Loss of opener power or a wiring problem is more likely than simple beam misalignment | Confirm that the opener has power, then inspect accessible sensor wiring for visible damage |
| Steady | Steady, but door will not close | The sensor lights alone may not explain the fault | Test the photo-eye response; if it passes, broaden the diagnosis to the opener, controls, door, track, springs, cables, or balance |
Steady orange and steady green
This is commonly a normal pairing where amber identifies the sending eye and green identifies the receiving eye. On the Chamberlain-family systems covered by the manufacturer’s documentation, both LEDs should remain steadily illuminated after obstruction or alignment issues are corrected. Confirm the exact model and test the photo-eye response rather than relying on color alone.
Steady orange but unstable or absent green
This pattern suggests that one side is powered while the receiving side lacks a stable signal. Possible causes include a leaf, cobweb, dirty lens, shifted bracket, direct sunlight, loose connection, damaged wiring, or failed sensor.
Start with the beam path, lenses, and alignment rather than replacing parts. Chamberlain’s guidance associates a steady sending sensor and an off or flickering receiving sensor with obstruction or misalignment, while also identifying sensor and wiring faults as possibilities.
Blinking or intermittent orange
There is no universal translation for “blinking orange.” Depending on the model, it may involve unstable power, a poor connection, damaged wiring, an internal sensor issue, or a defined diagnostic sequence.
If the light repeats a pattern, watch several complete cycles and record the flashes and pauses. Do not assume that a particular count always means a wiring fault or that a dim LED always indicates low voltage without the correct manufacturer chart.
Both photo-eye LEDs off
When neither sensor is illuminated, check shared causes first. The opener may have lost power, a low-voltage connection may be loose, or the sensor circuit may be damaged. A blocked beam alone does not usually explain why neither unit appears powered.
Confirm motor-unit power without opening electrical enclosures. If accessible wire is cut, crushed, wet, corroded, or unfamiliar, stop and arrange service rather than handling it.
Both LEDs steady, but the door still will not close
If both LEDs look normal and the door responds correctly when the beam is interrupted, replacing the sensors may not solve the original problem. The fault could involve the controls, opener, travel system, or the door itself.
A broken spring, loose cable, bent track, unusually heavy door, or unstable movement is not a photo-eye problem. Do not attempt spring, cable, track, or balance adjustments as part of sensor troubleshooting.
Safe troubleshooting, from simplest check to stop-work point
Work from no-tool observations toward limited adjustment. Keep people and pets away, and never stand beneath a moving door.
1. Clear the entire beam path
With the door stationary, remove boxes, tools, toys, leaves, trash, and stored materials from the line between the sensors. Look for less obvious interference, including:
- cobwebs across a lens;
- a broom handle leaning into the opening;
- a bag or bicycle tire near the track;
- leaves caught against a sensor; or
- an object that shifts into the beam only when the door moves.
There is no reason to reach into the opening beneath a moving door.
2. Clean both lenses gently
Wipe each lens with a soft, dry cloth. Remove dust, cobwebs, and surface film without pushing or twisting the sensor housing. Do not apply harsh cleaners, soak the sensor, or scrape the lens.
Clean both sides. A clear sending lens cannot compensate for dirt or condensation on the receiver.
3. Compare the sensors visually
From outside the door’s travel path, sight across the opening. The photo eyes should face one another rather than the floor, wall, track, or driveway. Look for obvious differences:
- Is one sensor tilted?
- Is one bracket twisted?
- Is a housing hanging loose?
- Does one sensor move when lightly touched?
- Is stored equipment pressing against either bracket?
Matching height alone does not prove alignment. The faces must point toward each other and remain stable.
4. Correct only an obvious, minor alignment problem
If a sensor was plainly bumped, make a small adjustment while watching the relevant LED. The goal is a stable indicator—not repeated bending or trial-and-error modification.
Loosen only the adjustment hardware intended for the sensor bracket, and only if that procedure agrees with the model manual. Move the sensor slightly, allow the LED to settle, and secure the hardware without shifting its aim. Do not bend the track or fabricate a new mounting position.
If a minor adjustment does not produce stable lights, stop. The cause may be damaged wiring, a failed sensor, a damaged bracket, or a model-specific fault.
5. Inspect only visible, accessible low-voltage wiring
Trace the visible wire from each photo eye toward the opener. Look for:
- cuts or abrasions;
- crushed or pinched sections;
- impact damage;
- corrosion at exposed connections;
- wire pulled loose from a sensor; or
- damage from staples, hooks, pests, or recent work.
Do not rely on generic wire colors or terminal positions. Pre-wired garages and replacement sensors may differ from a manufacturer’s standard example; Chamberlain specifically notes that pre-wired installations may use different wire colors.
Disconnect opener power before inspecting connections at the motor unit. Do not handle wiring that is wet, damaged, concealed, unfamiliar, or near live electrical components; those conditions require qualified service. This stop-work guidance is consistent with garage-door service recommendations for sensor wiring and power checks in Dayton Door Sales’ photo-eye troubleshooting guide.
The stop-work boundary
Sensor troubleshooting does not include adjusting springs, cables, tracks, hinges, drums, or door balance. If the door is crooked, unusually heavy, jerky, unstable, or supported by damaged hardware, stop operating it and arrange qualified service. Service guidance recommends professional help when physical door damage, broken springs, or unresolved closing faults are present in addition to sensor symptoms (GDX safety-sensor guidance).
Intermittent faults: sunlight, moisture, vibration, and shifted brackets
A problem that appears only at certain times can be difficult to reproduce, but its timing may narrow the investigation.
Direct sunlight
Low-angle sunlight can interfere with the receiving sensor even when nothing physically blocks the opening. A garage may therefore work normally at midday but fail near sunrise or sunset. Garage-door service guidance identifies direct sunlight as one possible source of receiver interference (sensor-light troubleshooting overview).
As a temporary diagnostic check, shade the suspected receiving lens while keeping your body outside the opening and without placing your hand, cardboard, tape, or another object in the beam. If the LED becomes steady, sunlight is a plausible contributor.
Do not treat this test as a permanent repair. An improvised cover could obstruct the beam, collect moisture, enter the door’s path, or conflict with manufacturer instructions. Ask the manufacturer or a technician for a model-appropriate remedy.
Moisture and condensation
Condensation, rain intrusion, dirt on a damp lens, corrosion, or internal moisture damage may produce intermittent behavior. A failure that begins after rain or rapid temperature changes makes moisture worth checking, but timing alone does not establish the cause.
Dry only accessible exterior surfaces. Do not open sealed sensor housings or work on wet wiring. Visible water damage, corrosion, or repeated post-rain failure calls for service.
Vibration and minor impacts
A bracket may shift after contact with a trash can, bicycle, mower, storage bin, or cleaning tool. Door movement can also expose a bracket that is already loose. The sensor may appear aligned while stationary but move enough during operation to lose the beam.
Observe the LEDs from a safe position while the opener runs. Do not hold a bracket or place any part of your body in the door’s path. If an LED flickers during operation, inspect the sensor’s mounting hardware. Persistent movement may require bracket repair or replacement rather than repeated realignment.
Use timing as a clue
Compare the symptom with recent conditions:
- Near sunrise or sunset: investigate low-angle sunlight.
- After rain or condensation: inspect for exterior moisture or visible corrosion.
- After moving bins, bicycles, or equipment: look for a shifted bracket or impact damage.
- Only while the opener vibrates: look for loose mounting hardware or an intermittent visible connection.
- Randomly in all conditions: document both LEDs and inspect accessible wiring before consulting the manual or a technician.
These patterns guide the next check; they do not prove a diagnosis.
Test the safety function after cleaning or alignment
Solid LEDs do not prove that the opener responds properly to an interrupted photo-eye beam. After clearing, cleaning, or aligning the sensors, test that response according to the exact model manual when it provides a procedure.
- Clear the doorway. Move people, pets, vehicles, tools, and valuable objects away from the opening.
- Stay completely outside the door’s path. Do not crouch beneath the door or reach across its travel area.
- Use a long object from outside the opening. It should let you briefly interrupt the floor-level beam without entering the door’s path.
- Start closing the door.
- Briefly interrupt the beam, then withdraw the object immediately. Do not leave it in the door’s travel path.
The door should stop or reverse when the beam is interrupted. This confirms the opener’s response to the photo eyes, not the condition of every other safety or mechanical component.
Do not test photo-eye operation by allowing the door to contact a person, pet, vehicle, tool, box, or valuable object.
If the door continues closing after the beam is interrupted, stop using automatic closing and arrange qualified service. Do not repeat the test in the hope of a different result, and never move or defeat the sensors merely to make the opener run. Manufacturer guidance requires connected, aligned sensors for normal downward operation on the covered Chamberlain-family equipment (Chamberlain Group troubleshooting guidance).
If both LEDs remain steady and the photo-eye test succeeds but the original problem remains, broaden the diagnosis. The cause may involve the controls, opener settings, motor unit, travel system, track condition, springs, cables, door balance, or damaged sections. Keep spring, cable, track, and balance work outside a sensor troubleshooting session.
Use the exact model to interpret blinking lights and opener codes
Blink frequency and LED color may encode a model-specific condition, but there is no universal chart for every opener. “Orange blinking three times” is incomplete information unless you also know which component is flashing and which model produced the sequence.
Before searching, record:
- opener brand;
- exact model number;
- approximate age, if known;
- indicator location;
- sending-sensor LED color and behavior;
- receiving-sensor LED color and behavior;
- complete number and order of flashes;
- whether the door starts closing, reverses, or does not move; and
- whether the issue changes with sunlight or weather.
Watch several complete cycles, count each group, and note the pauses. For example, three upward-arrow flashes followed by two downward-arrow flashes are not interchangeable with five flashes from a floor-level sensor. The sequence is only an illustration: do not assign it a meaning without the exact model documentation.
Locate the model label, then use the exact manual or manufacturer support page. Search the model number with terms such as “diagnostic code,” “safety sensor,” or “LED.” Give first-party manufacturer information priority over:
- generic color charts;
- forum posts;
- individual Q&A responses;
- retailer descriptions;
- service-company generalizations; and
- charts for a similar-looking opener.
Keep indicator locations separate:
- Floor-level photo-eye LED: generally relates to the sensor pair.
- Ceiling-mounted motor-unit LED: may relate to the opener, power system, battery, or diagnostics.
- Wall-control light: may indicate a control state or selected mode.
- Up/down diagnostic arrows: may display an opener-specific fault sequence.
An orange motor-unit light is not the same as an orange photo-eye light. Treating them as equivalent can send the diagnosis in the wrong direction.
When to stop troubleshooting and call a professional
Basic owner checks should end when the next step involves uncertain wiring, failed photo-eye operation, or mechanical door hardware.
Arrange professional service when:
- one or both LEDs remain off or unstable after confirming opener power, clearing the beam, cleaning the lenses, and making a minor alignment correction;
- interrupting the beam does not stop or reverse the closing door;
- wiring is cut, crushed, wet, corroded, concealed, spliced unpredictably, or near live components;
- the sensor bracket or track is damaged rather than merely loose;
- the problem repeatedly returns after alignment;
- the opener displays a code that cannot be matched confidently to exact-model documentation; or
- both lights look normal, but the door still will not close or moves abnormally.
A door that closes only while the indoor wall control is held has an unresolved safety-sensor condition on systems that use constant-pressure closing during a photo-eye fault. It is not a completed repair or an acceptable permanent operating method. General service guidance describes this behavior as an override of normal photo-eye protection and recommends correcting the underlying problem (Dayton Door Sales).
Never permanently bypass, disable, remove, short, cover, or defeat the photo eyes. Doing so removes the protection intended to stop or reverse a closing door when the beam is interrupted. Garage-door safety-sensor guidance expressly warns against bypassing these devices (Overhead Door Company of Huntsville).
Escalate immediately if the problem also involves:
- a broken or separated spring;
- a loose, frayed, or displaced cable;
- a bent or separating track;
- a cracked or damaged door section;
- a door that feels abnormally heavy;
- crooked, jerky, or unstable movement; or
- hardware that appears ready to detach.
Do not attempt those repairs while diagnosing the sensors. The orange LED may be incidental to a larger mechanical problem.
Do not replace sensors merely because one is orange. First confirm the exact model, sensor roles, opener power, alignment, opposite LED, visible wiring condition, and response to an interrupted beam. Replacing parts without diagnosis can leave the real fault unresolved.
The central rule is simple: diagnose the pair, not the color. Confirm that the light is on a floor-level photo eye, observe whether it is steady, inspect the opposite sensor, clear and clean the beam path, correct only an obvious minor alignment issue, and perform a safe beam-interruption test. A steady orange-and-green pair is often normal on supported systems. If the photo-eye test fails, wiring is damaged, or springs, cables, tracks, or abnormal door movement are involved, stop and call a qualified garage-door technician.
Frequently asked questions
Should both garage-door sensors have green lights?
No. The sensors perform different roles, and their LEDs may use different colors. On the Chamberlain-family systems covered by the manufacturer’s support guidance, the sending sensor is amber and the receiving sensor is green. Other brands and models may use different conventions.
What matters is whether both indicators show the normal state described in the exact model manual and whether interrupting the beam causes a closing door to stop or reverse.
What does a solid orange sensor light with no green light on the other side mean?
On a system where orange or amber identifies the sender, the sender may have power while the receiver is not detecting a stable beam. Possible causes include an obstruction, dirty lens, misalignment, shifted bracket, sunlight, damaged wiring, loss of receiver power, or sensor failure.
Clear and clean both sides, compare their alignment, inspect accessible low-voltage wiring, and consult the exact model manual. If the receiving light remains off, arrange service rather than assuming that the steady orange light proves the pair works.
Can sunlight make a garage-door sensor light blink or turn off?
Yes. Direct, low-angle sunlight can interfere with a receiving photo eye and cause a problem that appears only at certain times.
Temporarily shade the suspected receiver without blocking its beam. If the LED stabilizes, sunlight is a plausible cause. Do not install an improvised permanent cover or relocate the sensor without model-specific guidance.
Why does the garage door close only when I hold the wall button?
On some openers, continuous pressure on the indoor control can permit closing while a photo-eye safety condition remains unresolved. That points toward a beam, alignment, sensor, wiring, or related safety-system problem; it does not mean the door is repaired.
Do not use constant-pressure closing as a permanent workaround. Stop automatic closing and correct the fault or arrange service.
Can I bypass the garage-door sensors until I replace them?
No. Do not permanently bypass, short, disable, cover, remove, or defeat the sensors. That eliminates the protection intended to stop or reverse the door when the beam is interrupted.
If obstruction removal, gentle cleaning, minor alignment, and visible low-voltage wiring checks do not restore normal operation, stop automatic closing and have the system serviced.