
How Much Space Does Your Door Actually Need?
Adding 2 inches to a nominal 36-inch exterior slab produces a 38-inch estimate, but the cited product schedule calls for 38 3/8 inches.
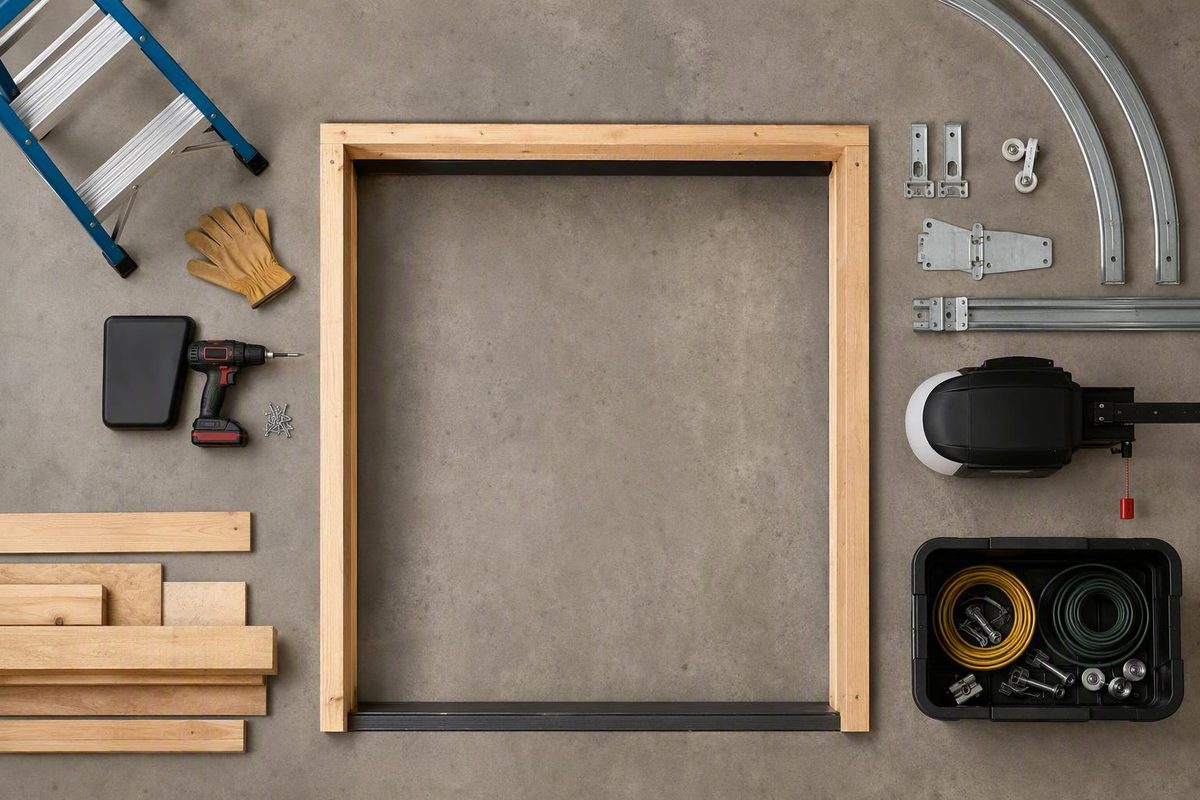
A rough opening is not simply “the door size with a little extra space.” The correct dimensions depend on what the advertised size describes: a bare slab, a complete prehung unit, a specialty frame, a finished opening, or an overhead garage door.
For many conventional hinged doors, a useful first estimate is to add about 2 inches to the nominal slab width and 2 to 2.5 inches to its height. That shortcut is useful for early planning, but it should never override the installation drawing for the actual door, frame, sill, or garage-door system being ordered.
Quick answer: common rough-opening dimensions for hinged doors
For many standard hinged doors:
- Estimated rough-opening width = nominal slab width + about 2 inches
- Estimated rough-opening height = nominal slab height + about 2 to 2.5 inches
For example, a nominal 30-by-80-inch slab is commonly associated with an estimated rough opening of approximately 32 inches wide by 82 to 82.5 inches high. The 82.5-inch figure comes from a general slab-based rule that adds 2 inches in width and 2.5 inches in height, while some prehung-door guidance uses a 2-inch height allowance for an 80-inch door (compare the published hinged-door formula).
The following figures are calculated estimates using those width and height conventions:
| Nominal slab size | Estimated rough opening |
|---|---|
| 24 × 80 inches | About 26 × 82–82.5 inches |
| 28 × 80 inches | About 30 × 82–82.5 inches |
| 30 × 80 inches | About 32 × 82–82.5 inches |
| 32 × 80 inches | About 34 × 82–82.5 inches |
| 34 × 80 inches | About 36 × 82–82.5 inches |
| 36 × 80 inches | About 38 × 82–82.5 inches |
Verification note: These are nominal-slab estimates, not guaranteed dimensions for a complete door unit. Check the installation sheet for the actual prehung unit or frame before framing the wall or ordering the door.
Why is the opening larger than the slab? A hinged door ordinarily needs a jamb or frame around it, along with enough installation space to position and align that frame. The required space depends on the frame system. A residential wood jamb, knockdown metal frame, welded exterior frame, threshold-bearing exterior unit, and concealed-door assembly can all require different allowances.
The estimating formula is most useful when all of the following are true:
- The quoted size clearly describes the door slab.
- The door uses a conventional hinged frame.
- The project is still in preliminary planning.
- No sidelites, transom, astragal, unusual sill, or specialty hardware changes the assembly.
- The estimate will be checked against the selected product’s documentation.
If any of those conditions is uncertain, identify the type of dimension before doing the arithmetic.
Know which dimension you are looking at
Door measurements are easy to confuse because several related dimensions can appear on a quote, drawing, carton, or product page. They do not describe the same physical boundaries.
Nominal slab size is the advertised width and height of the door leaf. A “30-by-80-inch door” often means a slab nominally 30 inches wide and 80 inches high. It does not necessarily describe the outside dimensions of an assembled jamb.
Complete-unit or prehung-unit size describes the assembled product. Depending on the design, that may include the slab, side jambs, head jamb, hinges, sill or threshold, weatherstripping, and other frame components. The complete unit is therefore wider and taller than the slab alone.
Rough opening is the framed wall space intended to receive the unit. It is generally measured between the applicable framing members and from the required floor reference to the underside of the header. Where the product requires it, the rough opening includes installation clearance around the complete frame.
Finished opening is the space remaining after the applicable jambs, finishes, or other opening components have been installed. For a pedestrian doorway, it may refer to the installed passage. For a garage door, it may mean the finished jamb-to-jamb and floor-to-head-jamb opening. Always determine how the manufacturer or installer defines the term.
Published frame-specific formulas demonstrate why these labels matter. Guidance for interior knockdown frames, exterior welded frames, and prehung doors can assign different allowances to the same nominal slab because each frame occupies the wall opening differently (review the frame-specific distinctions).
Two other terms commonly appear on exterior-door schedules:
- Brickmould dimension relates to the exterior casing or trim around the unit.
- Masonry opening describes an opening associated with a masonry installation.
Neither is automatically another name for rough opening. A product schedule may publish separate dimensions or adders for the rough opening, brickmould, and masonry opening.
A practical decision path
Before applying any formula, ask these questions in order:
-
Does the listed size describe a bare slab? A slab-based estimating allowance may be useful, subject to the selected frame.
-
Does it describe the outside size of a complete prehung unit? Use the manufacturer’s specified clearance around that unit. Do not automatically add another full slab-based allowance.
-
Is it a specialty frame or assembled system? Use the system’s opening chart or accepted dimensional range.
-
Is the number a finished-opening requirement? Determine which installed surfaces define the opening. Work backward only from an approved product drawing.
-
Is it an overhead garage-door size? Stop using pedestrian-door formulas. Garage doors follow different opening conventions and require separate operating clearances.
This decision path prevents two opposite mistakes: adding an allowance to the slab and then adding it again around the prehung frame, or framing directly to nominal slab dimensions even though the full unit must fit.
For replacement work, begin with the opening that actually exists and the outside dimensions required by the replacement unit. For new construction, begin with the selected unit schedule whenever possible. “Nominal door size” alone is not enough information to finalize framing.
How to measure a rough opening correctly
Measure exposed framing rather than trim, casing, an old slab, or an existing jamb unless the replacement product specifically requests a finished-opening measurement.
Remove only the finishes necessary to expose the relevant measuring surfaces. If the framing cannot be seen, label the readings as finished-opening measurements instead of assuming they represent the rough opening.
1. Measure the width in three places
For a bare pedestrian-door opening, measure horizontally from framing member to framing member at:
- The top of the opening
- The middle of the opening
- The bottom of the opening
Record all three readings. The smallest usable width generally controls because the frame must pass through the narrowest part of the opening. A wider reading at one point does not compensate for a stud that bows inward elsewhere. This three-point method and use of the smallest width are reflected in published rough-opening measurement guidance.
Do not round a tight measurement upward. Record the actual tape reading, including fractions, and compare it with the accepted opening range for the selected product.
2. Measure the height on both sides
Measure from the applicable floor reference to the underside of the header on both the hinge side and latch side. The correct starting point may be:
- The exposed subfloor
- The finished floor
- A threshold or sill-support surface specified by the manufacturer
- Another reference shown on the product drawing
Label that reference on the worksheet. “82 inches high” is incomplete information if one person measured from the subfloor while another assumed the finished floor.
If flooring is not yet installed, account for the complete planned buildup, including tile, wood, underlayment, mortar, carpet, pad, or another finish. Otherwise, the completed floor can reduce usable opening height or interfere with the intended clearance beneath the slab.
The ordering measurement should correspond to the final reference required by the door manufacturer. Do not measure from unfinished concrete or subfloor and assume the height will remain unchanged after finishes are installed.
3. Measure wall depth
Measure from one finished wall face to the other, or calculate the eventual finished depth from the framing and planned wall layers. This determines the required jamb depth.
A frame intended for one wall assembly may not fit correctly in a wall with extra drywall, tile, plaster, paneling, sound-control layers, or other finishes. Check several locations if the wall thickness appears inconsistent.
Wall depth is a separate compatibility measurement. It is not ordinarily added to rough-opening width or height.
4. Check diagonals, level, plumb, and condition
Measure diagonally from one corner of the opening to the opposite corner, then measure the other diagonal. Equal or nearly equal readings indicate a more square opening; a noticeable difference shows that the opening is racked.
Also inspect:
- Both sides for plumb
- The header and floor reference for level
- Framing members for inward bowing
- The header for sagging or damage
- Fasteners, wiring, pipes, plaster, or debris projecting into the opening
- Rot, splitting, crushing, or other framing damage
- High points in the floor that reduce usable height
These checks explain why a unit can appear to fit based on one width and one height yet still be difficult or impossible to align.
Rough-opening measurement worksheet
| Measurement | Reading |
|---|---|
| Width at top | |
| Width at middle | |
| Width at bottom | |
| Height at hinge side | |
| Height at latch side | |
| Diagonal: top left to bottom right | |
| Diagonal: top right to bottom left | |
| Wall depth at first location | |
| Wall depth at second location, if different | |
| Height measured from subfloor or finished floor? | |
| Planned floor buildup | |
| Threshold or sill information | |
| Bowed, damaged, or obstructed framing | |
| Smallest usable width | |
| Smallest usable height | |
| Selected product and model | |
| Manufacturer’s accepted rough-opening range |
Photograph the tape in place at each critical measurement. The pictures can help establish whether a reading was taken to framing, drywall, trim, or another surface.
Interior, prehung, and exterior doors do not share one formula
Different rough-opening charts can give different answers for the same nominal slab because they may assume different frames.
For a nominal 30-by-80-inch hinged door, one prehung convention produces an opening of approximately 32 by 82 inches. Another general slab-based rule produces 32 by 82.5 inches. Neither figure should override the documented dimensions for the actual unit.
This distinction is especially important for exterior doors. Exterior assemblies can include a sill, threshold, weather seals, thicker jamb components, and swing-specific construction. The manufacturer may calculate the opening from the outside size of the complete unit rather than directly from the nominal slab.
For example, Reeb’s exterior-door schedule specifies a rough opening 3/4 inch wider than the actual unit and 1/2 inch taller than the actual unit. Its nominal 3-foot single-door example has a unit width of 37 5/8 inches and a specified rough-opening width of 38 3/8 inches. The schedule also lists an 82 1/2-inch rough-opening height for the described 6-foot-8-inch inswing unit, while the cited outswing configuration requires 81 11/16 inches (see Reeb’s unit and rough-opening schedule).
Those examples demonstrate two important points.
First, adding 2 inches to a nominal 36-inch exterior slab produces a 38-inch estimate, but the cited product schedule calls for 38 3/8 inches. The generic estimate is close, but it is not the specified dimension.
Second, “6-foot-8-inch exterior door” does not produce one universal opening height. The actual requirement can change with:
- Sill or threshold type
- Inswing versus outswing construction
- Frame design
- Actual unit height
- Transoms and other attached components
- Manufacturer-specific assembly details
Use generic dimensions for budgeting and preliminary layout only. Once a specific exterior unit has been selected, frame to its documented requirements.
The same principle applies to interior doors. A wood prehung door, knockdown drywall frame, and welded hollow-metal frame can surround slabs with identical nominal dimensions while requiring different wall openings. The frame type is part of the sizing question, not an afterthought.
Double doors, hidden doors, and other product-specific openings
For a conventional double door without an astragal, a qualified estimating shortcut is:
Estimated rough-opening width = twice one slab’s actual width + about 2 inches
Under that shortcut, two 30-inch slabs suggest an opening near 62 inches wide. This is a general estimate, not a complete-unit specification, and comes from the same slab-based guidance used for conventional single doors (see the published double-door shortcut).
Required dimensions can change when the assembly includes:
- An astragal attached to an active or inactive leaf
- A center mullion
- Sidelites
- A transom
- Venting sidelites
- A threshold or specialty sill
- Surface-mounted, concealed, or pivot hardware
- Multiple factory-assembled frames
- Unusual swing or clearance requirements
For those configurations, use the complete assembly schedule. Do not multiply a single-door formula and assume it accounts for every component between, beside, above, or below the slabs.
Specialty doors may specify an acceptable range
Some products publish a rough-opening range rather than one target dimension. The range allows that specific assembled system to fit openings within stated limits; it does not mean dimensions outside the range are acceptable.
Murphy Door, for example, lists its nominal 30-inch hidden-door model for a rough opening 31.75 to 33 inches wide by 81.5 to 83 inches high. Its nominal 36-inch model is listed for an opening 37.75 to 39 inches wide by 81.5 to 83 inches high (consult the manufacturer’s measurement chart).
These are manufacturer-specific ranges for the cited hidden-door products, not universal allowances for conventional 30- or 36-inch doors. They illustrate the difference between:
- A fixed rough-opening target
- A minimum-to-maximum accepted range
- A nominal product size
- Actual pass-through clearance
Murphy Door also warns that its hidden-door products take up more pass-through space than regular doors. For those products, the usable passage can depend on door width, depth, swing direction, and frame components even when the nominal width resembles that of a conventional door.
Garage-door openings follow different conventions
Do not add 2 inches to the width and height of a sectional garage door by default. Pedestrian-door slab formulas do not transfer to overhead doors.
Garage-door dimensions are normally stated width first and height second. A 9-by-7-foot door is 9 feet wide and 7 feet high.
One common sectional-door convention makes the opening the same nominal width and height as the door. Under that convention, a 9-by-7-foot door uses a 9-by-7-foot opening. The same guidance identifies 8 by 7, 9 by 7, and 16 by 7 feet as common residential door sizes, but these are contextual door sizes rather than universal rough-opening requirements (review the sectional-door measuring convention).
A competing convention recommends making a residential finished opening approximately 2 inches narrower and 1 inch shorter than the nominal panel size. That approach is intended to provide about 1 inch of panel overlap at each side and above the opening. It is presented in the context of residential sectional steel doors in post-frame buildings and distinguishes residential panels from commercial sizing (see the finished-opening overlap explanation).
These positions may sound contradictory, but part of the disagreement involves different measurement boundaries:
- Bare structural framing versus finished jamb surfaces
- Door call-out dimensions versus actual panel dimensions
- Residential versus commercial panel construction
- The opening before jambs are installed versus the finished opening afterward
- Manufacturer instructions versus local installer practices
Neither convention is universal. Before framing, determine whether the selected installation drawing specifies:
- A bare structural rough opening
- A finished jamb-to-jamb opening
- The nominal door or panel size
- Required panel overlap
- Separate dimensions for residential and commercial assemblies
Sectional and roll-up doors must also be treated separately.
For additional context on common garage-door sizes and the measurements involved, see this overview of standard garage-door sizes and measuring.
A garage opening must also leave room for the operating system
Opening width and height indicate whether the door can cover the opening. They do not establish whether the tracks, springs, hardware, door travel, and opener will fit inside the garage.
Record three separate operating clearances:
- Sideroom: Usable wall space beside each jamb
- Headroom: Vertical space from the top of the opening to the ceiling or lowest obstruction
- Backroom: Unobstructed depth extending into the garage from the opening
Do not add these clearances to the opening dimensions. They are adjacent operating spaces, not part of the opening itself.
Published figures should be treated as planning examples. One sectional-door guide lists at least 4 inches of sideroom on each side for residential 2-inch vertical track, but it also emphasizes that requirements vary with the door, track, springs, opener, insulation, and hardware (compare the sectional-door clearance guidance).
A separate supplier guide says vertical track may require up to 5 inches per side. The same guide gives door height plus 18 inches as a backroom example for a manually lifted sectional door (see the supplier’s measurement guidance).
These figures are not universal minimums. The selected model and installation drawing determine the actual clearances.
Measure the opening at multiple points
Measure garage-opening width near the bottom, around the middle, and near the top. Measure height at the left, center, and right where practical. Multiple readings can reveal:
- Tapered or bowed jambs
- A floor that rises toward one side
- An irregular or unlevel header
- Finishes projecting into the opening
- Different dimensions at structural and finished surfaces
If the floor is unfinished, account for the anticipated finished-floor buildup when determining final opening height. Clearly note whether each reading was taken from unfinished concrete, a planned floor elevation, or an existing finished surface.
Measure sideroom
Measure from each finished jamb to the nearest wall, corner, column, cabinet, shelf, electrical component, or other obstruction. Record the left and right sides separately.
Open space is not necessarily an acceptable track-mounting surface. Confirm that the installation drawing’s attachment requirements can be met behind the intended track location.
Measure headroom
Measure vertically from the top of the opening to the lowest obstruction above it. Check more than one position because a beam, sloped ceiling, duct, light, pipe, rack, or opener rail may reduce clearance in only part of the garage.
Headroom can be affected by:
- Standard-lift or low-headroom track
- Torsion- or extension-spring arrangement
- Top-fixture geometry
- Door thickness and insulation
- Ceiling-mounted opener rails
- Structural beams
- Ducts, pipes, lights, outlets, and storage
Do not select a door based on opening height and assume its operating system will fit above it.
Measure backroom
Measure from the opening into the garage to the nearest obstruction along the door’s expected travel path. Inspect ceiling-mounted items as well as the rear wall.
Backroom may be restricted by:
- A beam or ceiling step
- The garage’s rear wall
- An attic hatch
- Lighting
- Ductwork or pipes
- Suspended storage
- Vehicle lifts
- An opener rail or motor
- Hardware associated with a wall-mounted opener
Actual backroom depends on the door model, height, track configuration, spring system, opener, hardware, insulation, and travel geometry. Record every obstruction, even if it appears slightly outside the opening.
Final checks before framing or ordering
Before treating rough door opening dimensions as ready for use, complete the following checks.
For pedestrian doors
- Identify whether the door is interior, exterior, double, or specialty.
- Confirm whether the listed dimensions describe the slab, complete unit, rough opening, or finished opening.
- Record three rough-opening widths.
- Record two opening heights.
- Identify the floor reference used for each height.
- Account for planned flooring, underlayment, thresholds, and sills.
- Measure both diagonals.
- Check the sides for plumb and bowing.
- Check the header and floor reference for level.
- Measure the finished or planned wall depth.
- Note damaged framing and all obstructions.
- Obtain the exact manufacturer installation sheet.
- Compare the opening with the accepted minimum, maximum, or target dimensions.
Additional checks for garage doors
- Confirm whether the drawing refers to bare framing or the finished opening.
- Confirm the actual door or panel dimensions.
- Identify whether the door is sectional, roll-up, or another type.
- Identify the track configuration.
- Confirm the spring-system arrangement.
- Confirm the opener type and location.
- Record left and right sideroom separately.
- Measure headroom to the lowest obstruction.
- Measure backroom along the full travel path.
- Record floor slope and unfinished-floor buildup.
- Note beams, lights, ducts, pipes, outlets, shelves, and storage.
- Coordinate mounting-surface requirements with the installation drawing.
An opening outside the accepted range should not automatically be “fixed” with more shims, trim, or seal material. Those materials serve specific installation purposes; they do not make every undersized, oversized, tapered, damaged, or severely racked opening suitable.
Do not alter a header or load-bearing wall based on a generic sizing chart. Enlargement, header modification, damaged framing, unusual assemblies, and major out-of-square conditions warrant review by a qualified structural or installation professional.
Manufacturer specifications override generic charts, estimating formulas, and installer conventions.
Frequently asked questions
What rough opening is commonly used for a 30-by-80-inch door?
A common planning estimate is approximately 32 inches wide by 82 to 82.5 inches high. The 82-inch figure reflects a common prehung convention, while 82.5 inches comes from the slab-height-plus-2.5-inches rule.
Treat that range as an estimate. The correct opening depends on the selected frame or complete unit, and the manufacturer’s specification controls.
Is a rough opening measured from the subfloor or the finished floor?
It may be measured from either surface, depending on the project stage and the reference required by the product instructions. The essential step is to identify and record the surface used.
When measuring from the subfloor, account for all planned floor buildup. For a garage opening measured from unfinished concrete, account for the eventual finished floor when determining final height. Do not compare a subfloor measurement with a product dimension that assumes finished-floor elevation.
Should I add the rough-opening allowance to the door slab or the complete prehung unit?
Use a slab-based allowance only when the formula specifically applies to the nominal or actual slab.
If the manufacturer provides the outside dimensions of a complete prehung unit, use the specified clearance around that complete unit. Do not add the full slab-based allowance again unless the installation drawing expressly requires it.
Should a 9-by-7-foot garage door have a 9-by-7-foot opening?
Under one common sectional-door convention, yes. Other guidance recommends a smaller residential finished opening so the panels overlap the jambs and head.
The apparent conflict often involves different measuring boundaries. Confirm whether the drawing describes bare structural framing, a finished jamb-to-jamb opening, nominal panel dimensions, or required overlap. The selected manufacturer’s drawing should determine the final dimensions.
What should I do if the opening is not square, level, or plumb?
Record all widths, heights, and both diagonals, then identify the narrowest and lowest usable points. Check for bowed members, an uneven floor, a sagging header, damage, and obstructions.
Compare the condition with the adjustment range allowed by the selected frame or garage-door system. Do not assume that extra shims, trim, or weather seal can correct every irregularity. If the opening is substantially racked, damaged, undersized, or associated with a header or load-bearing wall, obtain qualified review before altering the structure or ordering the door.
The bottom line
Adding about 2 inches to slab width and 2 to 2.5 inches to slab height is a useful estimate for many hinged doors, but it is not a universal framing specification.
The reliable process is to identify what the advertised dimensions describe, measure the opening at multiple points, account for flooring and adjacent operating clearances, and verify every result against the selected product’s installation drawing before framing, ordering, or making structural changes.