
Choose Garage Wall Storage That Fits Your Space and Load
Compare rails, slatwall, pegboard and hooks for garage storage. Check loaded depth, wall construction, accessory fit and mounting limits before buying.
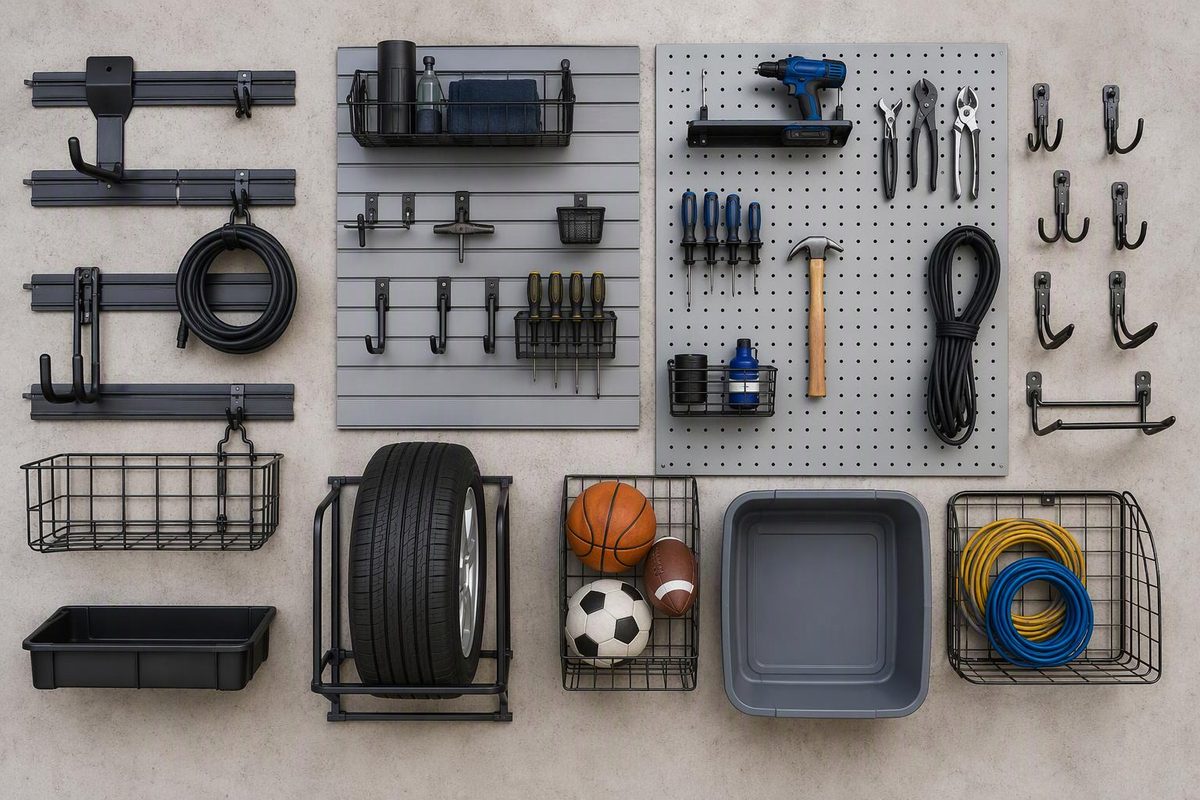
For rakes, shovels, ladders and other hanging equipment, a rail-and-hook system is the best starting point. Choose slatwall for several rows of movable hooks, baskets and shelves; pegboard for hand tools above a workbench; or individual wall hooks for a few items with permanent locations. Before buying any wall organizer system for your garage, check its loaded depth, retrieval space and required wall attachment—not just the wall’s width and height.
Enter your wall-to-vehicle gap and loaded storage depth to check the space left.
Loaded Storage Clearance
Remaining gap
18 inchesTest walking, door opening and item removal. This does not establish a safe aisle width.
Remaining gap = wall-to-vehicle gap − loaded storage depth.
Source: the article’s 30-inch gap and 12-inch basket example. No minimum-clearance standard is supplied.
The remaining gap is a measurement, not proof of a usable aisle. Test whether you can pass, open the vehicle doors and remove stored items without contact.
Match the System to the Items You Store
Make an inventory with each item’s weight, dimensions and intended support. Weigh baskets and bins with their contents, not empty.
| System | Best Starting Use | Check Before Buying |
|---|---|---|
| Rail with movable hooks | Long-handled tools, ladders and selected bike or equipment holders | Hook fit and rail placement relative to framing |
| Slatwall panels | Mixed storage at several mounting heights | Panel fastening, accessory compatibility and loaded depth |
| Pegboard | Visible hand tools above a bench | Board rating, mounting, hook fit and required rear clearance |
| Individual hooks or brackets | A small, stable collection | Each support’s rating and required wall attachment |
Treat these as different systems, not interchangeable wall coverings. Proslat specifies its own hooks and accessories for its slatwall; it also says its PVC, Procore and aluminum panels do not interlock with one another. A similar-looking slot is not proof of compatibility. Proslat compatibility guidance
If most of your inventory is loaded totes, compare a dedicated shelf layout before covering the wall with panels. Our wall-mounted garage shelving guide focuses on shelf depth, mounting and load limits.
Measure Loaded Depth With the Vehicle Parked
Park where you normally park, then mark a proposed storage area with painter’s tape. Measure the layout with the actual items, not just an empty hook or panel.
| Measurement | What to Include |
|---|---|
| Usable width and height | Exclude windows, switches, outlets and equipment requiring access |
| Loaded projection | Measure from the finished wall to the outermost part of the stored item |
| Retrieval space | Allow for lifting, tilting or turning the item into the aisle |
| Vehicle access | Check mirrors, passenger doors, hatch or tailgate, and your walking route |
Bike handlebars, ladder feet and basket contents can extend farther than their supports. A basket projecting 12 inches leaves only 18 inches in a measured 30-inch wall-to-vehicle gap. That arithmetic does not establish a suitable aisle: test whether you can actually pass and retrieve the contents without contacting the vehicle.
Choose mounting heights by handling the actual items. A reachable hook can still be awkward if a heavy item must be lifted above shoulder level.
Keep Storage Clear of the Door’s Full Travel
Keep the organizer and its contents out of the moving door’s path and clear of tracks, cables, opener equipment, the emergency release and sensor beams. Do not use door tracks, hangers or opener supports as storage mounts.
With any mock-up removed and everyone clear, observe a normally functioning garage door through its full travel—not just in the fully open position. Do not operate a damaged or binding door to complete this check.
Stop if the layout requires moving door hardware. Do not loosen spring supports, cable-connected brackets or counterbalance components to gain storage space. These parts can be under extreme tension; their adjustment or relocation is specialist work. DASMA safety warnings
Confirm the Wall Before Choosing Fasteners
Identify whether you have wood studs behind drywall, exposed framing, masonry or another assembly. Locate and mark the framing within the proposed area; do not assume that every bay has identical spacing.
Use the exact organizer’s installation instructions to establish the approved wall types, any required backing or furring, where rail or panel ends must land, and the fastener type, length and spacing. Check the required screw engagement in the supporting structure. Separately establish safe drilling locations clear of concealed wiring or plumbing.
There is no universal garage-organizer screw schedule. For wood-stud mounting, Gladiator’s linked installation manual requires GearTrack channels to begin and end at wood studs, with a screw in every slot at every stud. It specifies at least 1 inch of screw-thread engagement into wood and warns against piercing electrical wiring. Those requirements apply to that system and wall type, not every rail. Gladiator installation manual
Stop before drilling if you cannot establish the wall type or a safe fastening location. Longer screws and extra drywall anchors are not substitutes for an approved mounting method.
Read Load Ratings at Every Level
A rail or panel rating does not replace a hook, basket or shelf rating—or establish the supporting wall’s capacity. Check the individual attachment, the supporting rail or panel, and the required installation conditions. Do not multiply a panel-area rating into permission to hang one concentrated load.
The published manufacturer figures below use different units and installation conditions. They are not a like-for-like ranking of storage strength.
| Product | Published Rating | Qualification |
|---|---|---|
| Gladiator GearTrack | Up to 75 lb per linear foot | Applies to GearTrack, not GearWall |
| Gladiator GearWall | 50 lb per square foot | A different product and unit from GearTrack |
| Proslat PVC, 8-by-4-foot panel guide | 75 lb per square foot | Studs no more than 16 inches apart; fasten each panel into each stud |
| Rubbermaid FastTrack, 48-inch rail | Up to 1,750 lb | Maximum capacity requires the specified mounting arrangement |
Gladiator gives the GearTrack and GearWall figures in its installation manual. Keep the linear-foot and square-foot ratings separate when comparing products.
The Proslat PVC installation guide ties its rating to studs no more than 16 inches apart and fastening each panel into each stud. That PVC guide does not establish the rating or fastening method for Proslat’s other panel materials.
Rubbermaid advertises the 48-inch FastTrack rail at up to 1,750 pounds. Its installation sheet requires four studs for maximum capacity plus anchors every 8 inches between studs. It explicitly says maximum capacity is not possible with 24-inch stud spacing. The headline rating alone therefore does not tell you what that rail can carry on your wall.
Price the Complete Usable Layout
Build a parts list for your inventory: rails or panels, compatible hooks, baskets, shelf brackets, trim, fasteners and any approved backing. Compare the cost of that complete layout, not just the starter kit. The draft provides no prices, so there is no supported cost ranking among these systems.
Verify what each package includes. The listed GearTrack channel pack sells color-matched screws separately, and the Rubbermaid hang rail sells its mounting hardware separately.
Start with one useful section if the inventory is still changing. Before expanding it, check that every attachment seats or locks as instructed, the loaded items clear the vehicle and door, and you can remove them comfortably.
If a rail shifts, a panel cracks or a fastener pulls away, keep people and vehicles clear. Arrange safe unloading and resolve the mounting problem before using it again.