
Plan garage hanging storage around the load—not just the empty wall
Choose garage hanging storage by measuring tools and bikes, checking hook and rail limits, and keeping vehicles and garage-door travel clear.
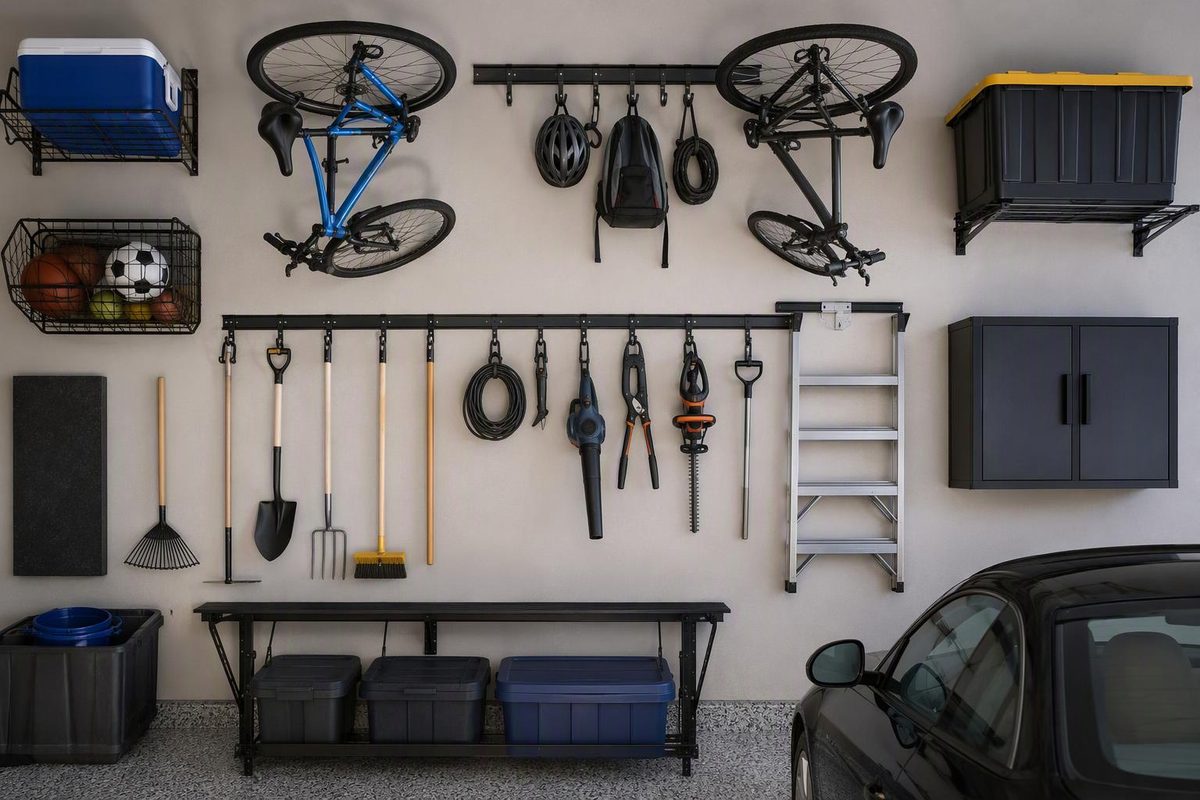
For tools and bikes you use regularly, start by checking whether wall-mounted hooks or a storage rail will work. Reserve ceiling storage for items whose weight, mounting requirements and retrieval method you can verify. The useful space is not simply an empty wall or ceiling: it must accommodate the stored item, its removal and the garage door’s movement.
1. Match the hanger to the item
Before buying a kit, list each item’s weight, stored dimensions and how often you use it. Include baskets, bags and accessories in the load.
| Item | Storage option to consider | Check before buying |
|---|---|---|
| Rakes, shovels and brooms | Individual tool hooks or a rail with movable hooks | Handle fit, head width and room to lift the tool off |
| Ladder | Purpose-made ladder hooks | Ladder weight, specified support spacing and removal path |
| Bicycle | Wheel hook, horizontal wall hanger or ceiling hoist | Bike weight, tire/frame compatibility and lifting effort |
| Small loose equipment | Rated basket or bin on a compatible rail | Loaded container weight and projection into the parking bay |
| Seasonal totes | Wall shelving or an overhead rack | Loaded tote weight, dimensions and safe access |
Individual hooks suit a few items with stable locations. A rail lets you rearrange compatible accessories without relocating every wall attachment. Slatwall offers more mounting positions, but check the panel and accessory instructions together; a hook that appears to fit is not proof of an approved combination.
For totes rather than hanging tools, use the separate garage bin storage planning guide.
2. Measure the loaded footprint and removal path
Park the vehicle where it normally sits. Measure from the wall to the nearest vehicle surface, then check with the vehicle doors open. The relevant projection is the hook with the item on it, not the empty bracket.
Mark a proposed layout with painter’s tape and check:
- Stored width: include rake heads, handlebars and neighboring items.
- Stored depth: include baskets, wheels and anything that hangs at an angle.
- Removal space: allow room to lift an item off its hook and turn away from the wall.
- Access height: choose a position where the intended user can retrieve the item without an awkward overhead lift.
For a door that operates normally, observe its full opening and closing cycle from a safe position. Keep proposed storage outside the path of the panels, hinges, tracks and opener arm. Also preserve access to the opener, emergency-release handle, lights and service areas. SafeRacks’ placement instructions specifically call for checking potential contact with garage doors, access doors, lights and automobiles. SafeRacks assembly manual
Do not move door hardware to make storage fit. Never loosen spring or cable attachments, bottom brackets or counterbalance supports. These components can be under extreme tension; conflicts involving them belong with a qualified garage-door technician. DASMA safety labels
3. Check hook limits separately from rail limits
A rail’s capacity does not become the capacity of every hook attached to it.
For example, Gladiator’s installation manual lists GearTrack channels at 75 pounds per linear foot, but its accessory limits vary: a Utility Hook is rated for 50 pounds, a Vertical Bike Hook for 30 pounds, and J and L hooks for 5 pounds. Those ratings apply to the specified system and installation—not to garage hooks generally. Gladiator installation manual
A 60-pound item therefore exceeds that 50-pound hook’s limit even if the rail has unused capacity. Do not assume that adding a second hook doubles the allowable load unless the manufacturer specifies that arrangement.
Ceiling hoists also have model-specific limits. The GUCMBLS bicycle-lift manual allows one bike weighing no more than 44 pounds, including attached bags and accessories. It also prohibits installation where people walk. Weigh the bike as stored and check the placement restrictions rather than assuming any bicycle hoist will work. GUCMBLS lift instructions
4. Verify the mounting surface before drilling
Identify whether the wall is wood-framed, masonry or another construction. Then match the product’s instructions to that surface. Drywall over studs is not the same mounting condition as drywall alone.
For example, Gladiator’s manual requires GearTrack channels on wood-framed walls to begin and end at studs, with screws in every slot at every stud location. Its accessory instructions also specify a maximum horizontal spacing of 24 inches between screws. The manual directs installers to locate wiring and choose screw length accordingly. Those are product-specific requirements, not a universal fastening recipe. Gladiator installation manual
Stop if you cannot identify the required support, avoid concealed services or achieve the specified attachment pattern. Do not substitute drywall anchors for required stud attachment. For uncertain ceiling framing or capacity, obtain structural advice before suspending a load; the rack’s rating does not establish your ceiling’s capacity. SafeRacks likewise directs users to discontinue installation if the ceiling structure is in question. SafeRacks assembly manual
If ceiling mounting remains the better option, continue with the overhead storage measurement and installation guide.
5. Check engagement before loading
Install using the exact product manual, then inspect each accessory’s engagement and any locking mechanism before placing an item on it. Gladiator, for example, calls for checking bracket engagement from the side and fully locking its Claw bike-storage hook. Gladiator installation manual
Keep a record of the hook and rail limits near the storage area. Recheck them whenever you rearrange accessories or replace an item with a heavier one. If a mount shifts, a fastener pulls out or a hook deforms, stop using that position until the cause is corrected—adding another screw at random is not a repair plan.