
How to Organize a Garage Without Losing Parking Space
Sort what you own, measure around the car and door travel, then choose storage that keeps everyday items reachable and access clear.
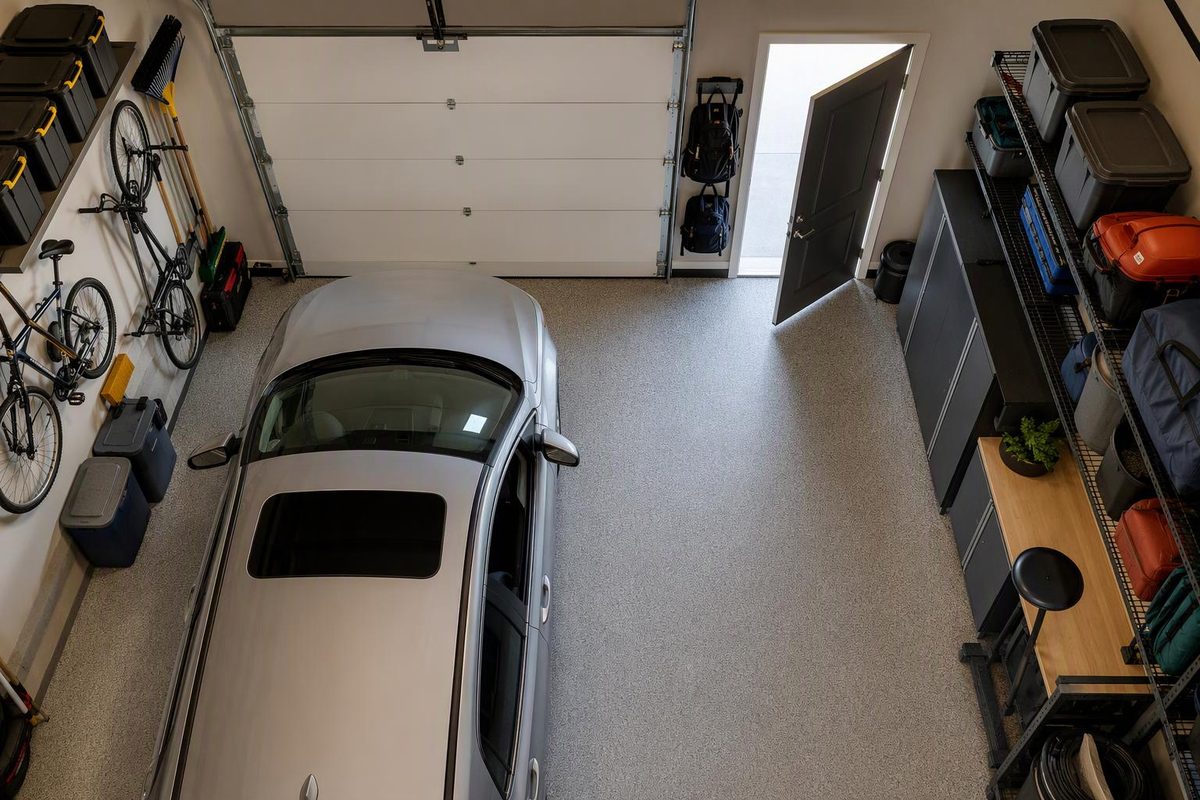
Organize a garage in this order: sort what you own, reserve space for parking and access, assign storage zones, then buy only the storage that fits. Starting with shelves and matching bins can leave you with a tidy-looking garage that still cannot accommodate the car.
For a manageable first session, clear one wall or one bay—not everything at once. Have bags, temporary sorting boxes, labels and a tape measure ready.
1. Sort before choosing storage
Give each item one destination:
- Keep here: equipment and supplies you actually use in the garage or yard.
- Move elsewhere: items better suited to indoor storage, based on their care instructions and your garage’s temperature and moisture conditions.
- Donate or sell: usable items you no longer need. Set a removal date so this pile does not become permanent storage.
- Dispose or recycle: broken items and waste, with hazardous products handled separately.
Group the keepers by activity: automotive, gardening, tools, sports and seasonal decorations. Put accessories with their equipment rather than creating a miscellaneous bin.
Stop for questionable chemicals. Keep hazardous products in their original labeled containers; do not combine leftovers or pour them into food containers. For corroding containers, get handling instructions from your local hazardous-materials official or fire department. Check local collection options for unwanted paint, oil, pesticides and similar waste rather than assuming they belong in regular trash. EPA’s household hazardous waste guidance explains these precautions.
2. Mark the space storage cannot occupy
Before measuring for cabinets, park your actual vehicle in its normal position, switch it off and check the space you use—not just its closed-door footprint.
Use painter’s tape to mark:
- The room needed to open vehicle doors and get in or out.
- Access to the trunk or tailgate, if you use it inside.
- A continuous walking route to the house door and other exits.
- The footprint of equipment that must roll out, such as a mower or tool cart.
- Access to electrical panels, appliance controls and service areas.
Keep appliance ventilation and service clearances specified in their manuals. Do not make these areas part of a storage zone.
Check garage-door travel separately from the opening size. With everyone and all loose objects clear, observe a normally functioning door through its full opening and closing cycle. Account for the panels, tracks, opener rail and moving arm. Keep access to the emergency-release handle unobstructed; do not attach storage to door hardware.
Keep bins, tool handles and other objects out of the photo-eye beam near the bottom of the opening. Chamberlain’s sensor troubleshooting guidance identifies obstruction as a cause of closing problems. Move the stored item, not the sensor, to gain space.
3. Assign zones by frequency of use
Place frequently used items where you can retrieve and return them without moving the car or another object.
| Zone | What belongs there | Layout priority |
|---|---|---|
| Near the pedestrian door | Everyday outdoor items | Reachable without narrowing the exit route |
| Near the vehicle opening | Bikes, mower, yard equipment | A clear route outside |
| Beside the workbench | Tools and project supplies | Small-item drawers or labeled containers |
| Upper shelves or suitable overhead storage | Lightweight seasonal items | Infrequent access and safe retrieval |
| Lower shelves | Heavy tools and loaded containers | No overhead lifting |
Keep fuels and chemicals out of ordinary mixed-item bins. Follow each product’s storage label and keep combustible items away from appliances, as advised in USFA’s garage fire-safety guidance.
Propane cylinders do not belong in the garage—or an enclosed shed. The Propane Education & Research Council explicitly warns against storage in these enclosed spaces. Arrange suitable outdoor storage using your supplier’s guidance.
4. Match storage to the items and structure
Measure the remaining wall width, usable depth and height. Include handles, brackets, open cabinet doors and anything that projects beyond a shelf.
Choose the simplest system that serves each group:
- Shelves: bins and irregular equipment that benefit from visible access.
- Drawers or cabinets: small parts and supplies that need containment.
- Rated wall hooks or rails: long-handled tools, cords and compatible bike mounts.
- Overhead racks: lightweight, rarely used items, only where structure and clearances are suitable.
For shelves, measure your largest loaded container, including its lid. Leave enough space to grip and remove it. Our garage shelf storage guide covers measuring, mounting and loading in more detail.
Read the exact product’s installation instructions before buying. Verify the required substrate, fasteners and load limits; a rack’s advertised capacity does not establish that your ceiling can support it. For example, the Gladiator Overhead Gearloft rack manual specifies a wood-framed structure, provided fasteners and checks for doors and vehicles underneath. Those requirements are model-specific, not universal rack specifications.
Stop if you cannot establish suitable mounting structure. Have a qualified installer assess it rather than guessing through drywall.
5. Load, label and test the layout
Keep each shelf and the whole storage unit within their specified load limits. Weigh heavy containers if necessary rather than estimating.
Put heavier items on lower shelves. Anchor tall freestanding shelving or cabinets to suitable structure using the manufacturer’s instructions and compatible anti-tip hardware. CPSC recommends anchoring furniture such as bookcases and keeping heavier items low to reduce tip-over hazards. CPSC anchoring guidance
Label containers on the side facing the aisle with specific contents: “bike repair” is more useful than “miscellaneous.” Use smaller containers when a large tote becomes awkward to lift.
Then test the arrangement:
- Park and open the vehicle doors normally.
- Carry a loaded bin along the walking route.
- Roll the mower or bike outside.
- Retrieve a common tool and put it back.
- Check that the garage door travels freely and its sensors remain unobstructed.
If a routine task requires moving several things, change the layout now.
6. Keep one reset routine
Set aside a brief weekly reset: return loose items, remove outgoing donations and clear the walking route. Review seasonal storage when you swap equipment.
When a shelf or bin fills up, sort that category before adding storage. The practical test is whether you can park, walk through and put things away without rearranging the garage each time.