
How to Polish a Concrete Garage Floor Without Skipping the Hard Parts
Inspect, grind, densify and polish a concrete garage floor safely, with stop points for cracks, coatings, weak slabs and silica dust.
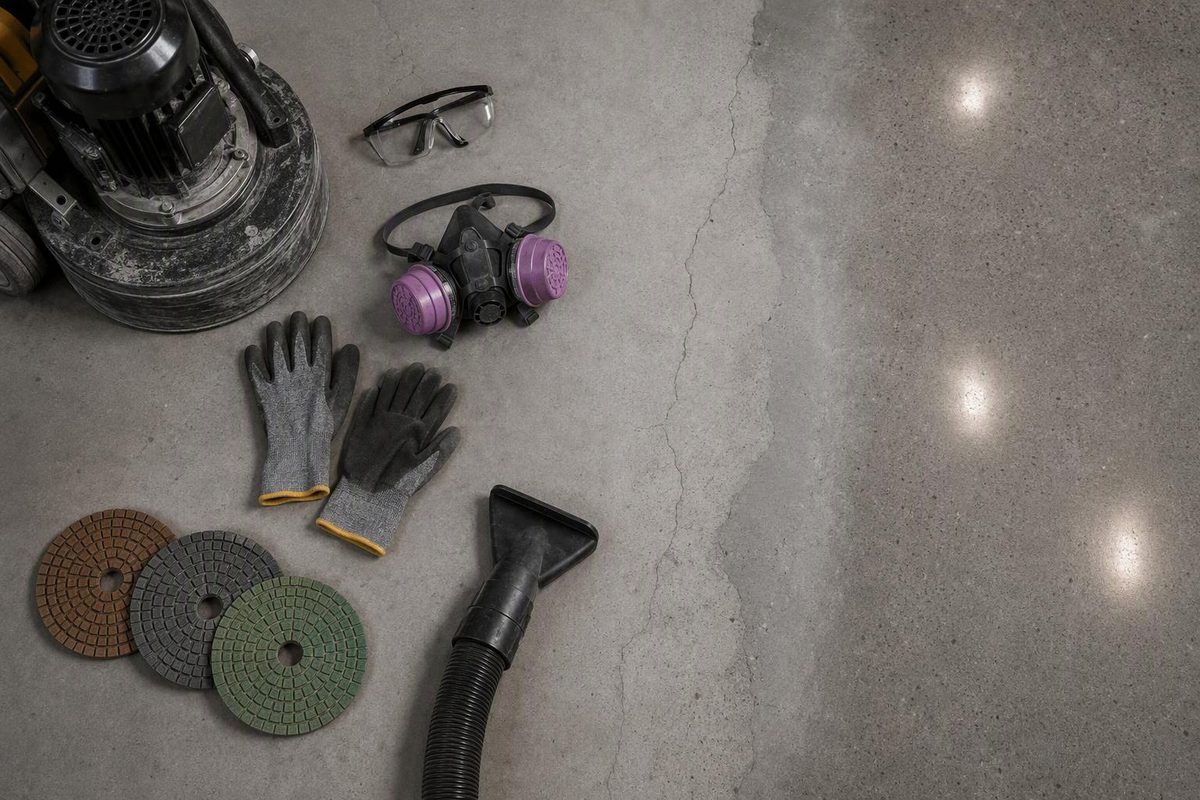
What is commonly called a “cement floor” is a concrete slab: cement is one ingredient in the concrete. Polishing means mechanically grinding, honing and polishing the slab with progressively finer bonded abrasives. It is not the same as applying a glossy sealer or epoxy coating. The Concrete Polishing Council defines bonded-abrasive polished concrete as a multistep process in which each cut is refined to achieve the required finished gloss (ASCC glossary).
For a garage, the practical sequence is:
- Inspect the slab and choose the intended finish.
- Remove contaminants and incompatible coatings.
- Repair suitable cracks, spalls and pinholes.
- Grind with a floor grinder and matched diamond tooling.
- Apply a compatible densifier at the system’s specified stage.
- Hone and polish through progressively finer grits.
- Add a compatible stain protector if needed for vehicle use.
The grinding itself is only part of the job. Dust control, edge work, repairs and scratch removal usually determine whether the result looks uniform.
Decide whether the slab should be polished
Polishing exposes the slab rather than hiding it. Aggregate, old patches, cracks, stains and variations in the original finish may remain visible—and coarse grinding can make them more prominent.
Clear the garage and inspect the bare floor under good light. Stop and resolve the cause before polishing if you find:
- cracks that are widening, rocking or vertically displaced;
- repeated water entry or damp areas with no identified source;
- extensive scaling, delamination or a weak surface that powders under light abrasion;
- deep oil contamination that returns after cleaning and drying;
- suspect older tile, adhesive or resilient-flooring residue;
- a coating that is peeling or too thick for the planned tooling.
Use the checks in Garage Floor Cracking: The Signs That Change What to Do before treating a crack as cosmetic. Surface repairs also affect appearance: the Concrete Polishing Council says repair materials and methods determine how well patches blend into the finished floor (CPC Position Statement 6).
Do not grind unidentified legacy flooring or mastic. OSHA defines sanding, abrading and grinding asbestos-containing material as aggressive disturbance; its construction standard also identifies asbestos-containing floor tile, sheeting and construction mastics as materials covered by Class II asbestos work (OSHA asbestos standard). Have suspect material assessed before disturbing it.
If the goal is uniform color, crack concealment or a thick chemical-resistant film, polishing may be the wrong system. Compare it with a coating plan in Epoxy Flooring Installation.
Choose the finish before the first grit
Two decisions control most of the work:
Aggregate exposure: A coarse first cut removes more surface paste and reveals more stone. Once that material is removed, it cannot be put back.
Sheen: A garage can stop at a honed or satin finish or continue to a more reflective polish. Higher sheen requires more refinement; it does not correct scratches left by an earlier grit.
Test the complete sequence in an inconspicuous area. The result depends on concrete hardness, previous treatments, floor flatness and the abrasives used. One professional Husqvarna specification, for example, starts a heavy-exposure finish with 25/30-grit metal tooling but starts a satin finish no coarser than 50 grit. It requires perpendicular passes and full refinement before moving to finer tools (Husqvarna polished-concrete specification). Those are system-specific examples, not a universal recipe. Match the sequence to the rented machine, diamond system and test patch.
Use a real dust-control system
Concrete grinding can release respirable crystalline silica. An ordinary household shop vacuum and loose-fitting dust mask are not substitutes for capturing dust at the grinder.
For walk-behind floor grinders, OSHA’s construction table specifies either continuous integrated water delivery or the manufacturer-recommended dust-collection system. A dry system needs the manufacturer’s recommended airflow, a filter with at least 99% efficiency and a filter-cleaning mechanism. Indoors, OSHA also calls for a HEPA-filtered vacuum to collect loose dust between passes (OSHA silica standard). These are occupational requirements, but they provide a useful benchmark when evaluating rental equipment.
NIOSH reported that tested grinder shrouds with local exhaust ventilation reduced dust exposure by at least 90%. That is a large reduction, not permission to ignore the remaining hazard; the same guidance says respiratory protection may still be necessary (NIOSH concrete-grinder controls).
For a dry process, rent a compatible set:
- planetary floor grinder;
- edge grinder with a close-fitting shroud;
- manufacturer-matched industrial dust extractor;
- diamond tools matched to the machine and concrete hardness;
- HEPA vacuum for cleanup between passes.
Use the PPE specified by the equipment and abrasive manufacturers, including eye and hearing protection. Determine respiratory protection from the task and control system; a respirator is not a substitute for source capture. Isolate the house from an attached garage, keep other people and pets out, and do not blow concrete dust with compressed air.
Wet polishing controls airborne dust differently but creates silica-bearing slurry. Use equipment designed for wet operation, GFCI protection and watertight connections. Collect slurry before it dries; OSHA warns that dried slurry can release silica dust again (OSHA handheld-grinder fact sheet). Dispose of the collected material according to the product instructions and local wastewater or solid-waste rules rather than flushing it into a drain without approval.
Polish the floor step by step
1. Clean and prepare
Remove everything from the garage. Protect walls, door tracks, the bottom seal and fixed equipment from impact, slurry and dust.
Scrape off deposits, then degrease oily areas with a concrete-compatible cleaner. Rinse or extract residue as directed and allow the floor to dry. Grinding over oil can spread contamination and load the diamonds. Deep oil may remain visible after polishing.
Remove paint, epoxy, curing compounds or sealer with tooling intended for that material. Coating removal and concrete polishing are different operations, and a tool selected for bare concrete may clog on an old coating.
2. Make the initial cut
Install the starting tool selected from the test patch. Make slow, overlapping passes while keeping the dust shroud seated. Crosshatch the floor by running each complete pass approximately 90 degrees to the previous direction.
Do not advance merely because the machine has crossed the entire floor once. Continue until the cut and aggregate exposure are reasonably uniform and the scratches from the previous condition have been removed. Work the perimeter with the edge grinder at the corresponding stage so the border does not finish darker or rougher than the field.
Vacuum the floor and inspect it under low-angle light. If deep scratches remain, another pass at the same grit is generally more useful than moving to a finer abrasive.
3. Repair revealed defects
The first cut often exposes pinholes, small voids and spalls that were not visible beforehand. Use a repair or grouting product specifically described as polishable and compatible with the selected system. Ordinary patching mortar may polish to a noticeably different color or texture.
Do not improvise joint treatment. Construction, control and isolation joints serve different purposes, and an active joint should not simply be bridged with a rigid cosmetic patch. Follow the repair or filler manufacturer’s instructions for the joint type and slab condition.
4. Densify at the specified stage
A concrete densifier is a penetrating treatment, commonly silicate-based, that reacts in the cementitious surface. It is not a clear coat and does not fill structural cracks. The ASCC glossary describes a densifier as silicate- and water-based compounds that react in the concrete surface to produce additional calcium-silicate-hydrate (ASCC glossary).
Many systems apply densifier after the later metal-bond grinding steps and before resin honing, but the timing, coverage, dwell time and residue removal vary. Follow one compatible system rather than combining generic instructions. Apply the product evenly, avoid puddles, and observe its specified reaction and drying time before continuing.
5. Hone and polish
Move through the tooling manufacturer’s transitional and resin-bond abrasives. A sequence may include 100, 200 and 400 grit, followed by 800 grit or finer for greater reflectivity, but the necessary transitions vary by system and floor.
At every stage:
- make overlapping crosshatched passes;
- blend the edges with the main floor;
- fully remove scratches from the preceding grit;
- vacuum or extract all debris before changing tools;
- inspect before advancing.
Skipping a grit rarely saves time if the next abrasive cannot remove the previous scratch pattern. Stop when the target appearance established in the test patch has been reproduced across the floor, not merely when an arbitrary grit number is reached.
6. Protect the garage floor
Densification improves the concrete surface but does not make it immune to garage spills. If stain resistance matters, apply a penetrating protector or guard explicitly compatible with the polishing system and intended exposure. The Husqvarna specification treats stain protection as a separate optional step after polishing, not as the densifier itself (Husqvarna specification).
Check whether the protector changes traction, particularly when the floor is wet. Follow its ventilation, temperature, application and cure instructions. Do not park a vehicle, install mats or expose the floor to water until the stated return-to-service time has passed.
Know when to hand the job over
A small, sound, bare slab with modest appearance expectations can be a manageable rental project. Professional polishing is the safer choice when the garage has extensive coating removal, weak concrete, significant crack repair, deep stains, poor flatness or no practical way to control silica dust.
It is also worth pricing professional work when consistent aggregate exposure matters. A heavy grinder can follow low areas and expose stone unevenly, while a handheld grinder can leave visible arcs around the perimeter. Those results are difficult to correct after too much surface has been removed.