
Plan on Several Hours—Unless the Door, Opening, or Opener Adds Complexity
A standard professional residential replacement often takes about 3–6 hours under ordinary conditions—a planning range, not a guaranteed window.
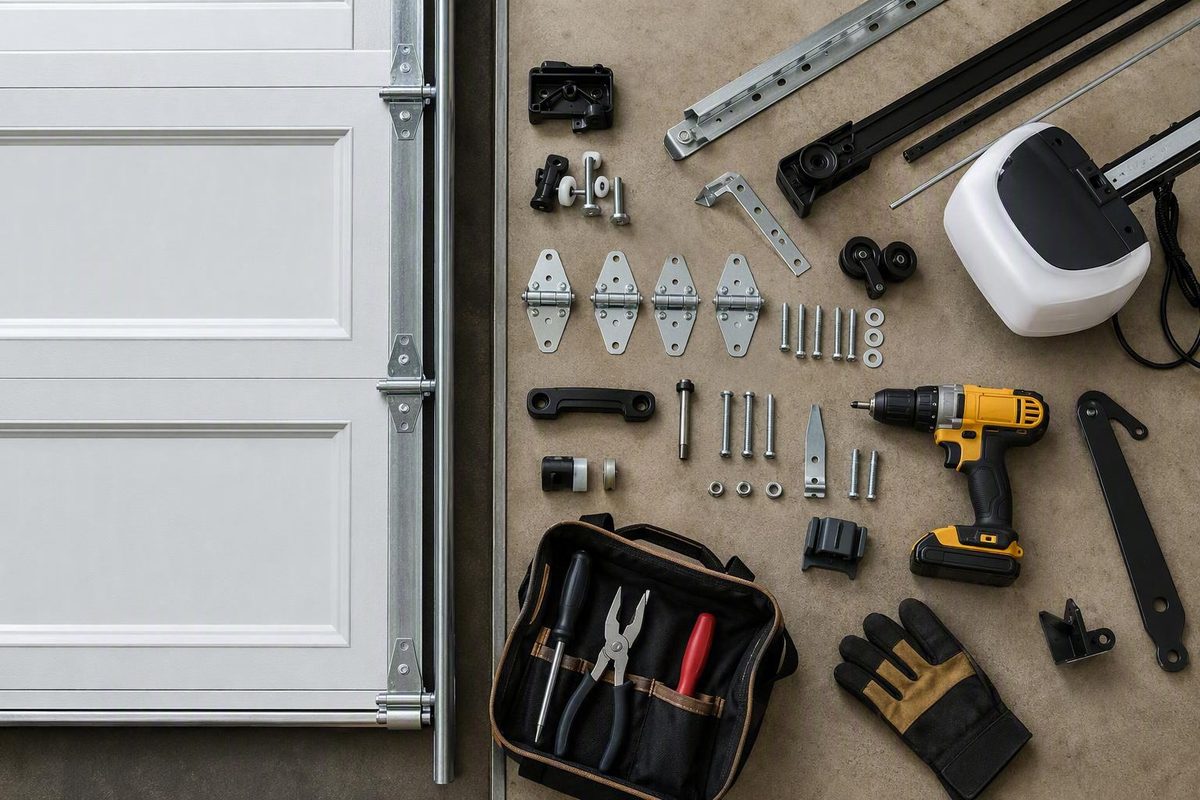
Plan on several hours—unless the door, opening, or opener adds complexity.
The short answer: allow 3–6 hours for a standard professional replacement
For planning purposes, a standard professional residential garage-door replacement often takes about 3–6 hours under ordinary conditions. This is a provider-published planning range rather than a guaranteed completion window or independently established industry average according to Fast Fix Garage Door’s installation guidance.
A straightforward single-car replacement in a prepared, accessible opening may take roughly 3–4 hours, provided there is no major structural work or other complication. Dayton Door Sales publishes that general timeframe for an installation that includes removing the old door and fitting the replacement in its installation-time overview.
Many uncomplicated professional replacements can therefore be completed within one working day. That does not guarantee that every door will be usable by a specific hour—or that every project will finish in one visit. Hidden framing damage, missing or incorrect hardware, an incompatible opening, electrical problems, adverse weather, or custom fitting can change the schedule after work begins.
The short estimate generally assumes:
- A standard residential sectional door
- A compatible, accessible opening
- No major damage to the framing or mounting surfaces
- Adequate headroom, sideroom, and backroom
- All required panels, tracks, springs, brackets, and fasteners on site
- Routine removal and hardware installation
- No extensive reframing or electrical work
- No complicated custom fitting
- An opener that is either being reused or is not part of the project
Treat the quoted duration as a ballpark estimate. Most available timing guidance comes from companies that sell garage-door installation services, and the sources do not disclose a shared project dataset, sample size, or calculation method. Repetition across installer websites does not turn a planning range into a guarantee.
Even if your written estimate predicts only several hours of hands-on work, keep the rest of the working day flexible. The appointment may also include unloading, inspection, work-area preparation, removal, programming, testing, cleanup, and the homeowner handoff. Avoid arranging a departure, delivery, school pickup, or other inflexible commitment immediately after the projected finish time.
Installation time by project type
The most useful answer to “how long does it take to install a garage door?” depends on the project. The ranges below are approximate planning estimates, not guaranteed completion windows.
| Project type | Approximate planning time | Assumptions and cautions |
|---|---|---|
| Like-for-like single-car replacement | About 3–4 hours | Prepared, accessible opening; routine removal and replacement; no major structural work per Dayton Door Sales’ estimate |
| Standard professional residential replacement | About 3–6 hours | Ordinary removal, installation, alignment, and testing without major complications per Fast Fix Garage Door’s guidance |
| Replacement plus a new opener | Reserve most or all of the working day | Open Sesame Garage Doors estimates that a new opener may add approximately 1–2 hours, but opener estimates vary in its installation-time guidance |
| New door in a fully prepared new-construction opening | Potentially several hours | Framing, mounting surfaces, clearances, wiring, and power must already be ready |
| First-time installation requiring site preparation | A full day or longer may be needed | Framing, reinforcement, mounting preparation, wiring, or electrical work can extend the project as reflected in Columbus Door Sales’ scenario breakdown |
| Double-wide, heavy, wood, glass, or custom door | Toward the longer end; possibly a full day | More demanding handling, fitting, alignment, reinforcement, or product-specific hardware may be involved |
| DIY replacement | Broadly, a weekend project | Menards calls for at least one helper and notes that the steps vary by door and situation in its garage-door installation overview |
The 3–4-hour scenario is narrow: a standard single-car door, an accessible and prepared opening, ordinary hardware work, and no major framing or electrical issue. The broader 3–6-hour range is more useful for general planning because it leaves room for removal, installation, adjustment, testing, and ordinary variation.
If a new opener is being installed with the door, reserve most or all of the day rather than assuming a fixed add-on. The work may involve rail assembly, motor mounting, sensor wiring, controls, remotes, compatibility checks, travel setup, and programming. City Gates USA separately estimates 2–3 hours for a professional opener-only installation, but that figure must not be mistaken for the time required to replace the complete door in its opener installation comparison.
New construction also needs context. Installing a door in a finished, correctly sized opening may be relatively quick if the jambs, mounting points, floor, clearance, reinforcement, electrical supply, and opener support are ready. A first-time installation can take much longer when those elements still need to be created or corrected. Sources that describe prepared new construction as a short job and sources that describe first-time installations as slower are often discussing different site conditions.
Double-wide, heavy, wood, glass, highly insulated, or custom doors belong toward the longer end of the schedule. They may require more deliberate handling, precise fitting, additional reinforcement, or model-specific hardware. The available evidence does not support assigning a universal number of extra hours to any one characteristic.
DIY timing is fundamentally different. A retailer’s description of replacement as a “weekend project” should not be converted into a precise labor-hour estimate. Door model, opening condition, tools, prior experience, helper availability, hardware, and safety complications can all change the schedule.
Finally, ask what the installation clock excludes. A several-hour installation estimate does not necessarily describe the total calendar time from ordering the door to final approval.
Why published estimates differ—and what your quote may include
Published estimates vary because providers define the job differently. A narrow estimate may cover a prepared, like-for-like replacement, while a broader estimate may include complete hardware replacement, opener work, structural correction, or a more difficult door.
A narrow estimate may assume:
- A standard single-car door
- A clear, prepared work area
- Compatible framing and mounting surfaces
- Adequate clearances
- Existing power in the correct location
- No opener replacement
- No structural repair
- All components available before the appointment
A broader estimate may include:
- Removal of the old door and hardware
- Replacement of tracks, springs, cables, and rollers
- A double-wide, heavy, or custom door
- Opener mounting and electrical connection
- Safety-sensor wiring and alignment
- Remote, keypad, or smart-control programming
- Framing corrections or reinforcement
- Final balancing, testing, cleanup, and hauling
The supplied timing evidence comes predominantly from garage-door service providers. These sources generally do not identify a common study, sample, or methodology. Their estimates are useful for setting expectations, but they should be treated as commercial planning guidance—not standardized performance benchmarks.
It is also essential to distinguish complete-door installation from opener-only installation. Installing or replacing an opener involves the motor unit, rail or drive components, controls, sensors, wiring, travel setup, and testing. Replacing the complete door adds removal, tracks, panels, rollers, springs, cables, alignment, balance, and related work. An opener-only estimate cannot answer how long the entire door replacement will take.
A complete professional appointment may include:
- Inspecting the opening and confirming the project scope
- Disconnecting the opener where applicable
- Removing the old door, tracks, and contracted hardware
- Installing and aligning the new tracks
- Positioning and connecting the door sections
- Installing rollers, hinges, brackets, and supports
- Setting up the spring and cable system
- Mounting or reconnecting the opener if contracted
- Aligning sensors and programming controls
- Balancing and testing the door
- Making final adjustments
- Cleaning the work area and completing the homeowner handoff
Do not assume every line item is included. Confirm each item in writing.
Also separate hands-on installation time from the total appointment window. Unloading, protecting the work area, verifying parts, discussing hidden damage, programming accessories, cleanup, and explaining operation all consume time even though they are not panel-and-track assembly.
Where the installation time goes
A garage-door replacement is a sequence of interdependent tasks. Later steps depend on the opening, tracks, hardware, and door sections being correctly prepared and aligned.
-
Inspect the opening and confirm the scope. The installer examines the opening, floor, framing, clearances, mounting surfaces, existing hardware, electrical access, and work area. This is also the point to verify which old components will be removed or retained.
-
Disconnect the opener, if applicable. The existing opener must be separated from the door before controlled removal. If it will be reused, its condition and compatibility still need to be assessed.
-
Remove the existing system. The old sections, tracks, rollers, and included hardware are disassembled in a controlled order. Spring and cable components can retain dangerous tension and require specialized handling as Door Doctor notes in its installation-hazard discussion.
-
Prepare and align the tracks. The new track system is positioned against suitable mounting surfaces and aligned with the opening. Wall condition, floor level, and available clearance become particularly important here.
-
Prepare and mount the door sections. Model-specific hardware is fitted to the sections, which are then positioned, connected, and guided by the track system. Windows, reinforcement, insulation, decorative hardware, or unusual materials may make handling more involved.
-
Install rollers and related hardware. Hinges, brackets, rollers, supports, and other components must correspond to the door and installation design.
-
Set up the springs and cables. This is specialized, hazardous work rather than a homeowner tutorial step. The lifting system must match the door and be configured so the door can be balanced and controlled.
-
Mount or reconnect the opener when included. Depending on the contract, this can involve mounting the opener and rail, connecting the door, aligning sensors, setting travel, and programming remotes, keypads, or smart features.
-
Balance, test, and adjust the door. The installer checks movement, balance, travel, alignment, controls, and relevant safety functions. A door that is merely assembled but not properly adjusted and tested is not a finished installation.
-
Inspect, clean up, and complete the handoff. The appointment should conclude with a final inspection, removal of debris covered by the agreement, and an explanation of controls, locks, manual operation, and follow-up needs.
Alignment, balancing, operation checks, and safety testing are part of completing the installation, not optional extras to discard when the appointment runs late. The objective is a properly fitted and tested system—not merely meeting the shortest published timeframe.
The factors most likely to add time
The variables that turn a half-day appointment into a full-day or multi-visit project fall into four broad groups.
Project scope
A replacement is often simpler than a first-time installation when the opening, mounting surfaces, clearances, reinforcement, and power are already suitable. But “replacement” does not mean every existing component can or should be reused.
Scope-related additions include:
- Removing a complete existing system
- Replacing tracks rather than retaining them
- Installing new springs, cables, rollers, or reinforcement
- Adding or replacing an opener
- Running or correcting sensor wiring
- Installing wall controls, remotes, keypads, battery backup, or smart controls
- Making framing or electrical changes
- Returning after another trade completes prerequisite work
A first-time installation may require mounting preparation, framing, reinforcement, opener support, wiring, outlets, or other work that a like-for-like replacement does not.
Door characteristics
Door characteristics influence handling, assembly, and fitting:
- Single versus double-wide size
- Overall weight
- Steel, aluminum, wood, glass, or composite construction
- Custom dimensions or design
- Windows and decorative hardware
- Insulation and reinforcement
- Unusual track or lift configurations
- Product-specific assembly requirements
A larger or heavier door may require more deliberate positioning and alignment. A custom product may also leave less room for improvisation if a component is missing or the opening differs from the approved measurements.
Opening and structure
Potential delays include:
- Damaged, rotted, or aging framing
- A nonstandard or out-of-square opening
- An uneven floor
- Misaligned walls
- Unsuitable mounting surfaces
- Low headroom or inadequate backroom
- Insufficient sideroom
- Missing reinforcement
- Interference from ceiling obstructions, storage, or building services
- Inadequate or unsuitable electrical access
Stewart Door identifies aging or damaged framing, low clearances, narrow access, uneven floors, and electrical limitations among the site conditions that can delay installation in its property-condition guidance.
Working conditions
Even a suitable door and opening can be slowed by the jobsite:
- Vehicles or stored items in the work zone
- Cramped space around the tracks
- Blocked ceiling or opener access
- A narrow approach for carrying sections
- Landscaping or exterior obstructions
- Weather that interferes with safe handling
- Missing, damaged, or incorrect materials
- No practical place to stage panels and tools
A like-for-like replacement can proceed more predictably when access is clear and the opening, mounting surfaces, clearances, and power are suitable. Still, do not assume existing tracks, springs, cables, or opener components are reusable until the installer confirms their condition and compatibility.
There is no sound basis for adding a fixed number of minutes for each variable. The factors interact. A large door in a square, empty, prepared garage may be more predictable than a smaller standard door going into damaged framing with inadequate clearance.
Request a pre-installation site check if you suspect framing damage, low headroom, an uneven slab, a nonstandard opening, reinforcement needs, or electrical work. Identifying those conditions before the door and crew arrive gives the installer a better chance of quoting a realistic schedule and bringing the correct materials.
How to prepare the garage and prevent avoidable delays
Good preparation will not eliminate structural surprises, but it can prevent wasted time at the beginning of the appointment.
Use this checklist before installation day:
- Remove all vehicles. Move them before the crew arrives and park them somewhere that will remain accessible if the driveway is occupied.
- Clear the opening. Move tools, shelves, bins, bicycles, lawn equipment, and stored materials away from both sides of the door.
- Clear the track path. Keep the wall and ceiling areas where tracks and supports will run free of storage and obstructions.
- Create a staging area. Leave floor space for door sections, hardware, tools, ladders, and packaging.
- Expose the opener area. Make sure the ceiling-mounted or wall-mounted opener location is accessible.
- Provide access to controls and sensors. Clear wall buttons, low-mounted sensors, wiring paths, and relevant outlets.
- Keep exterior access open. Where practical, provide an unobstructed route for the crew and delivery vehicle.
- Confirm product availability. Verify that the expected door sections, tracks, springs, opener, accessories, and model-specific hardware have arrived.
- Clarify removal and hauling. Ask whether the old door and hardware will be removed from the property or merely taken down.
- Plan for displaced belongings. Decide where vehicles and anything removed from the garage will remain throughout the work.
Before the appointment, discuss fit as well as floor space. Garage Reference’s garage-door measurement framework identifies five useful preflight checks: opening dimensions, sideroom, headroom, backroom, and floor level. These measurements can reveal low-clearance conditions, ceiling obstructions, insufficient wall space, or a sloped floor before installation begins.
Homeowner measurements are useful for planning and asking better questions, but they do not replace the installer’s final verification. The installer should confirm the finished opening, mounting conditions, clearances, track layout, opener requirements, and product fit before installation.
Finally, leave schedule buffer. Do not build a plan that fails if the handoff occurs later than expected. Even a routine installation estimate is not a deadline.
Questions to ask before accepting the installation timeline
A credible time estimate should be attached to a defined project. Before agreeing to the appointment, ask the installer to identify exactly what the quoted duration includes.
Use this scope checklist:
- Does the estimate include taking down the old door?
- Does it include hauling and disposal?
- Are new tracks included?
- Are the springs, cables, rollers, brackets, and related hardware being replaced?
- Does the scope include panel assembly and installation?
- Is the existing opener being reconnected, or is a new opener being installed?
- Are safety-sensor alignment and wiring included?
- Are remotes, keypads, wall controls, battery backup, or smart features being programmed?
- Are balancing, travel checks, safety testing, and final adjustments included?
- Is cleanup included?
- Does the estimate assume one technician or a larger crew?
- Is this a like-for-like replacement?
- Do the opening, framing, clearances, mounting points, or electrical supply need modification?
- Are delivery and unloading inside the quoted appointment window?
- Are permits or required inspections separate?
- Could disposal or follow-up adjustments occur on another day?
- What conditions would require a second visit?
- If hidden damage stops the work, how will the opening be secured?
- How long will vehicles and the garage opening be inaccessible?
Do not assume that a crew of a particular size always finishes within a predictable number of hours. Ask what staffing the estimate assumes and whether that staffing is confirmed for your appointment.
Also ask what the installer already knows about the site. A generic estimate made without checking the opening can be useful for preliminary planning, but it is less reliable than one based on measurements, photographs, a walkthrough, or an on-site inspection.
Request a written, project-specific scope and timeline. It should distinguish the core door installation from opener work, structural correction, electrical work, permitting, inspection, disposal, and follow-up. That document is more useful than a generic website estimate because it defines what must happen before the project is considered complete.
DIY timing is different—and spring work is a stop-work boundary
Do not apply professional installation ranges to a homeowner’s first DIY project. Professional crews bring experience, equipment, an established workflow, and familiarity with heavy sections, alignment, product-specific hardware, and final testing. A homeowner learning the system while working will have a different schedule.
The available retailer guidance is deliberately broad: replacement is characterized as a weekend project, and at least one helper is called for. That description is not a reliable hourly estimate and should not be converted into one.
At a high level, DIY replacement can involve:
- Removing the existing door and track system
- Inspecting the opening and mounting surfaces
- Preparing model-specific panel hardware
- Positioning and connecting heavy door sections
- Installing and aligning tracks
- Fitting compatible rollers, brackets, and supports
- Integrating the opener where appropriate
- Testing balance, travel, controls, and safety functions
The critical safety boundary is the lifting system. Garage-door sections are heavy, and springs and cables can retain dangerous tension. Door Doctor specifically warns about heavy components, cables, and high-tension springs in its discussion of installation hazards.
This article does not provide instructions for releasing, winding, adjusting, or tensioning springs. Stop and use a qualified professional when the job involves:
- Loaded or unfamiliar spring systems
- Damaged, loose, or displaced cables
- Unstable or unsupported door sections
- A door that may fall or move unpredictably
- Structural modification
- Unclear product or track compatibility
- Electrical work beyond your competence
- Any step for which the manufacturer’s instructions and safe procedure are unclear
A rushed DIY schedule is not a reason to cross those boundaries. Garage Reference’s editorial approach is to distinguish practical owner checks from genuinely dangerous work; the publication provides informational guidance and does not sell doors or accept installer payments for placement.
Frequently asked questions
Can a garage door be installed in one day?
Often, yes. The provider-published ranges cited in the comparison table indicate that many uncomplicated professional residential replacements fit within one working day. A custom door, first-time installation, opener addition, damaged framing, electrical work, missing parts, adverse weather, or difficult access can delay completion or require another visit. Reserve the day, but do not treat same-day completion as guaranteed.
Does the installation estimate include removing the old garage door?
Sometimes, but not always. Some installer estimates include old-door removal as part of replacement, while quotes vary on loading, hauling, disposal, and related fees. Ask whether the timeline covers disassembly, removal from the opening, loading, and taking the old materials off the property.
How much longer does installing a new garage door opener take?
Open Sesame Garage Doors’ estimate cited in the table allows about 1–2 additional hours, but published opener estimates are inconsistent. The actual addition depends on mounting, rail assembly, compatibility, wiring, sensors, controls, programming, and final adjustments. When combining a door replacement with a new opener, reserve most or all of the working day instead of relying on a fixed add-on.
Why can a first-time garage-door installation take longer than a replacement?
A suitable replacement opening may already have usable framing, mounting surfaces, clearances, reinforcement, wiring, and power. A first-time installation may require those elements to be created or corrected before the door can be fitted. If framing or electrical work remains, the project can take a full day or longer according to Overhead Door Sales’ residential installation guidance.
How long does DIY garage-door installation take?
There is no well-supported universal hourly estimate. Menards’ retailer guidance cited in the table broadly calls replacement a weekend project requiring at least one helper. Door model, prior experience, opening condition, tools, hardware, and safety complications all affect the schedule.
Do not use professional installation times as a DIY target. Stop when the work reaches loaded springs, damaged cables, unstable sections, structural changes, unclear compatibility, or electrical tasks outside your competence.
For most homeowners, the practical choice is to reserve the cited 3–6-hour planning window plus schedule buffer for a standard professional replacement based on Open Sesame Garage Doors’ provider guidance. Narrow that estimate by defining the door, opening condition, hardware, opener work, access, disposal, testing, and cleanup in writing. Clear the work area, arrange a site check when fit or structural conditions are uncertain, and treat loaded springs, cables, and unstable door sections as safety boundaries—not obstacles to overcome by rushing.